


 This is another recycled post, not just because I'm lazy and pressed for time! I honestly thought it was worth digging this out of the archives since it might inspire you to make some of these with your kids for your Christmas tree or for gift tags.
I love recycling nearly as much as crafting (kinda sad, huh?) so when I was making limeade for some unexpected guests the other weekend, I had an "aha!" moment. I keep a few of those frozen concentrated mixes on hand in the freezer for when I'm in a pinch and want to offer visitors something more than the customary water and iced tea we drink around here. As I was opening the can, I remembered a craft my mom used to do with us when I was little.
She would save the metal lids throughout the year (we had tons, since I have 4 brothers who were sugar addicts) and around Christmas we'd make ornaments for our tree and as tags for presents for teachers, grandparents, and others. These lids are perfect because they don't have sharp edges like ones you get from steel cans.
This craft requires a hammer, so you may want to do it with more mature kids. It doesn't require heavy pounding, just a few little taps so you could try it with younger kids. I remember loving the chance to use a hammer as a child. I felt so grown up, and hey, who doesn't like to pound things every once in a while.
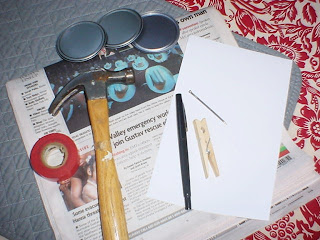
What You'll Need:
- juice can lid(s)
- hammer
- long nail or awl (if you're fancy!)
- stack of newspaper (for padding)
- pretty ribbon
- tape
- paper
- pencil/pen
- Optional: Shoe polish or brown acrylic paint and a paper towel and a clothespin for helping hold the nail
What You'll Do:
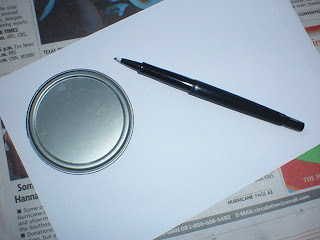
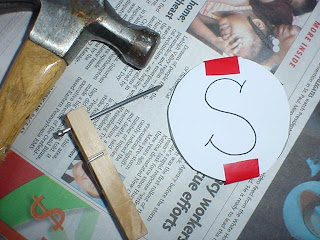
1. Trace the lid from the can so you have a circle to draw your design in. You could draw it right on the metal lid if you wish, but then you have to wipe it off in the end.
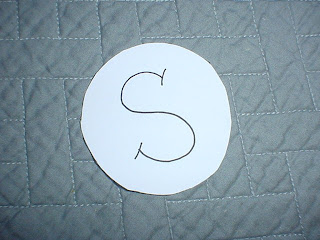
2. Cut it out and draw your design. I chose "S" for my son's name. You could also print letters or images from the computer or take a design from a coloring book. The simpler the image, the better it will turn out.
 4. Tape the paper to the metal lid. You don't have to use red electrical tape like I did! It was the closest thing available.
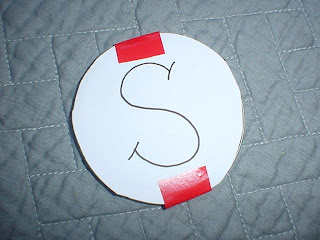
5. Here's the fun part. Take your hammer and nail and begin tapping holes in the tin, following the lines of your design. It may be easier to pinch the nail with a clothespin that has some tape on the inside (to hold the nail in place better). This would prevent little fingers from being smacked. Do this on top of a stack of newspaper so that you don't puncture your table.
 6. If you peek under the paper, it will start to look like this:
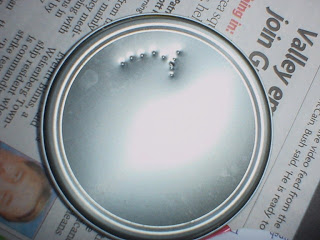 7. When you're done, your design will be seen as a series of tiny dots. Be sure to poke a bigger hole at the top for threading the ribbon into. Caregivers might want to do this step.
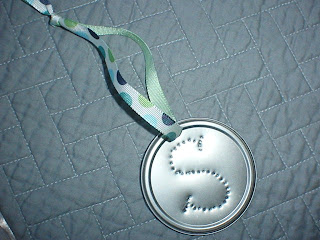
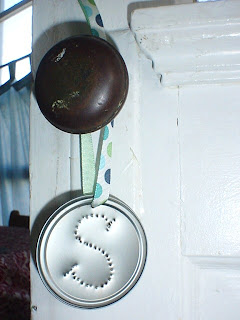
8. Here's the finished result with a pretty ribbon for hanging.
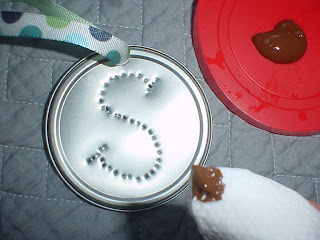
9. OPTIONAL: If you'd like to "antique" your ornament, put a dot of brown paint or brown shoe polish on a paper towel and rub it into the dots. It'll make your image "pop" a little bit. Do this on top of the newspaper because it might bleed through the back. Rub off any excess paint. And of course, do this before you put the ribbon on so you don't get paint on it.
10. There you have it! You can cut out a piece of felt to glue onto the back, since you might have some sharp pieces of metal poking through. It'll save little hands and walls from getting scraped. I've chosen to hang mine on a doorknob, as I think it looks quite charming.
 If I find some more time, I'll finish all the letters of my son's name and string them together to make a little banner for over his window.
Enjoy and happy crafting!


I really like this!!!
ReplyDeleteOkay, hello! C-U-T-E! So glad I found you.
ReplyDeleteI had forgotten about these. My boys made ornaments similar to this years back. I need to start being more creative. As usual, I love your step by step instructions.
ReplyDeleteCool idea Kathleen- you have great ideas. I am looking forward to taking time off at Christmas and honestly I want to spend time doing crafts with my kiddo. It is so relaxing. : )
ReplyDeleteWhat a fun idea!!
ReplyDeleteI recently came across your blog and have been reading along. I thought I would leave my first comment. I don't know what to say except that I have enjoyed reading. Nice blog. I will keep visiting this blog very often.
ReplyDeleteSusan
http://www.car-insurance-choices.com
That is so cute, and a great to do with kids. In fact I have several on my tree that have were made when my kidos were little
ReplyDeleteI used to love making those as a kid!
ReplyDeleteOh how cute is that-love that! So simple-thanks for the great idea!
ReplyDelete~Smiles~Tam