


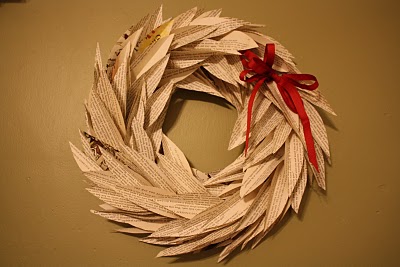
 I have probably 300 pages more to use up, so I thought I'd make a Christmas wreath using the vintage pages.
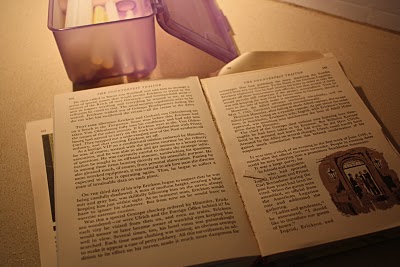 I took inspiration from Living With Lindsay's paperback book wreath, though I modified the design a bit.
Materials:
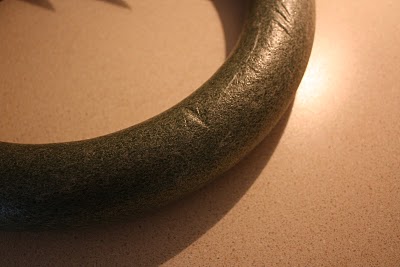
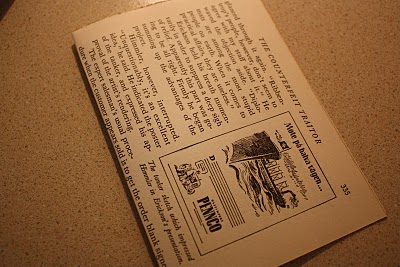
~foam wreath ~a book (a cheap paperback would work well) ~hot glue gun/glue sticks ~scissors ~pencil ~ribbon ~straight pins
Step 1
Tear out a page from your book, and fold it in half width-wise.
 Fold the page again in half.
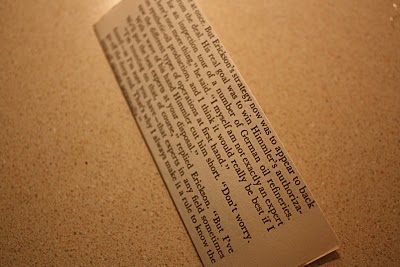 Step 2
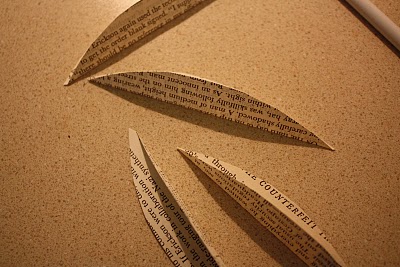
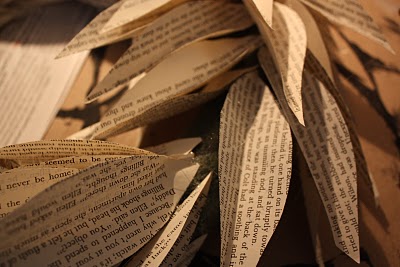
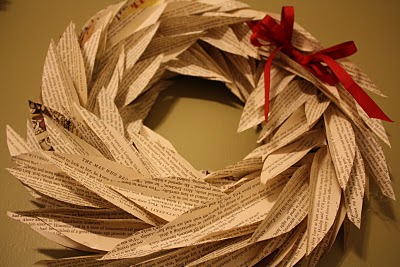
Draw a leaf shape onto the folded paper. You could cut out a cardboard template if you want, but I just freehanded mine. I like the variety of shapes and sizes from drawing them by hand.
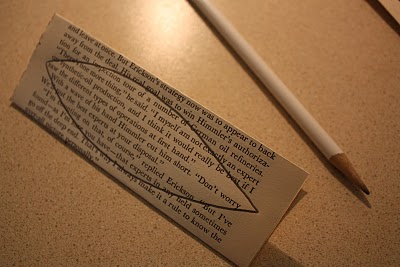 Then cut out the leaf. You will get 4 leaves from one sheet of paper.
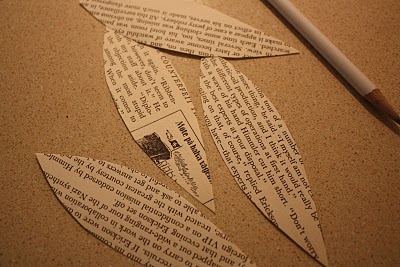 Step 3
Cut out a bunch of leaves and fold them in half down the middle.
 I don't know how many leaves I used for the wreath, (maybe 100?) because I cut them out as I needed them.
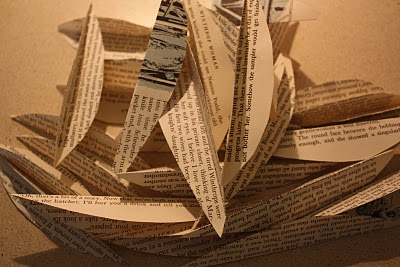 Step 4
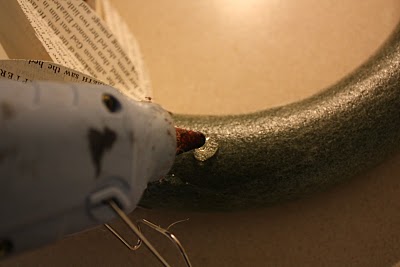
Get out your hot glue gun and extra glue sticks. You might want to lay some newspaper under your work surface so the glue doesn't get all over. You'll run a line of glue across the foam wreath and layer 4-5 leaves across it.
 I used the eraser end of a pencil to push the paper onto the hot glue.
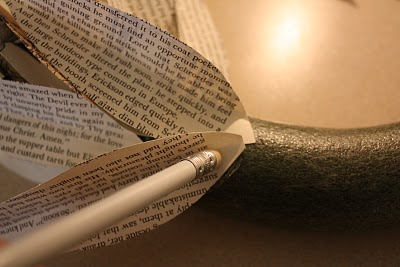 Once the glue dries a bit, you can add another layer about an inch further up on the wreath, making sure the ends of the leaves are all pointing in the same direction. You'll be overlapping them.
Step 5
When you come to the end of your wreath, you'll need to put glue on the tips of individual leaves and tuck them into the gap.
 Use the pencil eraser again to fill in the gaps and push leaves in place. You can also add more leaves around the edges to hide any of the foam circle that may be showing.
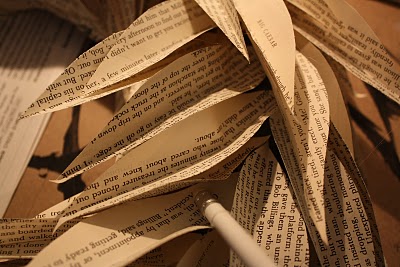 As long as all the leaves are going in the same direction, it will look great!
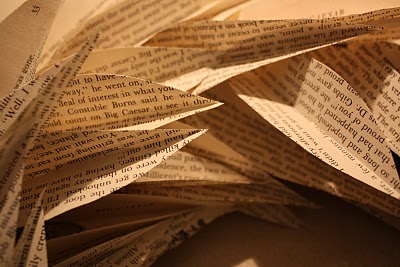 Step 6
Make a hanger for the back of the wreath by pinning a scrap of ribbon into the foam on the back.
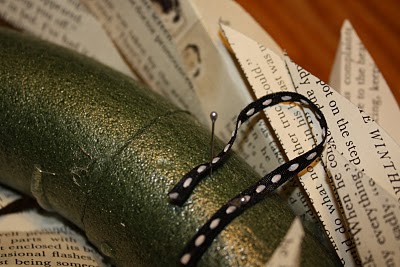 There are other ways you can hang the wreath, like wrapping a ribbon around it and hanging it that way. I opted for a hidden hanger.
Step 7
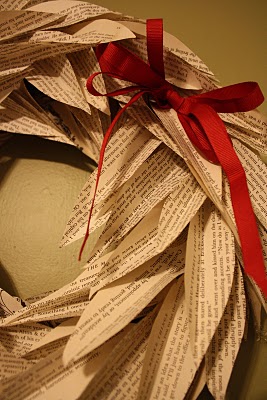
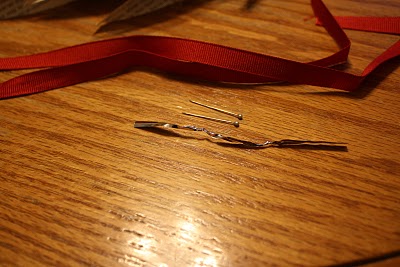
If you'd like to add a simple bow, here's what I did. I took a 2 foot length of red grosgrain ribbon, a wire twist tie and two straight pins
 folded the ribbon into loops and wound the twist tie around them in the middle.
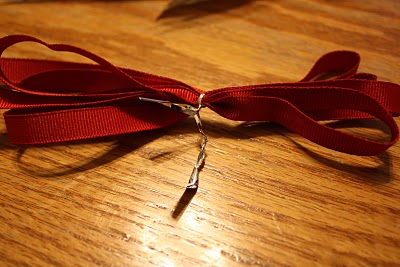 I covered the twist tie with some of the end of the ribbon and wound the tie around it to keep it in place. Then I fluffed up the bow and pinned it to the front of the wreath with the pins. Easy!
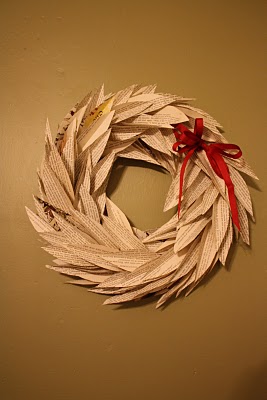
 You could use it as a centerpiece on your table
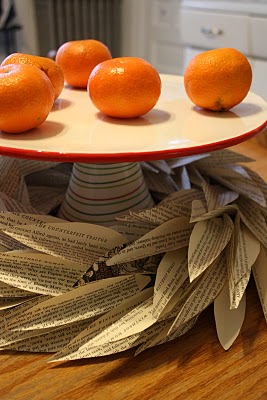 Or hang it in a place of honor in your home. In my case, in our living room between Ryan Berkley's prints.
I can definitely see this wreath staying up beyond the holidays. It's just so cute! For more book wreath ideas, check out this post at Apartment Therapy.


Your wreath is very cute! I am not certain I can make myself cut up a book. Maybe I can find one that is falling apart?
ReplyDeleteThat is really nice! I can see myself doing that after Christmas. Thanks for the easy directions.
ReplyDeleteThat's just simple but beautiful and I love it :) You're such a crafty inspiration!
ReplyDeleteOkay, THAT, is incredible!!
ReplyDeleteThis is one of those that is going to be bookmarked for further use :)
You are just amazing with the crafts...have you thought about doing a book? Absolutely beautiful.
ReplyDeleteI may have to move closer to you and just come by and swipe your finished projects. I mean, if you can make one.... :) That is beautiful. I may (key word) give that a go - I will be sure to blog about it so you will get a good laugh. Maybe I will swipe one of your pictures to put it up next to so people can see what it is supposed to look like?
ReplyDeleteYou are officially awesome. All of my patience is used up these days, but that looks incredible and I know it took lots of time!
ReplyDeleteGo crafty! Go crafty!
How awesome is that! Thanks for the tutorial.
ReplyDeleteThanks for the tutorial. The wreath looks great!
ReplyDeletegorgeous! thanks for sharing
ReplyDeleteOh, my! This is BEAUTIFUL!!!
ReplyDeleteI love it! Here's a provacative question, though...could you use something that isn't foam for the base, and if so, what?
ReplyDeleteWow, that is just neat. That's something I'll definitely think about making for the holidays next year.
ReplyDeleteWow, this is a nice variation of the book wreaths I've been seeing lately. Thanks for sharing. I've posted a link.
ReplyDeleteAh ha, this is one I think I could do! Thank you so much! I love it and it's so cute!
ReplyDeleteI like your version a lot more. I am going to keep it in mind for a future project.
ReplyDeleteI just made this last night!! What a fun, easy, CHEAP, and cool wreath! I hung it on a mirror in a little nook I have, and love it!! Thanks so much for the great, detailed tutorial!
ReplyDeleteThank you for sharing your fabulous tutorial! I made one and I love it!! I posted a pic of mine and linked back to you.
ReplyDeletehttp://dudeimadeit.blogspot.com/2010/04/beautiful-book-wreath.html
Thanks again!
I love this variation - thanks for the inspiration :)
ReplyDeleteI've made two since reading this
ReplyDeletehttp://farm4.static.flickr.com/3581/5729650776_0890d2d532_m.jpg
http://farm3.static.flickr.com/2388/5729646262_ab0f014495_m.jpg
I added an extra fold before cutting, and i cut crescents around the fold so I get 4 creased leaves and a folded the bottoms of the leaves which aided in gluing. Thank you!
This was such a cute idea - I made mine tonight, check it out: https://fbcdn-sphotos-a.akamaihd.net/hphotos-ak-ash4/390155_10100812412545553_1208713_61779826_1448104799_n.jpg
ReplyDeleteI couldn't find a wreath form at my craft store, so I just used red card stock. Also, my book was Dickens' "A Christmas Carol". :)
Thanks for the inspiration!
c'est très originale et joli ! MERCI
ReplyDeleteune francaise qui aime votre site