


Anyway, while Soren and I had out all the paper hearts and stuff last week, I thought I'd recycle some salt containers and tissue paper scraps into a cute paper bouquet. This would be a sweet thing to give a teacher, librarian or grandparent. For us, it's sitting in our kitchen, brightening the space.
Here's what you'll need:
- Empty round cardboard container (oatmeal, salt, etc.)
- Red, pink, white, or even orange colored or decorative paper or paper doily hearts
- Scissors
- Glue (Mod Podge or glue stick works best)
- Contact paper (optional)
- Tissue paper in "Valentine's" colors
- Pipe cleaners
Cut off the top with a knife,
then measure the cylinder to size on the decorative paper. I added an inch at the top so I could fold it over and cover the edges.
Once you have your paper cut, cover the back with Mod Podge or glue. I stupidly used Elmer's Glue All, which ended up leaving wrinkles. Next time I'll use glue stick or something that doesn't wet and wrinkle the paper so much.
To finish the top, cut notches in the paper all the way around
then fold over and secure underneath with more glue.
Next, start adding your hearts. I had pre-cut a bunch from another project, which took no more than 5 minutes at that time. Fold a square of paper in half, then cut a candy cane shape.
Lots of sizes work best. You want to fill in the vase as much as you can.
Here is the finished vase, ready to be sealed either with Mod Podge or contact paper.
I chose to use contact paper--no surprise, given my plethora of contact paper projects as of late. I cut a piece to size, then rolled it over the outside of the vase, smoothing out any air bubbles.
Now on to the flowers. I cut some heart-printed tissue paper into circles
and fringed the edges by folding it into 4ths and cutting some scallops around the edge.
Don't worry about it being perfect--it doesn't matter!
Then I pinched it between my fingers
slipped the end of a pipe cleaner inside the fold.
Fold the pipe cleaner up, while still pinching the paper and the end of the pipe cleaner inside the paper,
and twist it around the stem of the pipe cleaner that's inside the "flower", holding the stem in place.
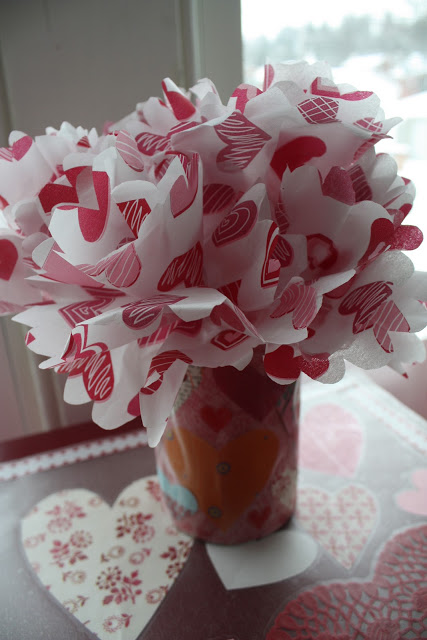
Fluff out the petals, and you're done. I made 5 for my vase, which gave it a full look.
Pretty and simple!


4 comments:
Very cute! I had all intentions of making some v-day decor...maybe it's not too late after all.
I only threw up in my mouth a little bit… too distracted by the cute paper bouquet. Just kidding! I think you guys are awesome.
So cute! Just looking at the pix makes me feel cheerful =)
How pretty is that! I love how you made the flowers...very cool. I've never seen it done that way. It turned out great and it is very cheery. I haven't made any Valentine decorations yet but I want to!
Post a Comment