Hello there! I'm Kathleen, a former art teacher and co-creator of two young boys. I'm perpetually in search of creative ways to spice up our daily lives, and always in search of a good cup of coffee and a knitting project. Join us in our adventures in making and doing, and making do.
I miss the days of exchanging Valentines with classmates at school. Making the fancy boxes adorned with red and pink paper, picking out the box of cards at the drug store, and handing out specially-chosen cards to my friends. How fun that I can relive that a bit now that Soren is in school.
He's still a little young to get the whole concept, and after taking him down the Valentine aisle at Target with little interest on his part in picking out cards, I decided it would be fun to make them with him.
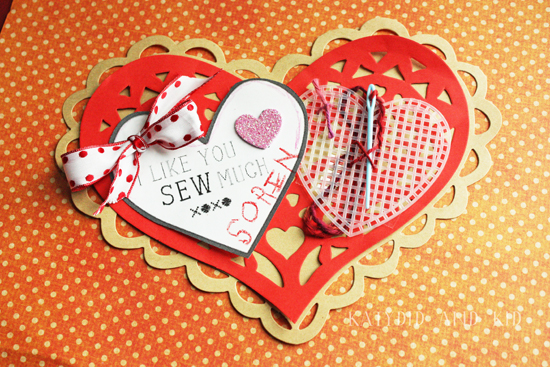
I wanted to come up with something fun and unique to give to his classmates, no candy or junky little toys that get quickly get thrown out. Since S has been taking an interest in one of my passions--needlework--I thought it would be fun for the kids to have their own needle, yarn and plastic canvas for stitching.
Soren enjoys stitching alongside me when I'm working on something, and he really liked this project,, which you can see in the photo above. I'm hopeful that his classmates will like it too, especially that they each get their very own plastic needle. Here's how we finished the Valentines for giving.
If you'd like to make some for your own friends, they're really simple to make, and you can dress them up any way you'd like, tucked into a card or stuck to some pretty paper.
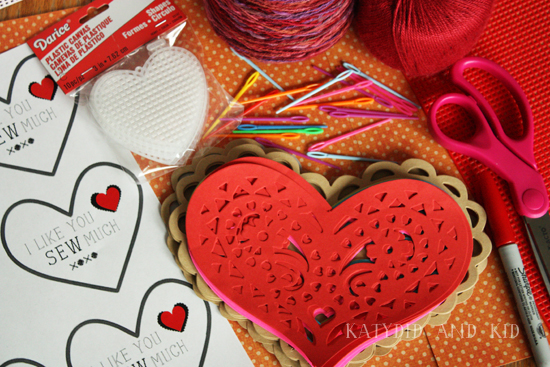
MATERIALS:
Plastic Canvas (either heart shaped or sheets that can be cut into hearts. The heart ones I bought were $2 for a package of 10 at a craft store).
Plastic yarn needles (purchased here as a pack of 40).
Yarn
Scissors
Paper doilies, construction paper, or scrapbook paper
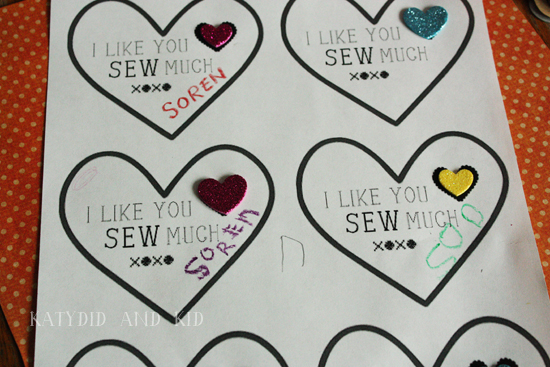
Printable tags, if desired. I'm sharing the ones I designed HERE
Clear Tape, pencil or markers for signing the cards
Stickers, etc. for embellishment, if desired (we used some glittery foam hearts)
STEP ONE
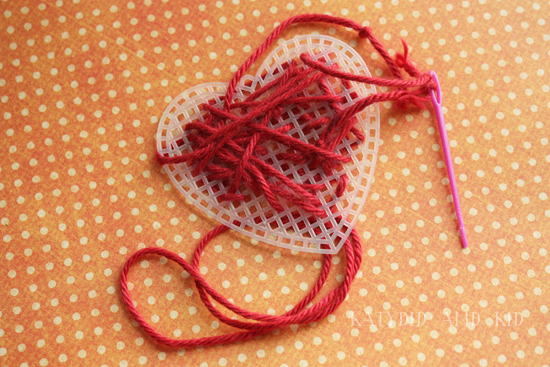
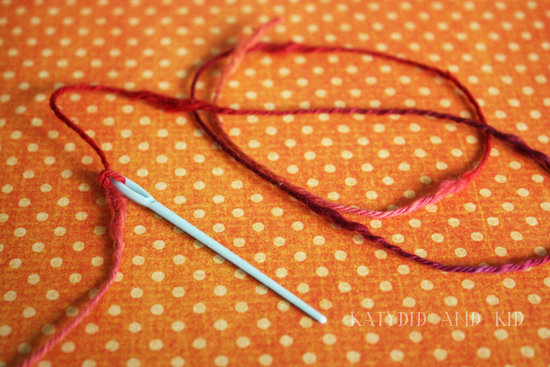
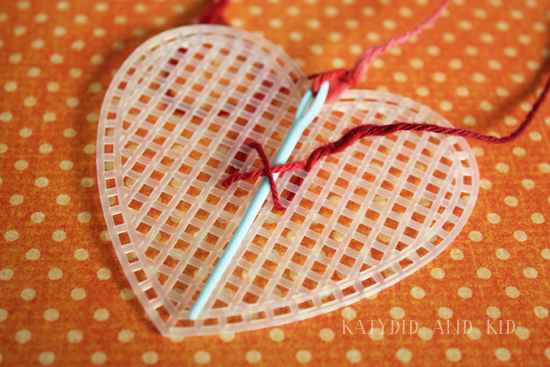
Cut a 12" length of yarn and tie to the needle so it doesn't slip off in transit.
Then make a few stitches onto the canvas heart (or have your child do it, which is more fun for them). I made a simple "X" in the center, just to hold the needle.
Then just tuck the needle into the "X" and fold the rest of the yarn nicely around the back and secure with a piece of tape.
STEP TWO
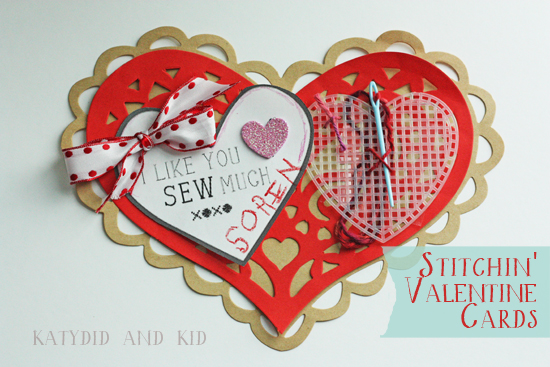
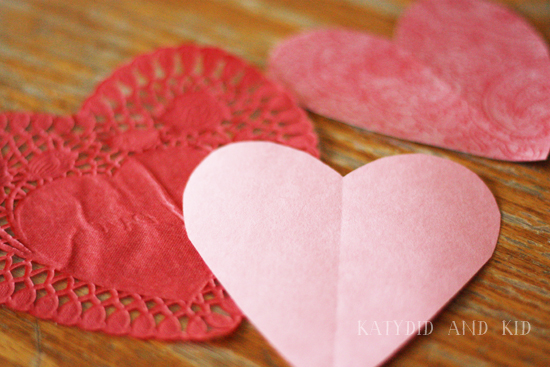
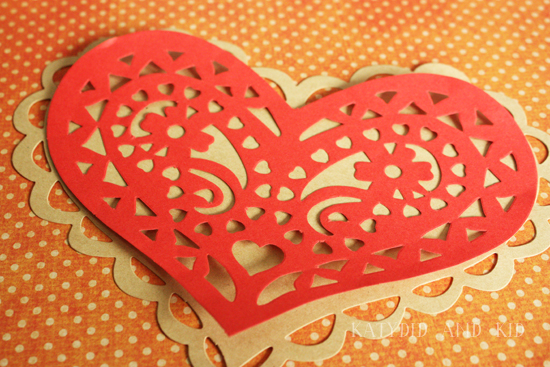
Create a backdrop for your heart out of paper hearts, either doilies, construction paper, or other paper. I picked up some paper doilies in a variety of colors at Target. It also came with two sized of doilies, which I layered on top of each other.
Arrange your heart, as well as the printable tag on top. You can make your own tag too, using paper. You might even change the wording to something like "Valentine, you leave me in stitches" or "You're SEW cool, Valentine!" Totally up to you and your kids.
STEP THREE
Assemble your Valentines. Print and cut out the tags and have your child sign them and embellish them if they want.
Thread a piece of yarn (in retrospect, I would have used thin ribbon here, since it's prettier) to attach your hearts to the background.
Poke the thread through the papers (I used a metal yarn needle here, but you could use a skewer or other sharp object to poke a hole),
then tie in a bow or knot on top.
Do the same for the plastic heart. I ended up replacing the yarn on the heart tag with a ribbon, just because I thought it looked prettier.
Now we just need to finish making another 15 for the class. Hopefully they'll have as much fun practicing their sewing skills as we did making this.
Again, if you'd like to use my printable tags, you can download them HERE. If you want to make your own tags, I found free stitching fonts called Kingthings Stitch and Stitches that I liked. Have fun creating!
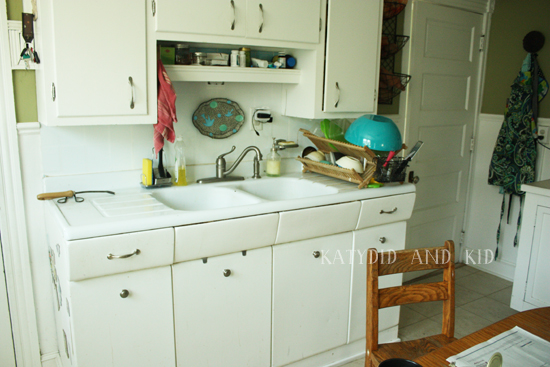
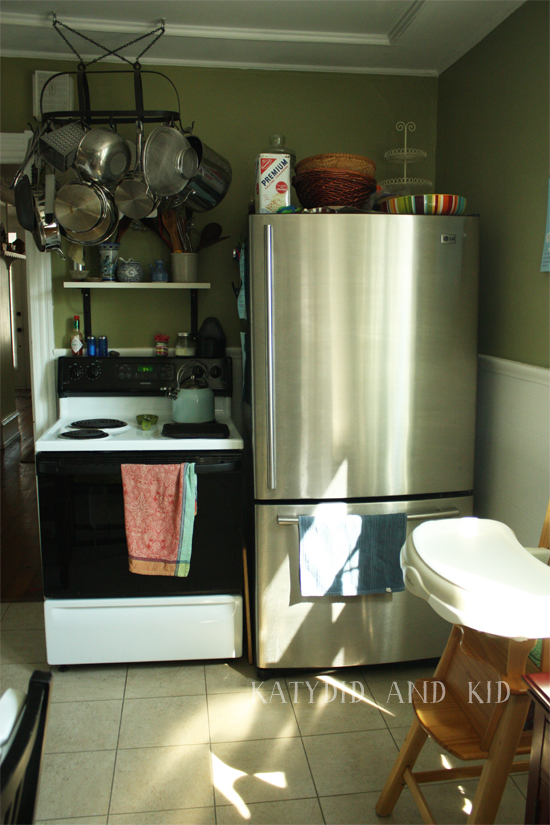
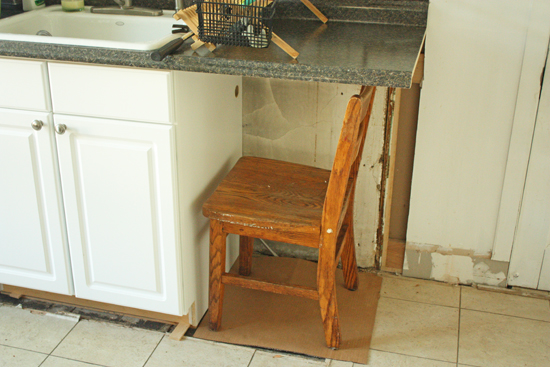
We're going on 4 months now, living and working with our Maytag kitchen appliances. Having gone from this:
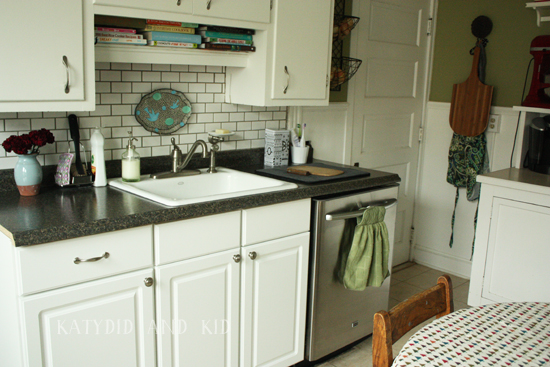
to this,
There's no doubt that our kitchen has been vastly improved, both visually and functionally.
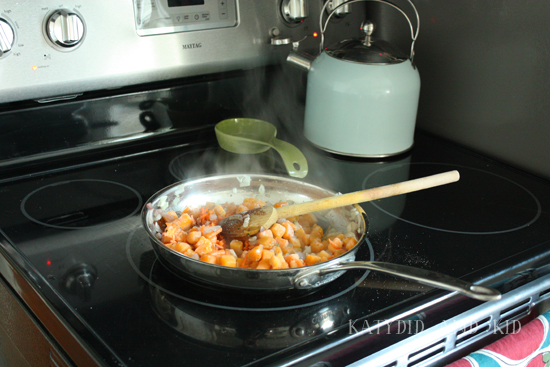
Cooking dishes like lasagna, which require the use of the stove, microwave and oven have been so simple, especially that I don't have to travel across the room to defrost the spinach before adding it to the skillet.
And here's the dish, right out of the oven, perfectly cooked.
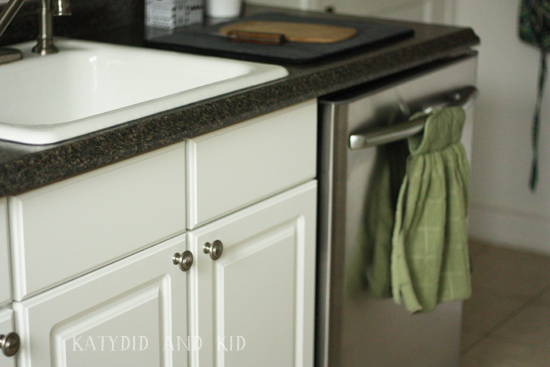
Having a dishwasher has probably been the biggest and most-welcomed change, as our original kitchen was without one. This required some new cabinets, sink and counter top to accommodate it, but it was well worth it.
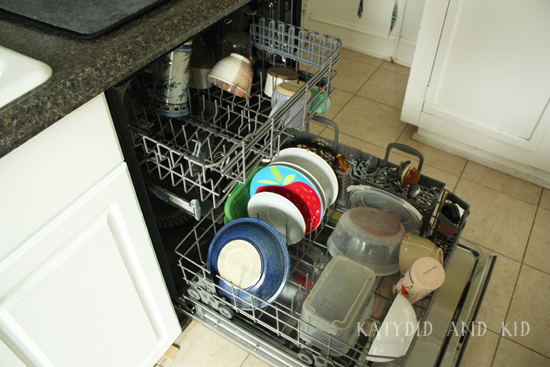
Cleaning up after meals is SO much easier. We use the Maytag dishwasher every day, mostly after dinner, when we've created enough dishes throughout the day to run a full load. It's seriously been a huge improvement on our family's life, requiring less time standing at the sink with hands in soapy water.
While I'm not an expert on dishwashers, having never owned one, I know that with the Maytag JetClean Plus dishwasher, I don't spend time and water rinsing the dishes beforehand. We just scrape off food bits and load them in and the high-pressure spray jets do the work. 95% of items come out perfectly clean, and on occasion I have some with some food buildup (mostly utensils that had some dried sauces on them).
The dishwasher has revolutionized life in the kitchen, and that statement is not a hyperbole. I'm not afraid to pull out all the pots and pans to bake and cook, since I don't dread cleaning up afterwards. Bonus points for doing a great job getting sippy cups and their dreaded valves clean.
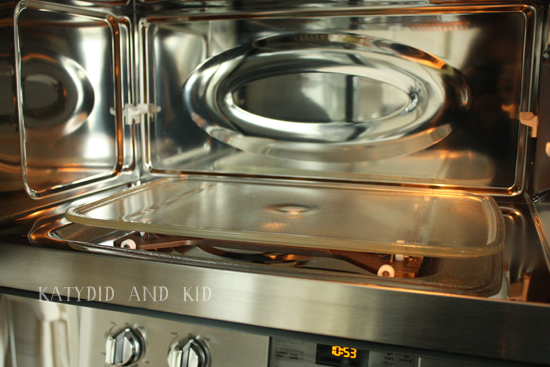
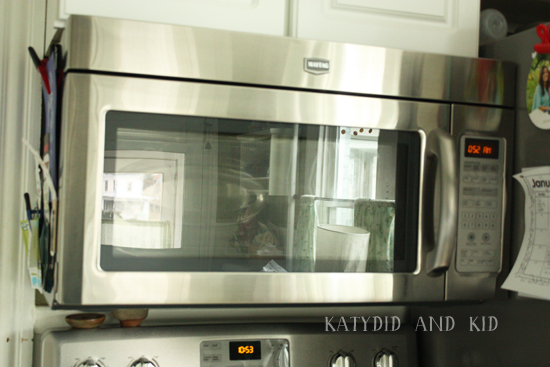
Another integral addition to our kitchen is the Maytag over-the-range microwave, which works hard whether it's softening butter or reheating leftovers.
I use the microwave every day, mostly for reheating leftovers, but also when making popcorn, heating beverages or even warming up our flax neck warmer. It can even fit a 9x13" casserole dish inside (the entire WideGuide rectangular glass plate moves around the edges of the microwave, rather than rotating like a carousel),
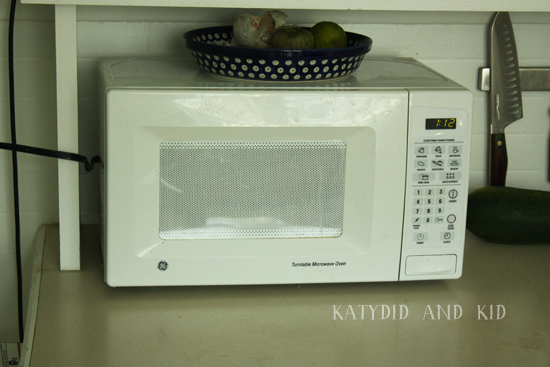
something which can't be said about my old microwave, a dorm room castoff.
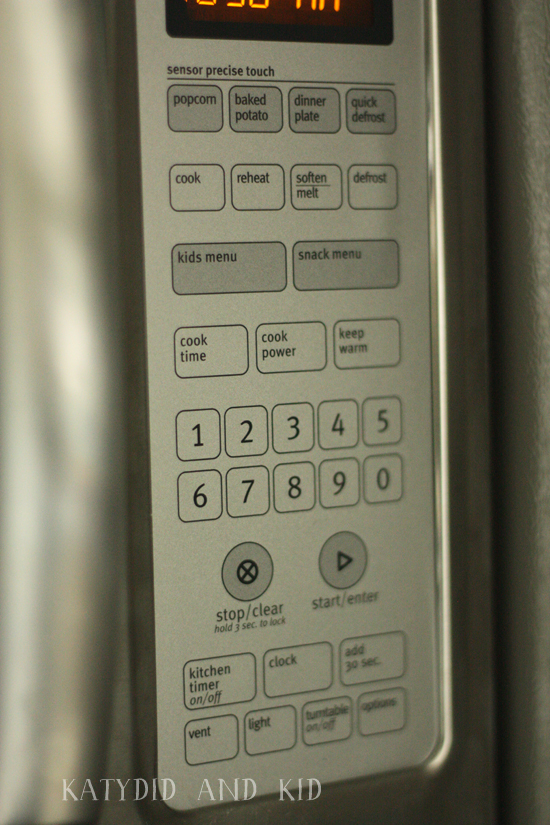
The Maytag microwave has lots of bells and whistles, which I'll admit to not using much out of laziness. Sometimes you have to stand there for a while as the LED panel scrolls through the options, trying to read which numbers to press for which kinds of food. But if I do take the time to do it, these features are worth it.
The microwave is powerful, and I've boiled coffee to where it actually overflowed the cup onto the glass plate. But when I use the pre-set beverage option, it comes out perfectly warmed due to the sensors inside the unit.
Probably the most-used button is the 30 second one, which I use to heat up leftover pasta for the kids. I don't use the "kids meal" button much, again with the LED scrolling and waiting, but we also don't have a lot of pre-packaged kids meals in our house.
Participating in the Maytag Dependable Kitchen Moms program has been an amazing experience, one that I'm sure to continue blogging about in the future here at Katydid and Kid.
Maytag has impressed me with their innovations that help people enjoy cooking and spend less time cleaning up. Unlike the appliances I grew up with, including microwaves that simultaneously burned and undercooked food and dishwashers that you had to actually WASH the dishes before loading them, these new Maytag appliances are so smart, anticipating what we need in the kitchen from cleaning extra-dirty dishes to evenly heating a casserole. It's been a pleasure working with such a renowned brand.
You can learn more about Maytag via their Facebook page, @MaytagBrand on Twitter and by checking out the other Maytag Moms (including the laundry moms) by following us on Twitter under the hashtag #MaytagMoms.
We're all wrapping up our thoughts on these appliances and would love for you to read our posts. Disclosure: I wrote this post participating in an Maytag Moms Dependable Kitchen Ambassador program by Mom Central Consulting on behalf of Maytag. I was provided with a Maytag kitchen appliances set, including a refrigerator, microwave, dishwasher, and range to facilitate my post.
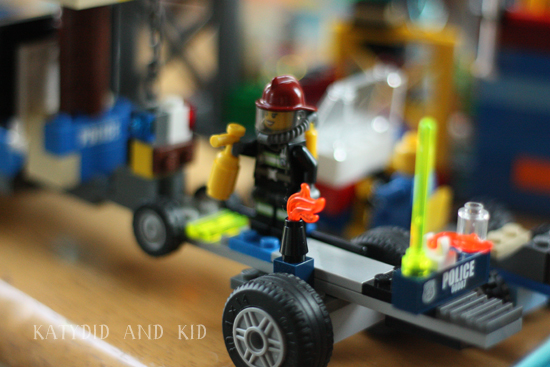
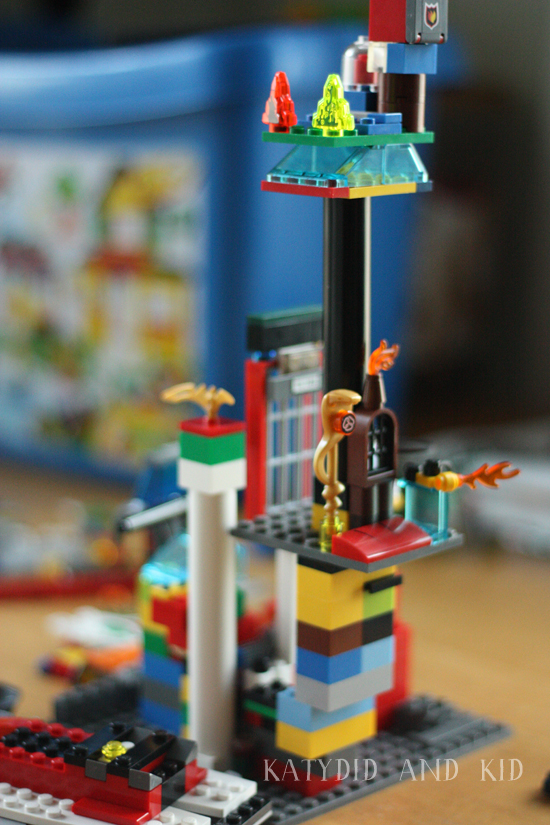
Between a string of days without an internet connection and a general feeling of being out of the online loop (save for Instagram and Facebook via my phone) it's been hard getting on this blog here to post. These cold days have been spent hanging around the house, meeting up for playdates, knitting, taking photos, and of course Legos, Legos, Legos.
Firewoman, or else a Fireman in makeup.
The days languidly go on, yet holy moley, January is nearly over. What do I have to show for it? The whole month seems like an outage, especially for this blog.
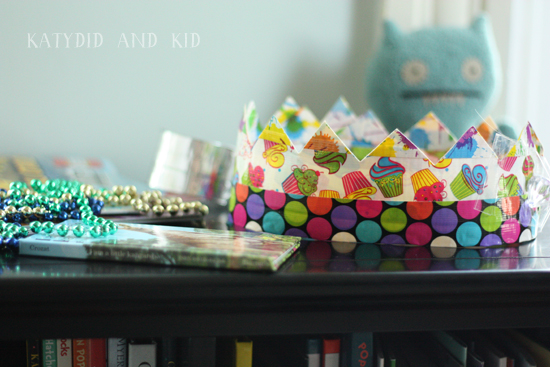
Well, today has been a good one, starting off with getting both boys dressed, ready for a school friend of Soren's to come by. We even made some of our famous duct tape crowns.
Somehow I fed the kids lunch AND gave them baths. Go me! One less thing to do tonight.
I have plans to make a lasagna for dinner, which will really push me into the supermom role today.
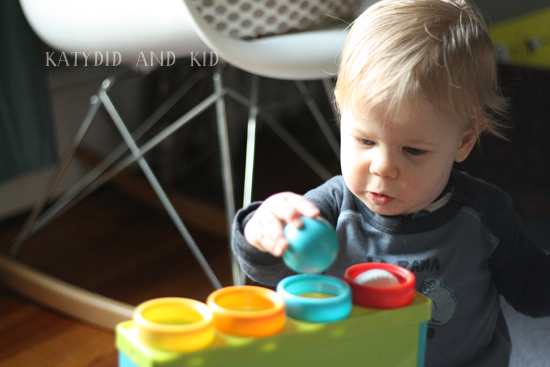
On the Jude side of my kids, he's doing well, talking a lot. He's quite a mimic. However he does have such a temper, much more than S ever did. It's funny, seeing such a mellow toddler get so angry and frustrated about things I can't even guess.
In fact, just after I snapped this photo, he pegged me pretty hard in the head with one of those balls. We're having some throwing-at-people issues too (hmmm, I wonder who in this house models that?).
Anyway, I'm in need of making the lasagna while Jude is napping (ahh, the slow torture of going from two naps to one), but I hope this post is momentum for being more regular about writing here. I'm so behind on things I was to blog about!
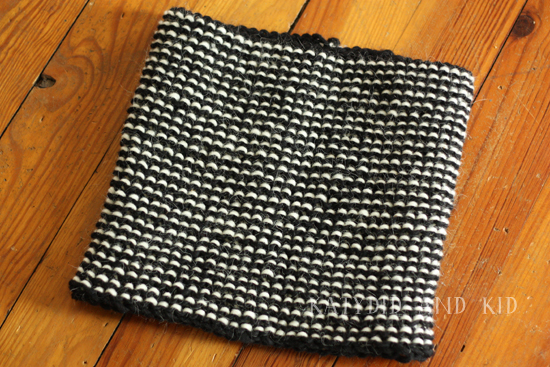
I've made progress on the needlework this week. I finished knitting a cowl, based on this one and even used up some yarn from my stash (Brown Sheep Bulky and Lopi, both wool). It was a quick and satisfying project, though an unnecessary one to finish right now, given it's going to be in the 60s this weekend in PA.
I'm purposefully not showing you the seam side, where I switched colors each round. It's a mess, but will hide nicely under a coat.
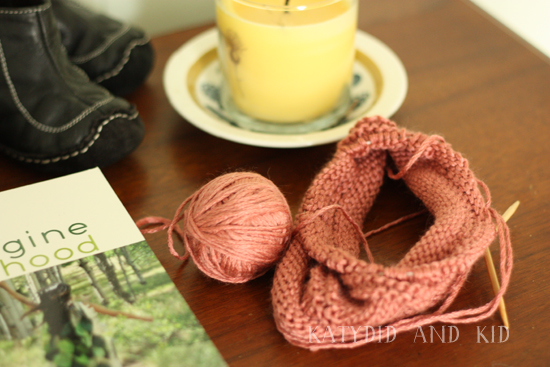
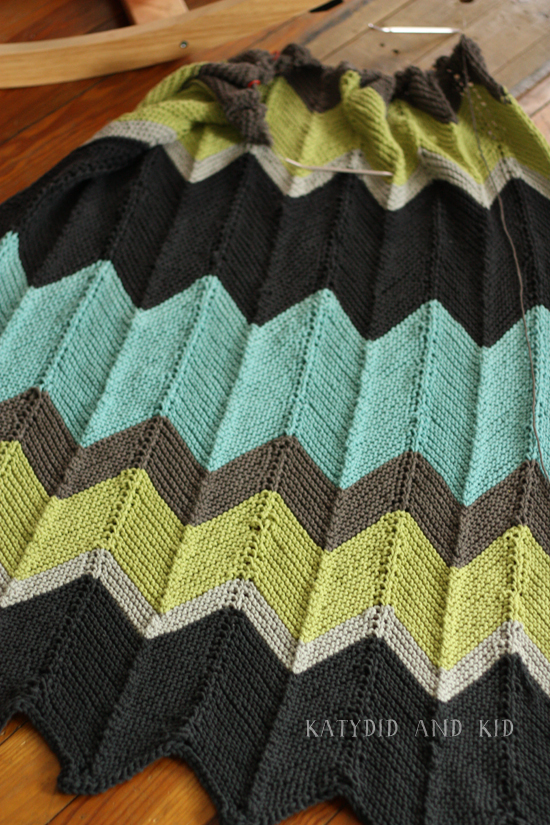
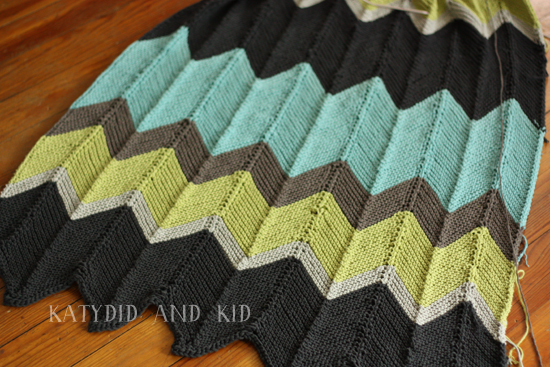
I've been making a lot on the needles, lately, mostly hats and working on my afghan, which is almost done.
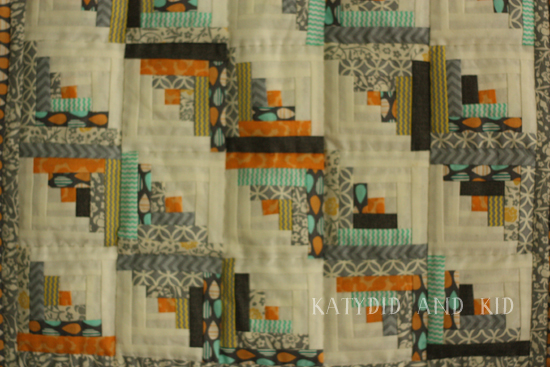
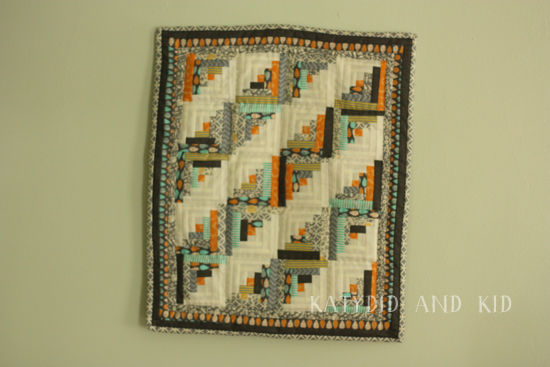
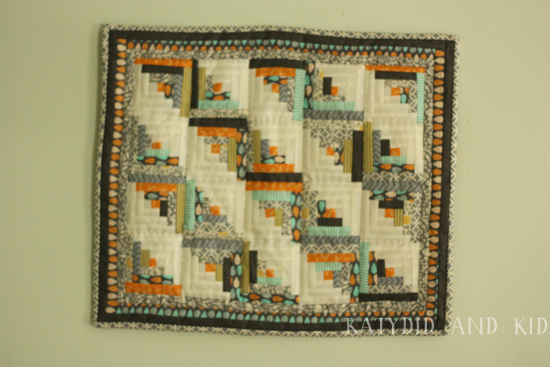
I'm most pleased at having finally finished my quilt. It's roughly 15x20", so it's tiny and quite intricate. All those half inch strips that make up the log cabin blocks nearly blew my mind and patience.
I'm a novice sewer at best, so I'm glad this photo is a bit blurry, considering that many of my pieces don't line up perfectly. And I hand quilted the layers together, in the ditch so you can's see how badly that turned out. But at least it hasn't fallen apart, even when the boys were tossing it around yesterday.
I'm now left with deciding about its orientation so I can sew on the pocket for hanging.
I'm inclined to make it vertical, considering that's how I laid out the blocks. Maybe two pockets can somehow be rigged up, so I can change it?
Quilters, I'm sure you're shaking your heads, but I guess we all have to start somewhere.
This handwork has sure been keeping me busy and giving me some creative contentment that I've been searching for for months. How have you been occupying your time?
I love the start of the new year because it's a time to de-clutter and simplify. However, I do miss the cheer of the holiday decorations, especially when January is such a long, cold month.
Why not add some wintry-but-not-Christmasy adornments to your living space? It's a perfect time to decorate with white, since the color lightens up your home and also echoes the outdoors.
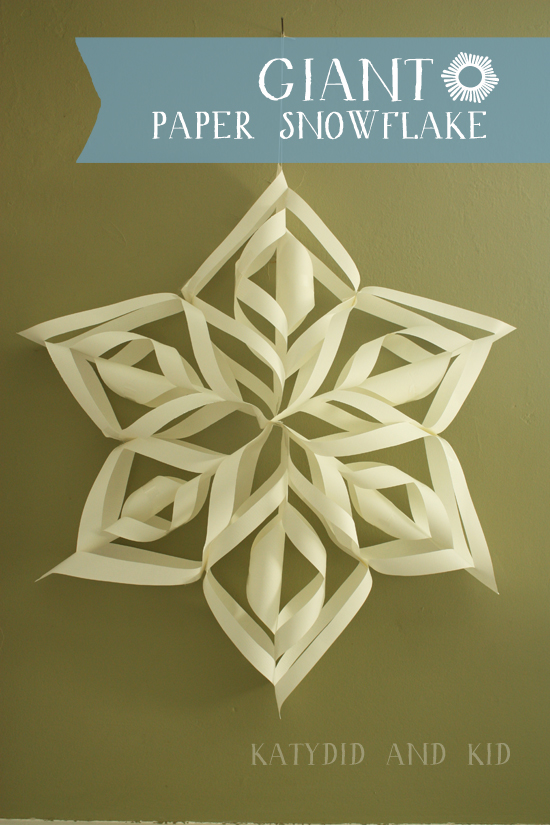
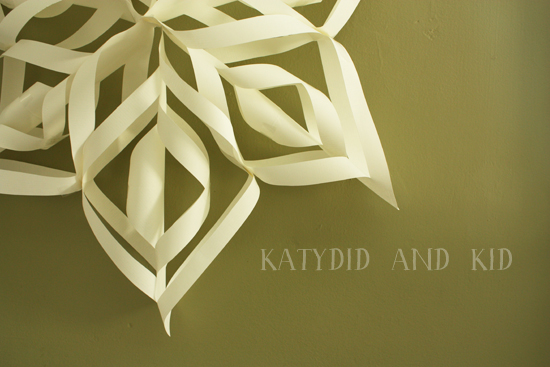
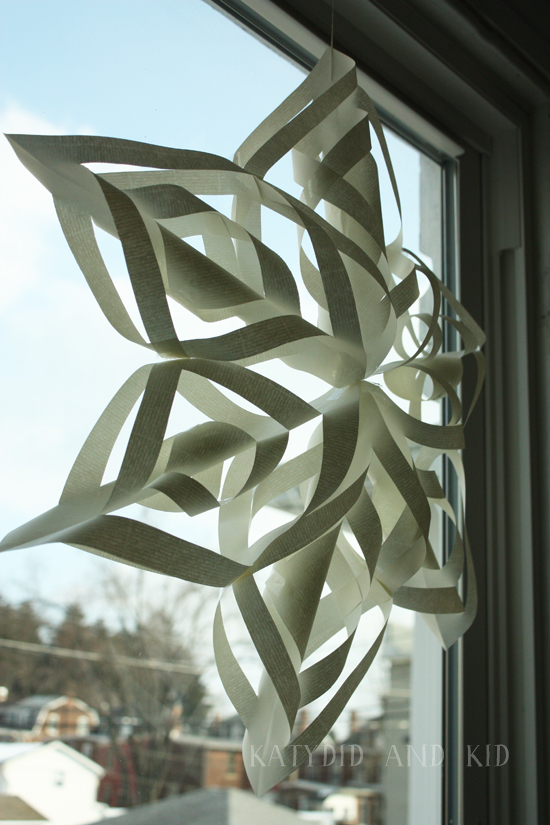
I came across some lovely and large paper snowflakes online, which reminded me of making them when I was a kid. They're simple and don't require any fancy materials. And they look elegant and showy in a window, on a wall or hanging from the ceiling (they're about 17" wide).
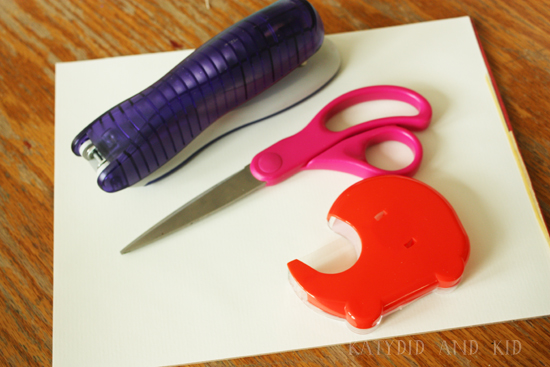
You only need a few materials, 6 sheets of white paper (8 1/2 x 11), invisible tape, scissors and a stapler.
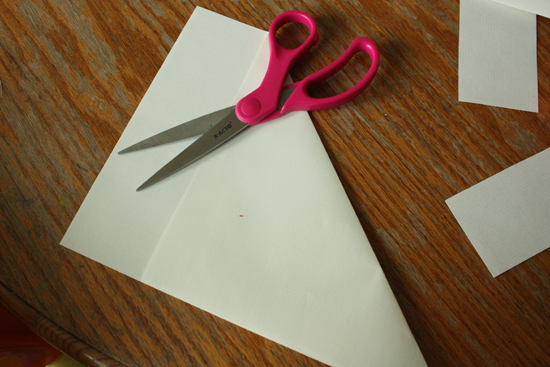
STEP ONE
Turn your rectangular paper into a square by folding the short side into a triangle, lining the edges up.
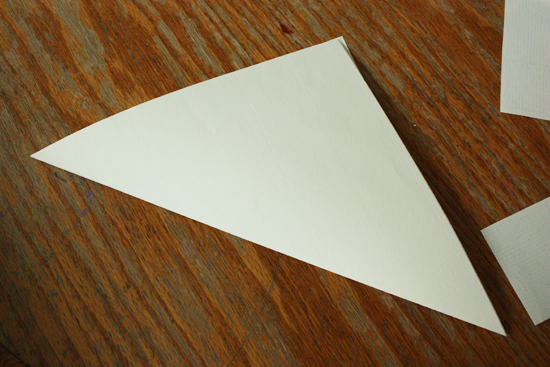
Cut off that extra flap of paper, leaving you with a right triangle (ultimately a square when you open up the folded paper).
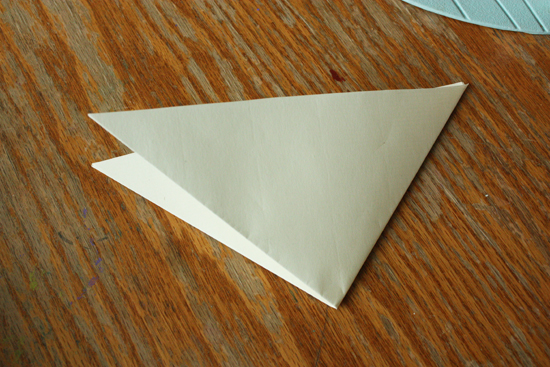
STEP TWO
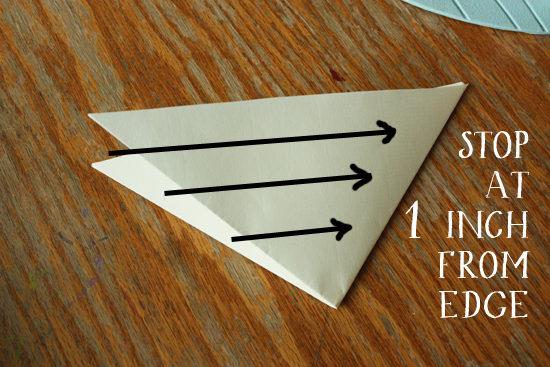
Fold this triangle in half again.
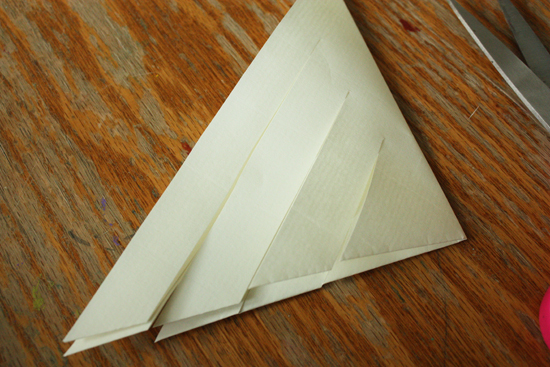
Then cut three parallel lines starting the longest edge, from the two open edges to the middle fold. Make sure to cut through all the layers of paper and DON'T cut all the way to the edge! Stop about an inch in, otherwise you'll just have a bunch of paper scraps.
It should look like this:
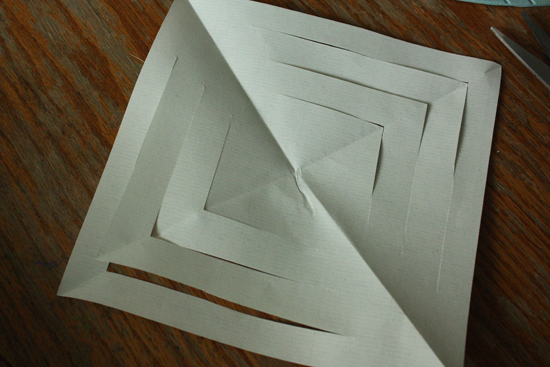
STEP THREE
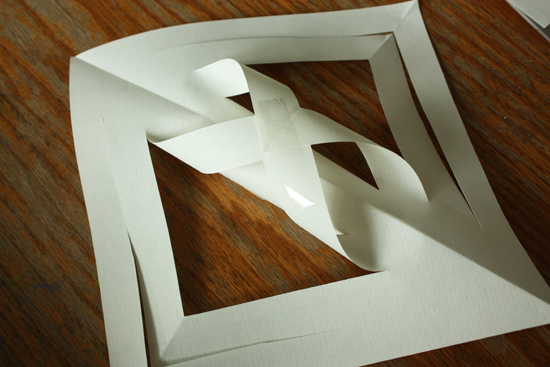
Open up your paper.
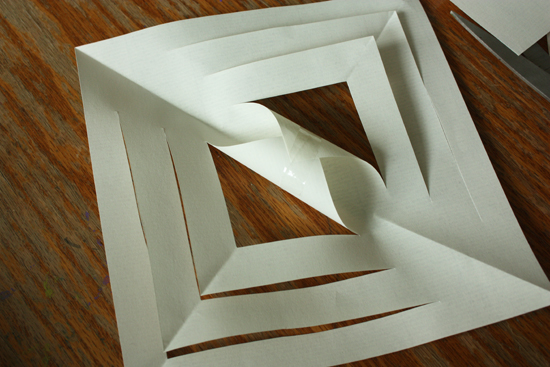
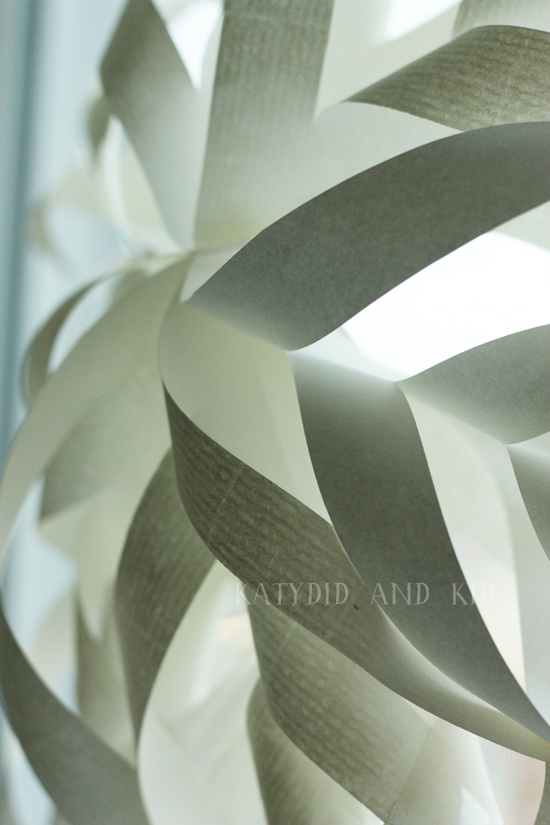
Take the edges of the center square and roll them into a tube. Tape it to secure in place.
Flip it over, then take the next pair of points and tape them together in the same way.
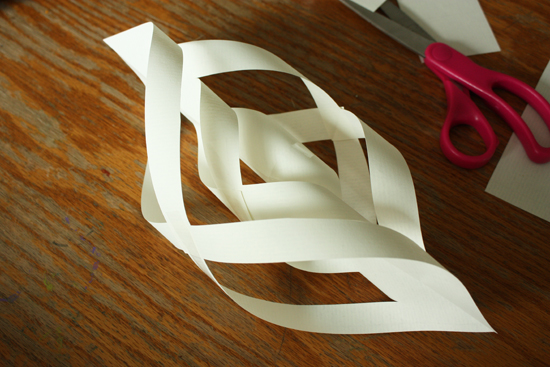
And then flip over once more and tape the last points. You'll get something like this:
which is one point of your six-sided snowflake. Now go on and make 5 more of these before moving onto the next step.
STEP FOUR
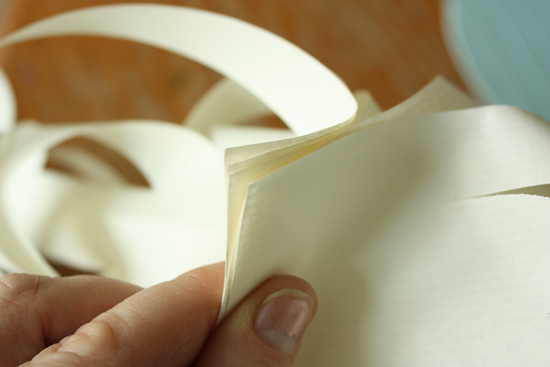
Gather your 6 papers and stack the points of one end on top of each other.
Grab your stapler and staple them together. Then staple each section together in the middle, where they would naturally touch.
Then staple a string or ribbon to the top and hang.
They're so lacy and light, and would perk up any bleak indoor landscape.