


 Mama Kenz aka MacKenzie has joined the Green and Clean fun, by sharing her tutorial on homemade dryer balls. She blogs about all things crafty over at Mama Kenz Studio, and I was fascinated when I came across her post for homemade dryer balls. And you don't even have to be a knitter or crocheter to make them. This is a great way to soften your clothes without the use of chemicals, especially if you can't use a clothesline (I've heard tennis balls work well too, but these are much nicer looking). All photos are courtesy of Mama Kenz.
Mama Kenz' Homemade Dryer Balls
Lately I have been faced with two dilemmas (among many, but let's just focus on these for the sake of this post):
1. I have left over, strange amounts of yarn that I don't know what to do with,
2. I have serious static in my dryer (we don't use dryer sheets and I recently found out the blue dryer balls we were using are made of PVC and therefore not going back in my dryer!)
My solution? Homemade wool dryer balls! I have heard from many people lately that they simply swear by them to not only reduce static, but soften their clothes and reduce drying times as well! So, I dug out my leftover stash and went to work! They are incredibly simple to make with a little bit of time and a good grip (I will explain in a moment!).
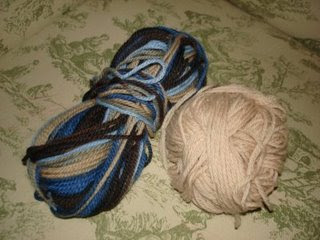 Left over wool yarn from other projects
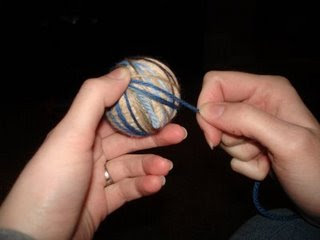
1. Wrap your 100% wool yarn of choice into a tight ball- we are talkin' tight here! As tight as you can make it! The tighter the better (this is where the grip issue comes in- when the ball is very small it has a tendency to pop out of your fingers and unravel- no fun!)!Wrapping a Tight Ball2. Once you have wrapped to about the size of a golf ball you have made your core, which should be felted on it's own for the best results. Take the end of the yarn and wrap it into the ball with a small crochet hook to secure it.Securing the end of the yarn
3. Place the ball into the end of an old nylon or sock and put a tie of non-wool yarn or string just past it to insure that it does not fall out and unravel. If you are making more than one ball tie in between each.
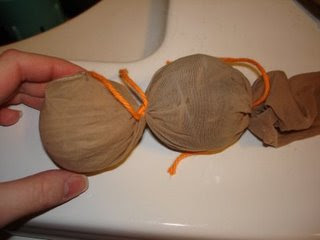 Balls tied in nylon
4. Throw the ball(s) into the washer with a load of clothes (preferably a hot wash) and follow up with a tumble through the dryer. This process can be repeated as many times as you like to acquire the desired level of felting. The more times you wash and dry the more firm and dense the ball will become.
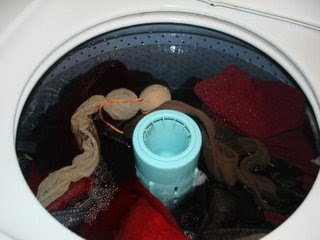 Balls in washer
5. Once your core is sufficiently felted it is time to add on your outer layer. Just begin to wind more string (tightly, once again) onto your core until it reaches about the size of a tennis ball (generally around 9 in. in circumference) but make sure that you allow for some shrinkage in the felting process.
 Starting to wind more yarn onto felted core
Thanks Mama Kenz, for sharing your crafty frugalness!


 Vote for parenting blog


 "/>
"/>


4 comments:
Congrats, you were given an award for your blog!
http://texasheartland.wordpress.com/2009/03/06/something-good/
That's awesome! I'm definitely going to try this!
I can make these! Thank you for this tip. I do not use dryer sheets.
I just wanted to stop by and say hi! Tahnks for the fun at the Launch Party.
Post a Comment