Showing posts with label Reviews. Show all posts

August 12, 2023

Apple Cider Vinegar Zucchini Pickles

I participated in a campaign on behalf of Mom Central Consulting for Heinz Vinegar. I received a product sample to facilitate my review and as a thank you for participating.
There are a few basics in life that I can't live without.  I'm not talking about the big things like family, home, health, etc.  Instead, I'm referring to the often overlooked items I take for granted like soap, flushing toilets, running water and my eyeglasses.

Apple cider vinegar is on my list of essential ingredients for my daily life.  I use it a lot, whether in cooking, cleaning, or as a health and beauty aid.  It's part of my hair routine, and adds a bit of reddish highlights to my auburn locks.
It makes kickin' refrigerator pickles, and I've even been known to make tea out of it with lemon and honey that helps soothe an upset stomach.  I read somewhere that it soothes sunburn too, but I haven't tried that since it's been years since I had one.

There's not much I don't use it for (it even works well in removing stickers!), and when I had the chance to try out Heinz Apple Cider vinegar and their new Unfiltered Apple Cider vinegar, I was eager to think of something to use it for.

The kitchen is the most natural place to start, so I thought I'd make a batch of Zucchini Pickles, since there are overflowing in my kitchen.
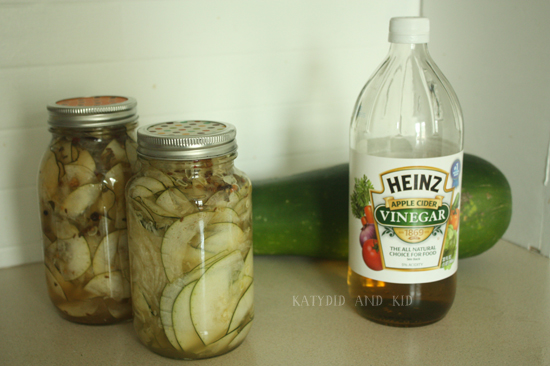
These are similar to my refrigerator pickles, but with zucchini instead of cucumbers.  I chose to use Heinz Unfiltered Apple Cider Vinegar because I find it has a slightly stronger taste, which I like.  It's cloudier, as it contains the "mother" of the vinegar (a compound created naturally during the fermentation process) and also because it's unfiltered and unpasteurized. 

I also have used it in salad dressing (my usual recipe is 1/3 vinegar, 2/3 olive oil, 1 tbsp Dijon mustard, 1 tsp honey and salt and pepper) and it gives a tangier taste than red wine.  I'm eager to try it in other recipes, but for now, I'll share my refrigerator pickle recipe.

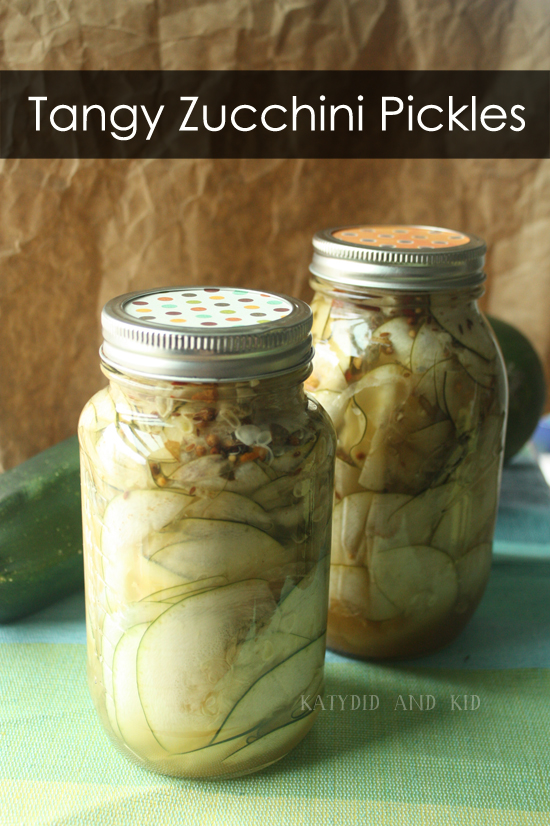
Tangy Zucchini Pickles with Apple Cider Vinegar

(makes 2 quarts)
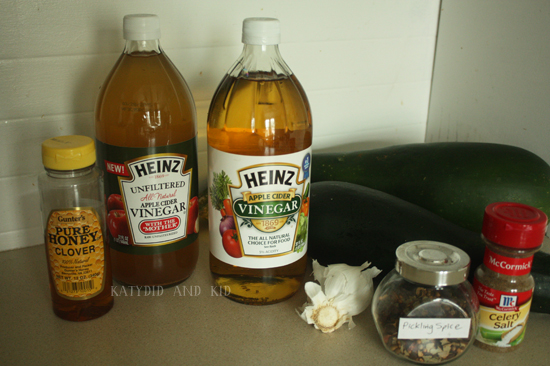
INGREDIENTS
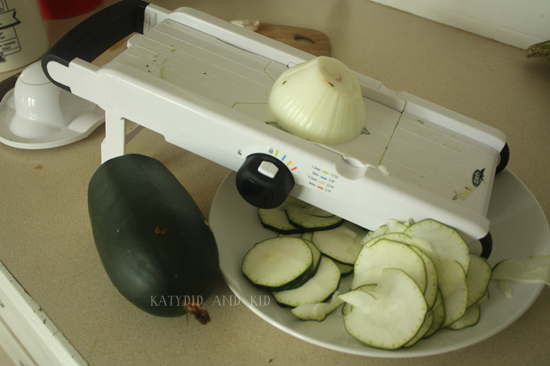
  • 1 pound of zucchini (1 large OR 2 medium), thinly sliced on a mandolin or by hand
  • 1 small Vidalia onion, thinly sliced on a mandolin or by hand
  • 6 cups Heinz Unfiltered Apple Cider Vinegar (or regular Apple Cider Vinegar)
  • 5 tbsp sea salt
  • 1 tbsp celery salt (if you don't have this on hand, you could substitute sea salt)
  • 3 tbsp honey
  • 1 cup sugar
  • 3 cloves of garlic, minced
  • 1 tsp pickling spice
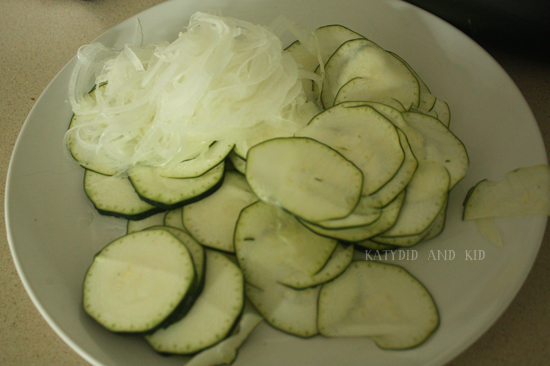
Slice the zucchini and onion very thinly.
I used the 1/16 setting, but you could make thicker slices. I wanted mine to be thin for piling onto burgers and salads.
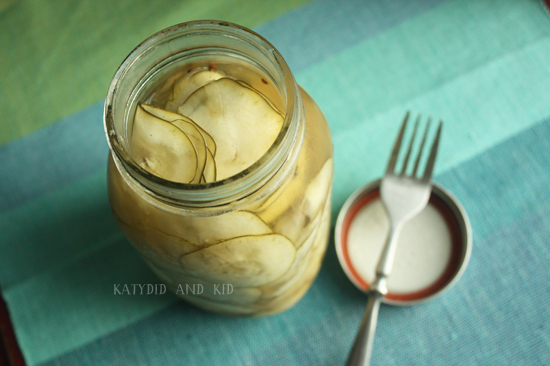
With clean hands, pack the zucchini and onion neatly into 2 clean quart jars.

In a small saucepan, combine all the ingredients except for the zucchini and onion in a small saucepan, then bring to a boil for 2 minutes until the sugar dissolves. Allow to cool to room temperature, then pour over the zucchini in the jars, filling up to within 1/2" of the top.

I put mine in the fridge for 5 days, and then tried them.  Tangy and delicious!  They should keep for a few weeks in the fridge.
You can find more recipes using apple cider vinegar, both for eating and for living, at the Heinz Vinegar website as well as on their Pinterest page.

August 4, 2023

Back to School Crate and Clipboard with Michael's

I'm excited for the beginning of the school year, and not just because my eldest will be in full-time Kindergarten (yay for some breathing room for me)!.  I've always liked the start of school, even as a kid; all those new boxes of crayons and pencils and the impending arrival of fall make me happy.

While Kindergarten doesn't require too much preparation or organization on my part, I remembered that when Soren was in pre-K last year, it was sometimes hard for him to keep track of where his school stuff was.  That made for some stressful mornings, when he couldn't find his shoes, hat, or show-and-tell item.

This year, I decided to change all that and eliminate some of my school-morning stress by creating a place to corral his stuff.  When Michael's challenged me to create a Back-to-School craft, I eagerly signed on.
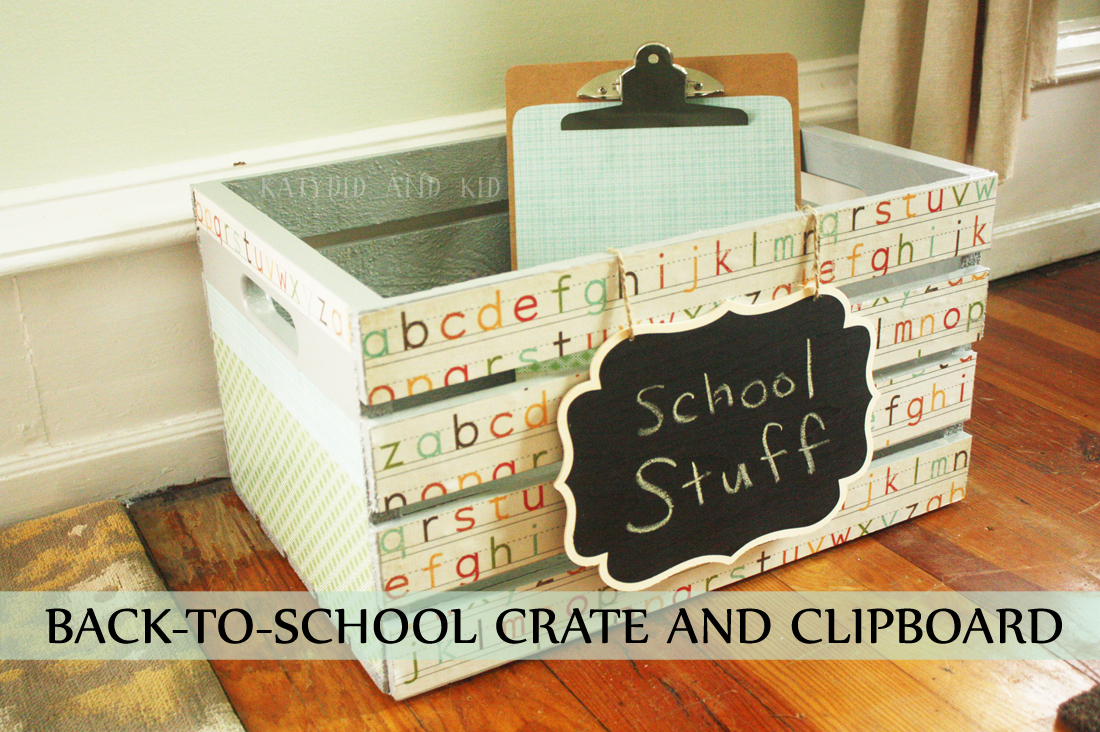
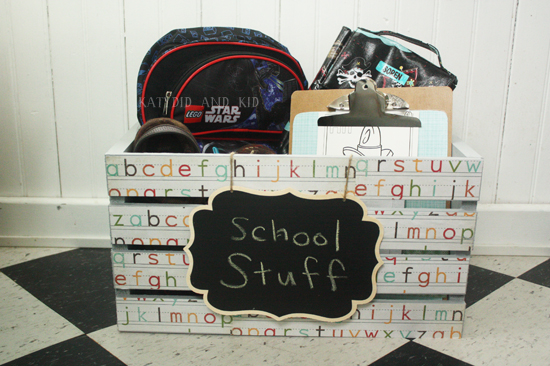
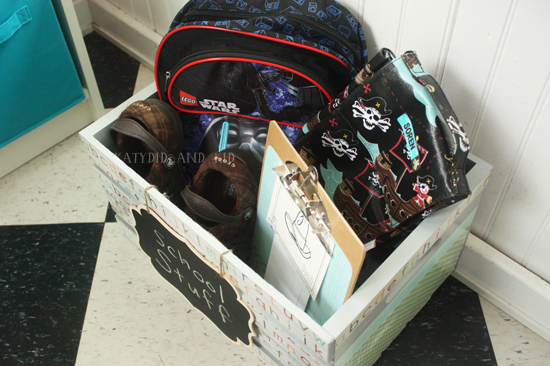
I envisioned a crate of some sort to hold a backpack, lunch bag, shoes, jacket, as well as something to keep papers or other important school stuff visible.  Naturally, I wanted to personalize this with paint, decorative paper, or other items, and Michael's had no shortage of ideas in their aisles. I love how my project turned out!
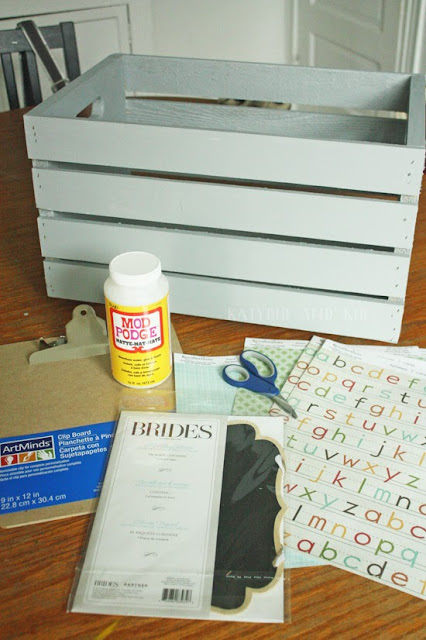
I found a wooden crate for under $15, which was the perfect size and material (highly durability) for my project.  
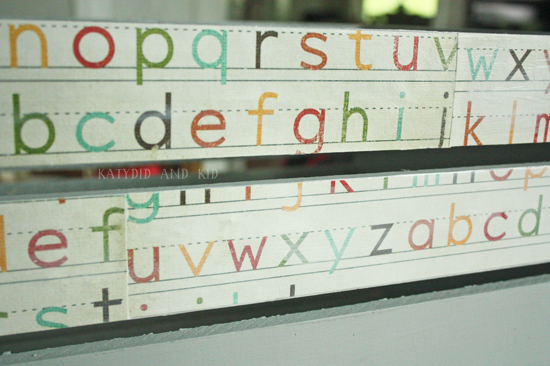
To add some pizazz to it, I strolled the scrapbooking aisle and found some pretty papers.  I decided to go with an alphabet theme, and use the color scheme in this paper.  I bought 4 sheets for the project.
I found two other complementary sheets of paper, which I'd use for the sides of the crate as well as on the clipboard.

While wandering the store, I came across a cute wooden chalkboard sign in the bridal aisle that would look great on my crate, so I picked that up too.
Lastly, I needed Mod Podge, a clipboard
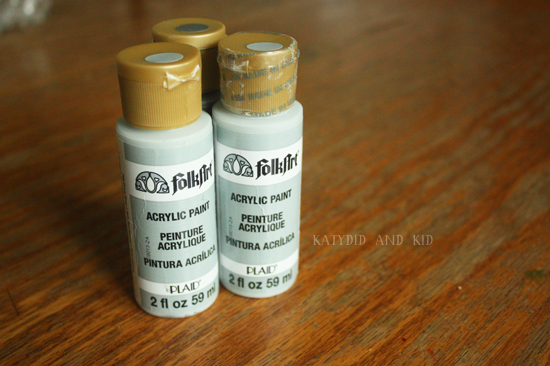
 and paint.  I settled on a light gray paint for the box.

While I tend to get a lot of the 40% off coupons from Michael's in the newspaper, I always seem to forget them when shopping.  However, Michael's has a great app that you can use to get coupons that the cashier can scan from your phone.  I scored one that was 20% off my entire order, which made this entire project less than $30 for me.  It took me about 2 hours to complete, not counting the time it took for the crate to dry.

Here are my SUPPLIES:
  • 1 wooden crate
  • 4 sheets of 12x12" alphabet scrapbook paper
  • 2 sheets coordinating scrapbook paper
  • 1 fiberboard clipboard
  • 4 2oz. containers of Folk Art paint in Dove Gray
  • Scissors/paper cutter
  • 1 wood chalkboard sign
  • Polyurethane for sealing (optional)
STEP ONE
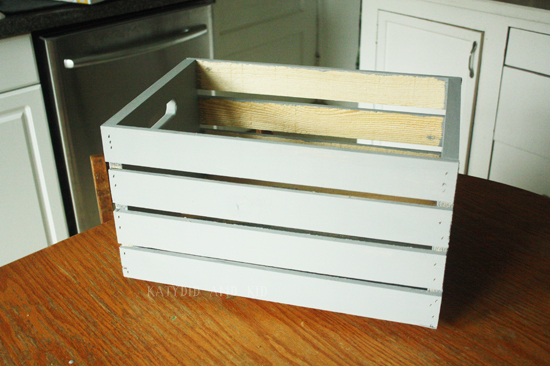
Paint your crate, inside and out with the Folk Art paint.  Allow to dry according to instructions on the paint tube.  If you're particularly fussy, you could sand and wipe down the crate before painting.  I'm just lazy and pressed for time, so I didn't do that.

STEP TWO
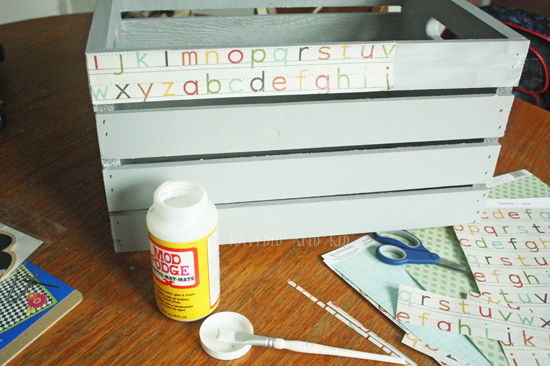
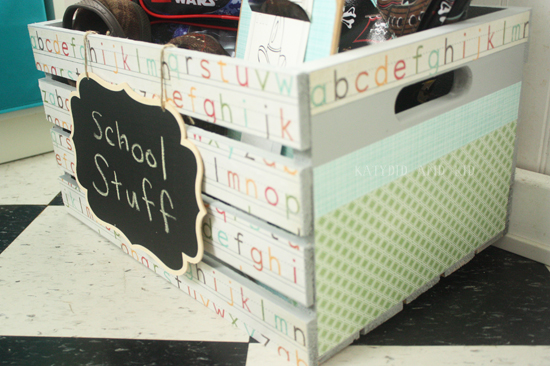
Cut your alphabet paper into 2" strips to fit onto the crate's slats.  The paper is only 12" long, so you'll need some 2"x6" strips too, to finish off each slat.

Using Mod Podge, adhere the paper to the slats.  I painted the Mod Podge on the crate, then painted some more on the backsides of the paper.  When adhered, I painted a layer of Mod Podge over the surface of the paper (just check the back of the Mod Podge bottle for clearer instructions)
You can see that the 12" long piece doesn't reach to the end, which is why you need a few 6" pieces to fill in the gap.  I also staggered the seams where the papers meet so it didn't line up all the way down the right side of the box.

STEP THREE
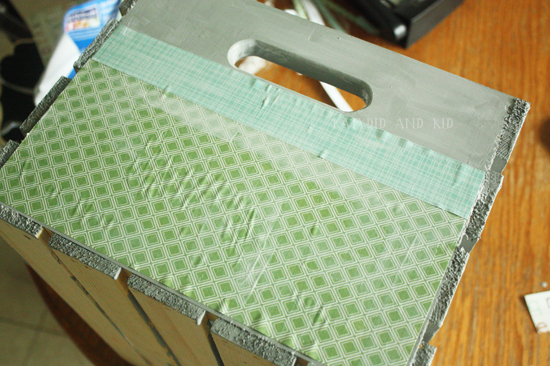
On the shorter ends of the crate, I adhered some of the coordinating papers in the same way.
Don't be alarmed at all the bubbles; they eventually went away as the paper dried.

STEP FOUR
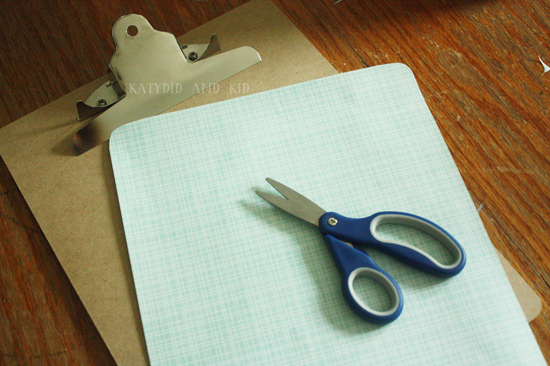
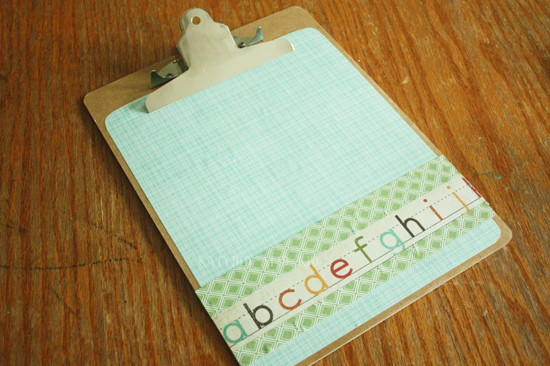
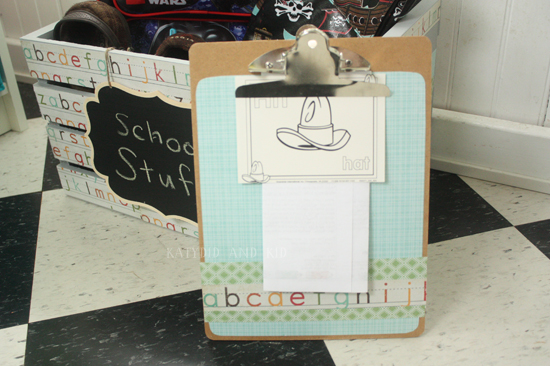
While the crate was drying, I moved onto the clipboard.  First, I measured the paper so it would fit.  I wanted to leave a gap of brown around the edges and round the corners of the paper too, so I traced the corners of the clipboard onto it.
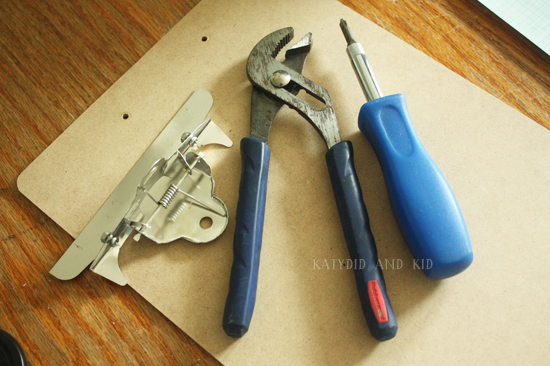
Then I unscrewed the hardware. I probably should have unscrewed the hardware first, but sometimes my mind doesn't work that linearly. 
Then I adhered the paper to it with Mod Podge (including a line of letters that I cut from the alphabet scrapbook paper), and coated the entire surface with a layer of it too.  When dry, I attached the hardware back onto the clipboard.

When the crate was dry, I sprayed the entire thing with a few coats of Polyurethane so it would hold up well.  A few layers of Mod Podge would work too.

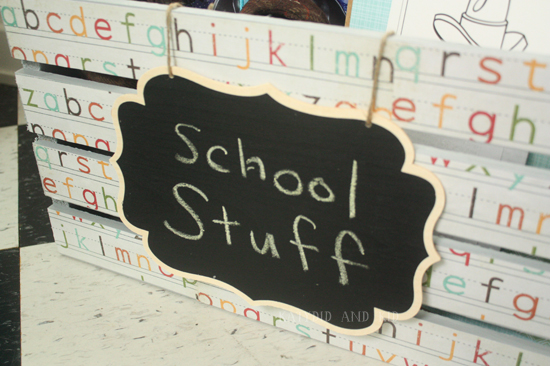
I attached the chalkboard sign with two pieces of twine,
and placed my son's school stuff inside.  Hopefully he will consistently use it as his go-to place for his school things.
This project would also make a great storage container for a nursery or playroom.  The possibilities are infinite.  I hope this project makes our lives a little more organized and less stressful, and fosters some independence and responsibility in my Kindergartener.

Here are a few helpful things you might not know about Michael's
  • Michael's offers a 15 percent discount for teachers every day. Talk to a store associate during your next trip to learn more. 
  • If you need a large quantity of one back to school item but don’t see enough on the shelves, Michael's offers a bulk ordering program. You can order as many supplies as you need and save up to 20 percent. 
  • Michaels has an app. Download the Michaels app so you have the latest deals and coupons at your fingertips in case you need last minute school supplies.
Disclosure: As a participant in this campaign from Michael's, I received a gift card to cover expenses for this craft project.  All opinions and ideas in this post are my own.

May 20, 2023

Hands, Paper, Sun Craft with Elmer's Naturals

Disclosure: I participated in a campaign on behalf of Mom Central Consulting for Elmer’s. I received product samples to facilitate my review and a promotional item as a thank you for participating.

With Father's Day quickly approaching, I've been thinking of ways to celebrate the dads in our lives, including my husband.  Since my eldest son's preschool ends this month, I can't rely on his teachers to come up with some cool craft like they do for Mother's Day (yea teachers!  And no, I'm not really so lazy as to not want to make a card/gift with my kids), so I had to think of something fun to make with the kids for Chris.

We always have an abundance of paper, and this week we also got to test out some of Elmer's School Glue Naturals, made of 99% natural ingredients.

We are always up for crafting, which allows me to exercise my old art teacher skills while engaging in a creative activity with my son.  Elmer's is the only glue I bought for students when I was a teacher, so I have a lot of experience using it.  I was eager to see how their line of natural glues held up when making our Father/Sun craft (pun intended).
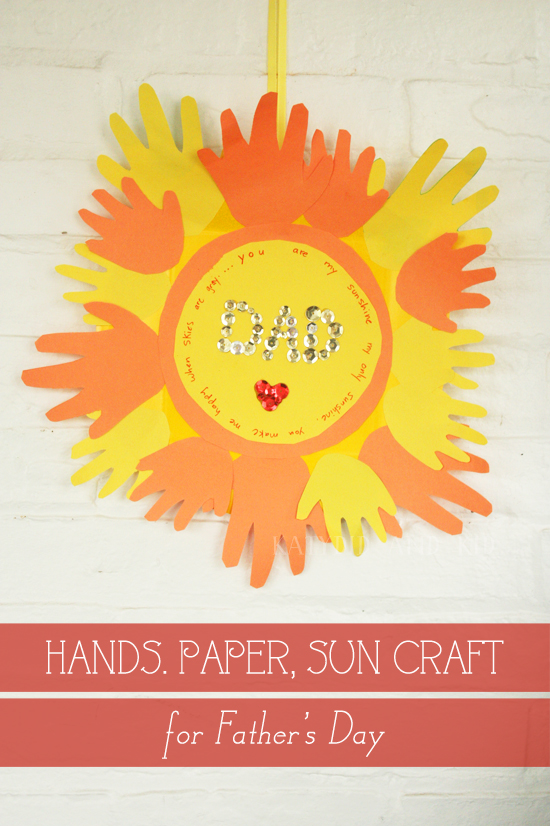
It's a very simple project you can do with your kids, and it is made up of tracings of their little hands, which is meaningful and sweet.

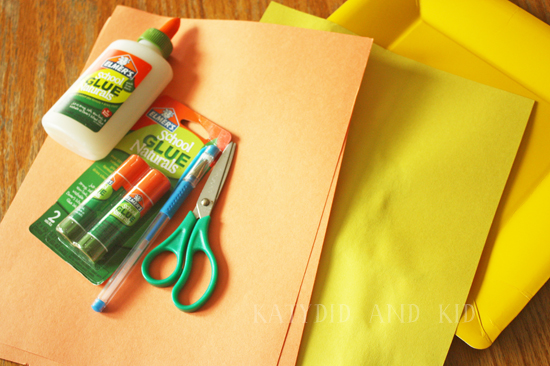
Here's what you'll need:
  • Construction paper (we used orange and yellow)
  • Scissors
  • Elmer's School Glue Naturals glue stick
  • Elmer's School Glue Naturals glue
  • Pencil
  • Markers
  • Sequins
  • Ribbon or string for hanging
  • Paper Plate
STEP ONE
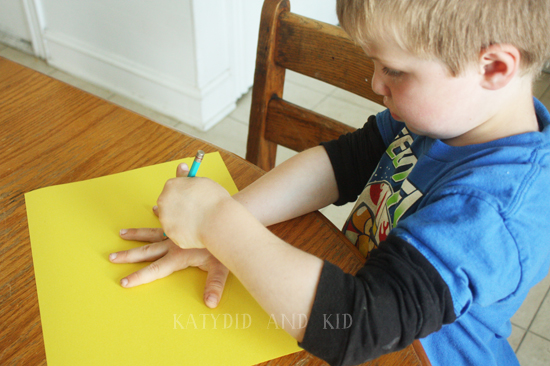
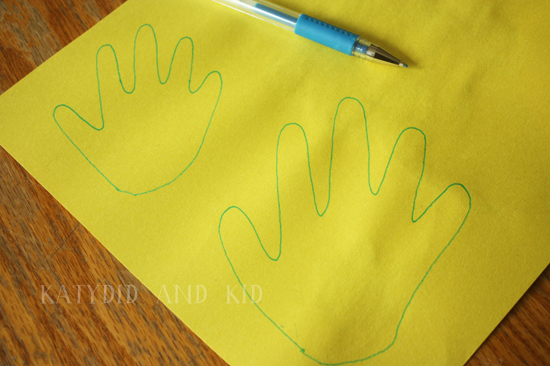
Trace your child's hand onto a piece of the construction paper.
Since I have two kids, we have a mix of small and smaller hands in both yellow and orange.
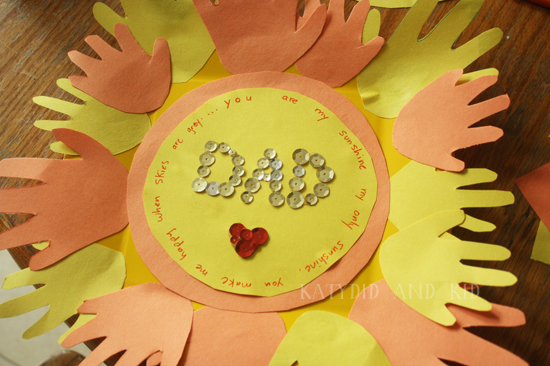
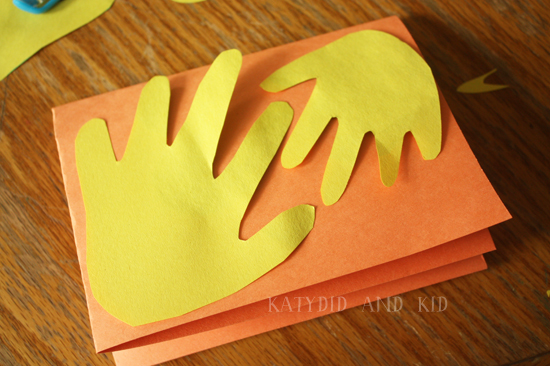
We cut out the hands,
then I folded the other papers and cut out multiple hands at once

STEP TWO
Gather all your hands and your glue stick,
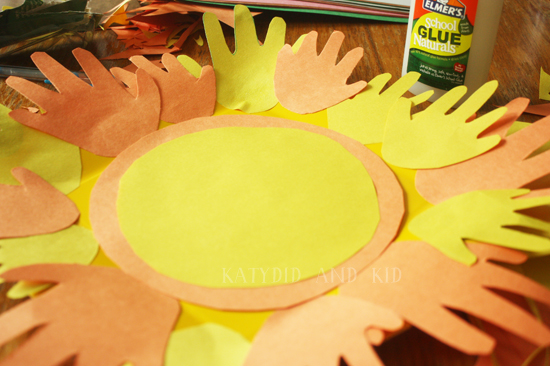
then glue your hands around the outside of your paper plate.
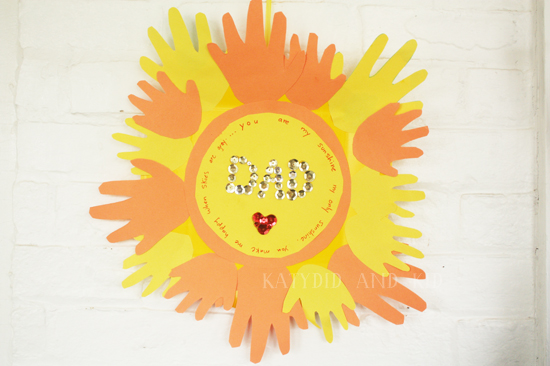
Please ignore my "rounded" square plate.  It's the best one I had on hand!
STEP THREE
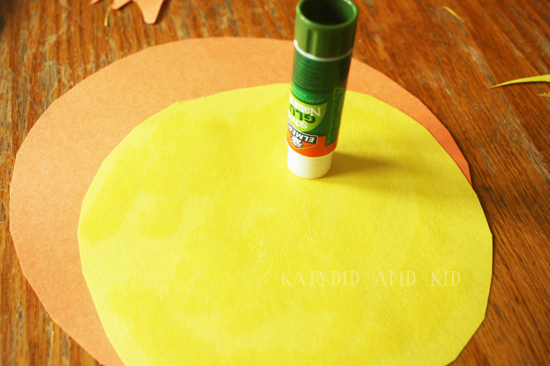
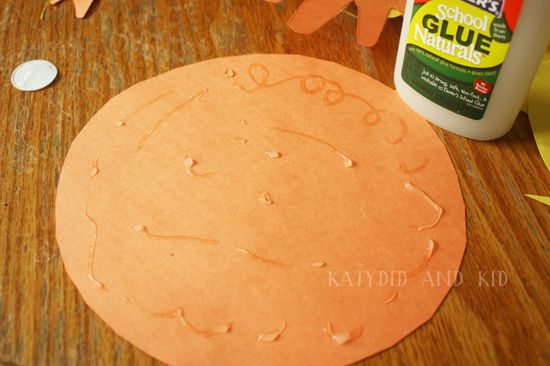
This step is optional, but I felt it added a little more pizazz to the artwork.  We cut out two circles out of orange and yellow paper, one larger than the other, and glued them together with the glue stick.
Then we glued that to the center of our plate using the Elmer's School Glue Naturals glue.
This helps jazz up a plain white plate too, if you're using one.

STEP FOUR
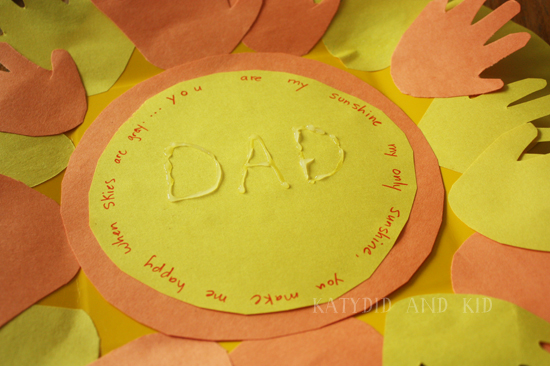
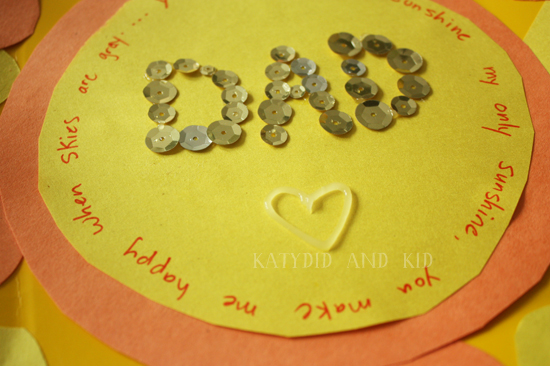
In the center of the sun, I wrote the lyric "You are my sunshine, You make me happy when skies are gray." but you could certainly write something like "you are the sunshine of my life", etc.  Then spell out "Dad" in glue and let the kids add sequins for sunny sparkle.
You could add a little heart too, out of glue.

STEP FIVE
When the glue is dry, turn the sun over and glue a length of ribbon to the back.
Allow to dry, then hang in a prominent place on Father's Day.
As for my take on Elmer's new natural glues, I found no difference in using these as compared to their traditional glue.  I would definitely have no problem replacing the traditional glue with Elmer's Naturals, especially knowing they are made from 99% natural ingredients, great for those glue-eaters that I've come across as a teacher. :)

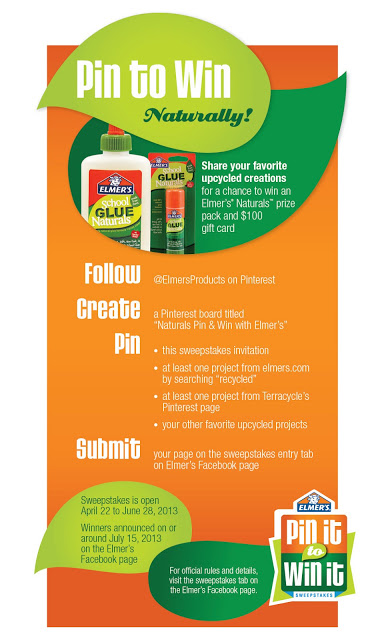
Be sure to enter Elmer's Pin-to-Win Sweepstakes, where you can win an Elmer's Naturals prize pack and $100 gift card.
Details are on the Elmer's Facebook page under the Pin to Win tab.

February 21, 2024

Wee Felt Worlds: Sweet Little Scenes to Needlefelt

I can't resist books on fiber arts.  Whether it's knitting, sewing, embroidery or felting, I love working with all kinds of fibers and fabric materials.

When these kind of books relate to kids, that's a bonus for me.  Not only can I enjoy the process of making something, but it can amuse my kids of those of friends, either in its final result or in the creation of the object.

Wee Felt Worlds: Sweet Little Scenes to Needle Felt by Amanda Carestio is a new, adorable book from Lark Crafts that focuses on needle felting.  And the projects included in the book are so stinkin' cute!
Using dyed, combed wool, you too can create these magical little scenes.  I have a stash of carded wool in my art supplies, so I'm quite eager to create some of these little creatures and settings for myself (forget the kids, I want these.  And without grubby fingerprints on them).

How sweet is this little woodland scene?  Felt and wool seems so fitting for the natural setting.
Any of these felted scenes would be a magical gift that encourages imaginative play in a child.

The Circus Maximus scene is also very cool.  I like the look of the characters (designing figures always stumps me, 3-dimensionally) and I like that the instructions are easy to follow for making one's own.
Prior to reading this book, my understanding of needle felting was cursory, at best, but having read through Wee Felt Worlds, I have a better handle on how to create items out of wool (appendages had always puzzled me).

While the book may intimidating for some in terms of securing the materials needed (really though, so much can be found online now), once you have the wool and a few tools, you're set.  The step-by-step techniques will hold your hand through the whole process.  Kudos to the author for explaining it so well, and also adding helpful illustrations throughout. 

With over 50 projects to make, there's something for everyone's taste in Wee Felt Worlds.  And for around $8, it's a beautifully illustrated, informative book on a craft that you might want learn more about.  You can purchase it via Barnes and Noble.

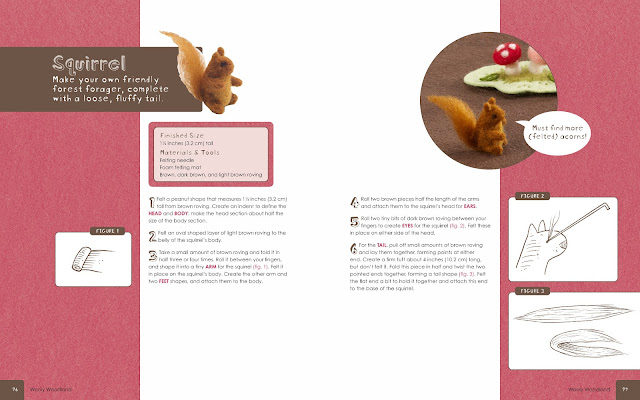
Why not try this sample project, for a Squirrel, as seen below (just click on the photo, then right click to enlarge).  Enjoy!

Disclosure: I received a sample copy of Wee Felt Worlds for review purposes. 
Related Posts with Thumbnails