


Another last minute Father's Day post here. I was scrambling for cards for the dads in my life, and I hate buying them, usually because I'm not into the cheesy sentiments or the price tag ($4.75 for the ones I like! Yikes!).
So I made a simple card for one of the dads who likes to grill, with a pocket for a gift card inside.
You just need a few things, like:
*Decorative or construction paper
*Ribbon
*Stiff paper (an empty cereal box works fine)
*scissors
*pen/pencil
*glue stick or other adhesive
*envelope (optional)
*aluminum foil
I began by cutting a piece of decorative paper and a piece of the stiffer cardstock paper into the same size as the envelope I had on hand. Then I folded the decorative paper in half, and drew a slight diagonal line from top to bottom, to form the triangular sides of the apron.
Folding it in half ensures that both sides will be equal when opened up. I then traced the apron shape onto the cardstock, and cut it out.
The cardstock will be the sturdier background for the card and will prevent the gift card from slipping out.
Next, you'll need to cut a slit for the gift card. Fold the decorative paper in half again, and cut a slit half as wide as the gift card.
You'll be opening it up so the whole card will fit in the pocket.Then you'll start gluing the card together. Put glue in the areas of the cardstock that are marked in the photo below.
Leave the section in the center where the gift card will slide in free from adhesive, otherwise the gift card will stick. Also add some glue on top of and under the ribbons, which serve as the apron ties.
When your decorative paper is secured on top, you can add some grill tools. I used aluminum foil for the spatula and fork, and a piece of raffia for the marinade brush. An unraveled piece of twine would work well too. I cut some scraps of red paper for the handles. Just glue them down, and you have a pretty cool card.
I might write something pseudo-clever like "Light it Up" or "Smokin'". I need some suggestions!
Martha has some other clever handmade Father's Day cards, including this Folded Shirt card
Enjoy your Father's Day with all of those wonderful dads in your life!
Showing posts with label Kitchen Table Crafts. Show all posts
Showing posts with label Kitchen Table Crafts. Show all posts
June 20, 2023
May 28, 2023
Kitchen Table Crafts: Summer Boredom Bag
 One of the fun things about being an art eduction student was scrounging around for interesting and free things to use for art making. Sometimes I'd find things online, like worksheets and origami patterns, and in dumpsters--I kid you not! I actually have taken art supplies like wood, and once, an unused 18'x24" drawing pad, from a trash bin. It helps living in a college town filled with art students who have no respect for the environment.
All these goodies need a home, and frankly, I'd be embarrassed if you saw my attic. There are so many items up there, branded with the "possible art project" tag. Mr. Geek doesn't go up there much, since he prefers being in a happy mood. By the way, does anyone need a box of cast-off spools of embroidery thread from a defunct t-shirt embroidery company?
Or better yet, an idea for how to use them?
As usual, I'm off topic. What I want to share are some ideas for making a boredom bag or box for your kids to use this summer. It's essentially a go-to resource for worksheets and self-guided arts/crafts projects. It can save your sanity!
I created one back in college to be used as an art teacher resource to have on hand for those kids who always finish their projects early and are looking for something to do. I took a scrapbook paper organizer bag
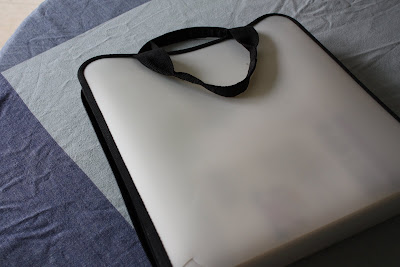 and devoted each pocket to some sort of art theme, like puppetmaking, animation, drawing, etc.
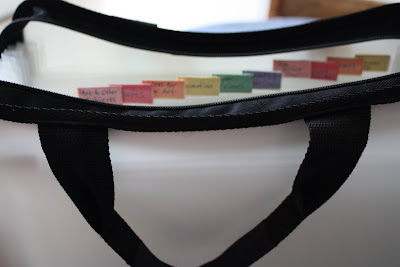 Then I stocked this baby full of coloring pages and worksheets. This would be a great item to tote along to places like the doctor's office (am I being naive here?), long car trips and soccer games to occupy sideline siblings. I keep some scissors, tape, a glue stick, and markers/crayons in the boredom bag, along with other items, as detailed below:
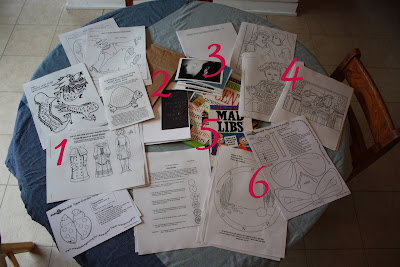 1. Paper dolls, puppets, cut outs.
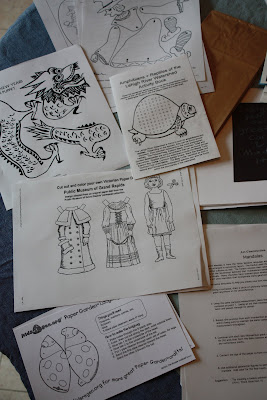 Many of the items in this area were taken from museums and nature preserves, which often have free worksheets for kids. I save them and include them in the bag, since you'd rather visit the exhibits at those places instead of sitting around coloring.
2. Paper bags, for impromptu puppet-making, blank cardstock for impromptu card-making.
3. Postcards which I save from mailings or collect when out and about and you stumble upon a place with free ones. They're great for cutting up for collage or playing sorting games (people, places, things).
4. Coloring pages of famous paintings
5. Mad Libs books! So fun!
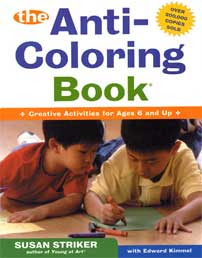
6. More art worksheets found online. Education.com and The Incredible Art Department have some good ones. I also have a few of the Anti-Coloring books, which I love.
 They have a partial drawing that your kids can complete. The porthole sheet in the photo below is from one of those books. You fill it in by drawing the fish that might be in there.
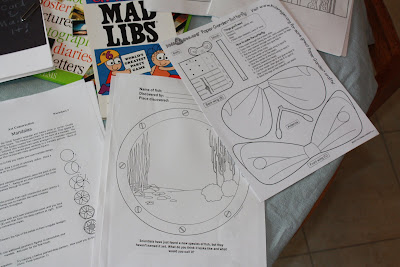 I also love this sheet below, where you can design a floor plan for a house.
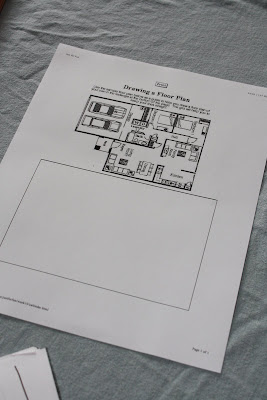 I was, and still am, dorky about these things. I love designing rooms, both on paper and in real life. You can also have some big sheets of paper to have kids draw treasure maps or fantasy maps. And of course, a stack of origami paper fits wonderfully into the bag.
There are so many more things to add to a boredom bag or box. Dollar Store Crafts has an cute and cheap idea for a Boredom Buster Art Box one that you can set up for summer. Create and enjoy!
March 20, 2023
Kitchen Table Crafts: Birthday Banner Tutorial
 Kitchen Table Crafts is back, baby! This tutorial is for a festive banner, perfect for birthday and other special occasions. This one is for my son's first birthday next week, but you can really make these for any occasion.
Today I'm sharing with you a tutorial on making one of those cute banners that you see frequently on Etsy and other blogs. This was really easy to make, albeit a little time consuming with all the cutting, pasting and tying. I like that it can be saved and reused every year, so it was worth all of the trouble.
 Materials:
~Scrapbook papers in coordinating colors (at least half as many sheets as you have letters)
~Cardstock or stiff paper
~Scissors
~Glue stick or adhesive tape (acid free is best if you want to keep this for a few years)
~A few rolls of ribbon
~Hole Punch
~Pencil
~Computer/printer
Process:
1. If you're looking for some great, FREE fonts, go to the Scraptivity website (a great online scrapbooking resource) and go to the section for Fonts and find a font that you like. I used "Circus" but unfortunately, that one is not on that site. You can get it HERE, which isn't where I got it, but it should work just fine.
2. Download your font, and save it to your desktop.
3. Move the file (.ttf) into the font folder of your control panel. This will ensure that the font appears in Word.
4. Open Microsoft Word, type the phrase (in capital letters if using Circus, since lowercase ones don't show up) that you want to put on your banner, such as "Happy Birthday", "Happy First Day of School", "Happy Halloween", etc. Then select it and change the size until the letters are big enough for you.
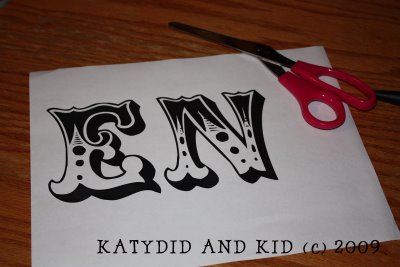 I was able to fit 2 letters per page on the "landscape" setting (horizontal paper). I believe my font size was 350.
5. Cut out your letters and set aside.
6. Now you'll be cutting the background circles from your scrapbook papers. You should be able to get 2 circles per sheet, plus 4 triangles from the leftover corners that can be used to make a little banner.
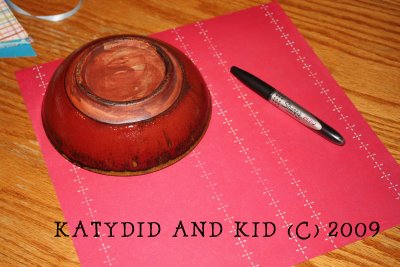 I used a bowl to trace the circles on the paper, then cut them out, saving the scraps for later.
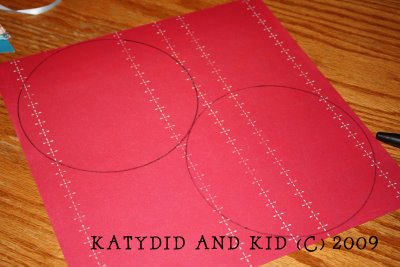
7. Glue your letter to the circle, using a glue stick or adhesive strips. Elmer's glue is too wet and will create bubbles in the paper.
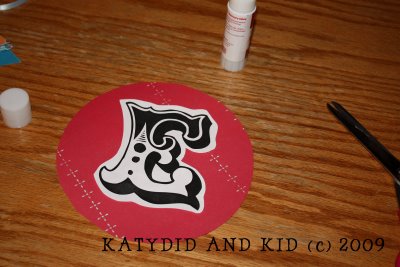 I also cut out some extra circles to serve as "spacers" between the letters, so it wouldn't read "happybirthday".
8. Since scrapbooking paper is so thin, I wanted to stiffen it up so it wouldn't sag when I hung the banner. I had some cardstock (you can get it at an office supply store--it's just a little stiffer than copy paper), that I decided to paste onto the back. I took another high tech circle maker, in this case the lid to a jar
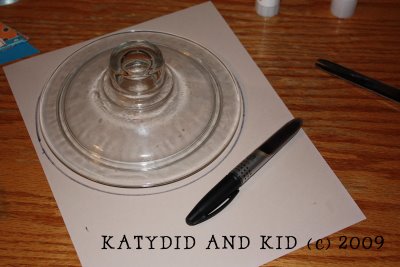 and traced another, slightly larger circle. You can make it the same size as the decorative circle, but I wanted a bit of a border around my circles. Just cut it out, then glue it to the backs of the scrapbook paper circles.
9. Once you've assembled all of your circles, it's time to punch holes in the sides to tie them together. I started with one and eyeballed the center of the circle, making sure the letter was lined up how I wanted. After I made the first one, I used it as a template to punch the holes in the other circles.
10. On to the ribbon! A high chair tray serves as a wonderful ribbon corral, that is, when a certain little boy is not sitting in it.
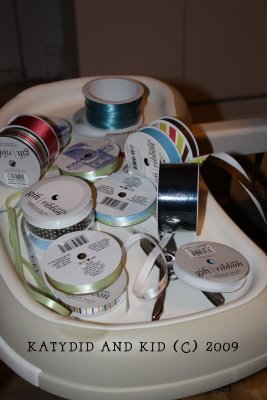 It's easier to cut all your ribbon at once, rather than doing it as you go along. But do you think I did that? Of course not!
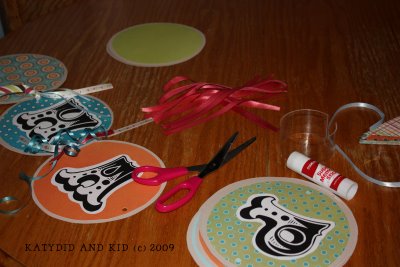 I used 3 pieces of different colored ribbon per loop. I like how that it looks more festive and fuller that way. The pieces were roughly 8 inches, and some of them I trimmed shorter after they were tied. Be careful not to knot them too tightly or you might rip the paper.
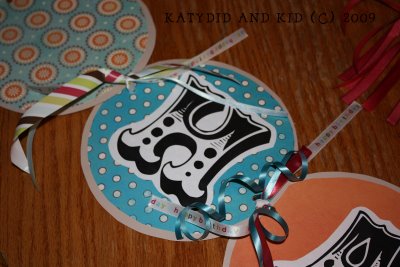 I found some really sweet coordinating ribbons, including one that said Happy Birthday. They were only $1 at AC Moore. Once you've tied them all together, you're done! Just add some ties on the ends to hang it up.
11. Before I show you the final result, I want to jump back to those leftover scraps. As I mentioned, you can get at least 4 triangles out of them to make some mini banners.
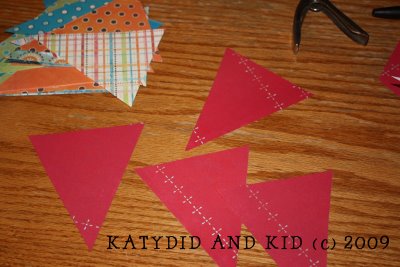 Just punch two holes on the top, and thread a ribbon through. They would be great party accents, and would carry the color theme throughout your home.
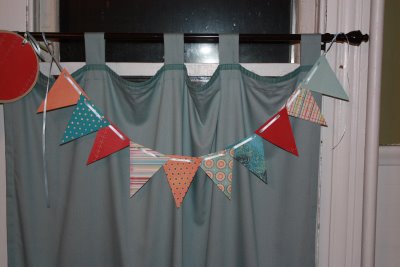
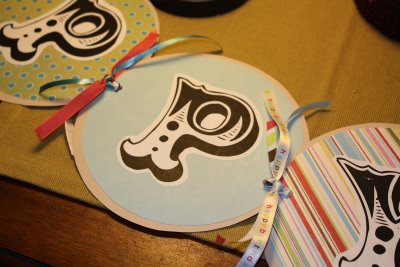
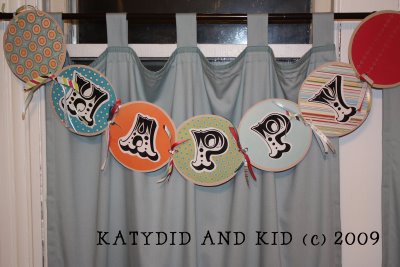
Here it is! I decided to break up the words into a few separate banners, rather than just having one really long banner. You can do whatever you'd like.
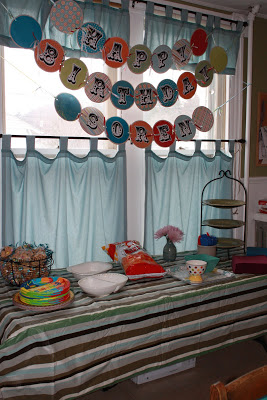 Update: the completed banner hanging at the party.
Enjoy! And Happy First Day of Spring! You need a banner for that now, don't you?

November 13, 2023
Tea Party Craft: Felting--Part Deux
 The moment all 5 of you have been waiting for! Tutorial Part Two: Dry or Needle Felting! I'm going to embellish the piece of felt I made yesterday in my sink. To refresh your memory, click HERE.
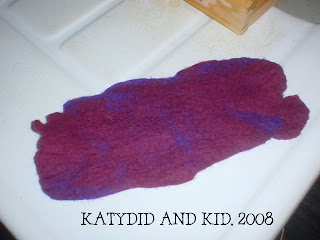
When you last tuned in, your hero (uh--me!) left you with something that looked like this:
 Now I'm going to explain as best I can in words and images, the craft of needle felting.
First you need a felting needle.
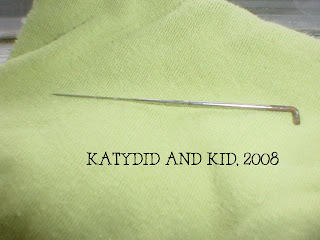 What it is essentially is a pointy needle with tiny barbs on the end of it, poking out of the sides. You can buy them at AC Moore craft store in the knitting section, or here. They're fairly inexpensive, but you will need a few. Some have coarser barbs and others have smaller, closer together ones that are used for more detailed, tinier sections.
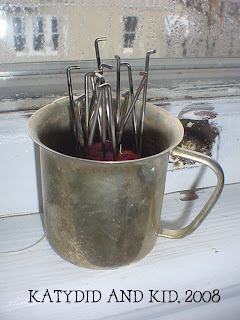
Here's my stash, stuck in a ball of felt inside an old silver punch cup.
 Once you have a needle, you really should have a chunk of upholstery foam to lay the felt on while you're poking the needle into it.
I just hold the felt in my hands, but you're likely to poke yourself, which I often do. I just forget to pick one up when I'm at the fabric store.
Here's that felt again. I started molding it into the shape I wanted while it was damp.
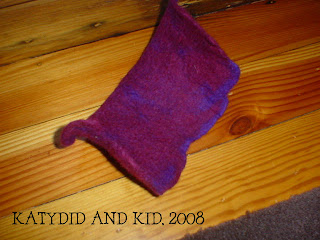 When it dried in the morning, it kept its shape. One might call this "blocking" which is what knitters do to shape their knits. See my Entrelac Headband post.
To begin, you need some wool, roughly twice the size of the design you want to add to your piece of felt.
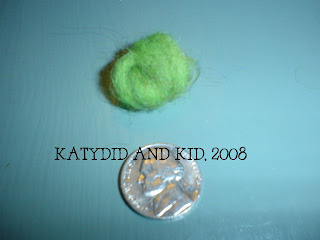
I want to make polka dots on the larger piece of felt, each about the size of a pea, so I took a chunk the size you see above.
Next, I twist it up and wrap it around itself into a circle for the polka dot.
Then lay it on the felt where I want it to go. With my coarser felting needle, I start punching into the wool, connecting it to the larger piece of felt behind it.
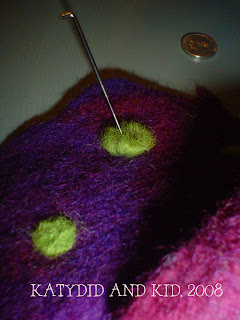
 What's happening is that the barbs are connecting the fibers, bit by bit. You bring the needle in and out, pulling the fibers together. It's as if the fibers are being sewn together with the felting needle. When factories are making commercial-grade wool felt, they use large machines with hundreds of these type of needles to adhere the wool together.
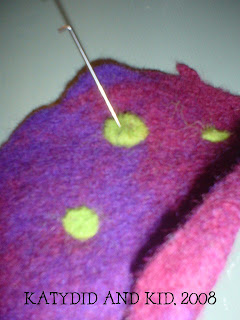
Here's the felt with green dots. Each one took about 2-3 minutes.
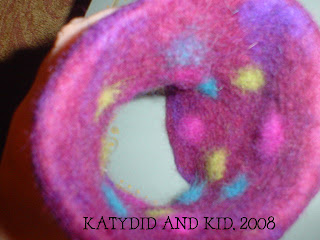
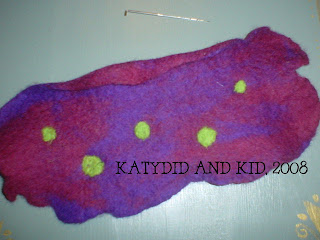 I added more dots in blue and magenta, and then turned the felt back into that circular shape and needle-felted it together, forming a tube. The final result: a coffee or tea cozy for hot paper cups.
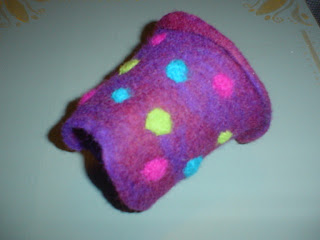 I'd like to add some embroidery when I get a chance. Sorry I didn't have a paper cup on hand to model this. I thought about cutting the edges down, but I like the raw, organic line that it creates. I did roll the top down a bit, since I just liked how it looked.
This is what the inside looks like. You can see the colored wool fibers poking though to the inside.
 As you can imagine, the possibilities are endless. I've seen needle felted dolls, animals, ornaments, and embellishments of all time. Just do a search for it and you'll find tons of examples.
Hope this post made sense, and that maybe you'll try needle felting sometime!
Subscribe to:
Posts (Atom)

