March 18, 2023

The Great Kombucha Experiment

It's time for a new science experiment in the house.  I've done the no-shampoo thing (still doing it with good results), attempted sauerkraut last week, and now I'm trying to make another weird fermented food--kombucha.
If you've never had it, it's essentially like a naturally-carbonated, fruity/vinegary fermented tea soda.  It's really hard to describe, but I like it.  It's a great source of probiotics, among other healthy things, but it's such a unique and enjoyable drink (and expensive when purchased in health food stores) that I wanted to learn to make my own.

In its gestating form, it's kind of disgusting, as you can see in the photo above (you don't actually drink the slimy stuff; the liquid is strained).  You need a SCOBY (Symbiotic Culture of Bacteria and Yeast) mother, which you can buy from here or get from someone you know who makes their own kombucha (mine is from a teacher at my yoga studio).  Here's what I got:
It's like raw chicken meets placenta.
The SCOBY was packed with some of the starter liquid from its original kombucha batch, and the watery blob smelled a lot like vinegar.  It really didn't bother me too much, looking at it, oddly enough.

I followed the recipe shared by the yoga teacher, which she got from Kombucha Kamp (she got her SCOBY from there).  I found a similar recipe and instructions from this website (it's a less-spammy looking one).

Here's what I used:
SCOBY :: Wide mouth Gallon jar :: 5 organic green tea bags :: 1 cup organic sugar :: tightly woven cloth and rubber band to cover the top of the jar

The process of making the tea was easy.  I boiled 4 cups of filtered water, then steeped my tea bags in it for 10 minutes.
Then I removed the tea bags and stirred in 1 cup of organic sugar until it dissolved.
In went 8 cups (64 oz.) of filtered water to the tea, which brought down the water temp so I didn't kill the SCOBY.
Next, I poured in all the contents of the bag, including the liquid.
Yes, that looks disgusting, like a fetal pig floating in formaldehyde.  Did I burn your eyeballs?  If not, here are some more shots
It apparently doesn't matter where the SCOBY floats, bottom or top. 
I gave it a stir, then capped it with the woven fabric and tightened it with a rubber band.
 
Then I stuck it in my pantry where it's dark.  That spot still gets some airflow due to opening and closing the door throughout the day.
I'm hoping that when I taste it in a week (yes, I'm going to taste it!) it will be sweet and bubbly.  The next step is to strain it, add fruit juice and bottle it.  I'll post about that part of the experiment then.

What do you think? Does this give you the heeby-jeebys?  Have you ever tasted kombucha?  Would you?

March 13, 2024

Sandpaper Printed Shamrock T-Shirt

Hey all! Today I'm over at my friend Sheena's blog Sophistishe sharing an easy sandpaper printing craft for St. Patrick's Day.
Hope you enjoy it and make it with your kids (or for yourself!).

March 3, 2024

Wise Craft {Giveaway}

In an act of serendipity, I was contacted to review a new book from a blog that I had only just stumbled upon the day before.  Have you ever visited Blair Stocker's blog, wise craft?  It's a remarkable site, filled with crafts, quilts, upcycling and repurposing, and general inspiration for creative types (or would-be creative types).  Actually, it's very much what I'd like to see my blog turn into, someday, when little hands and bodies aren't always in my face.  But I digress...

Blair Stocker's new book, out this month from Running Press, is called Wise Craft: Turning Thrift Store Finds, Fabric Scraps, and Natural Objects into Stuff You Love, and it's full of inspiring projects to transform things you already have into beautiful and useful craft objects.
Arranged by season, the projects incorporate a variety of materials from paper, fabric, leather and found objects.  There are so many clever projects in this book, from Zombie Barbies (!!!)
to cross stitched pegboard Christmas trees
and even a reimagination of an old standby like a crocheted placemat.
This book is filled with so many creative and more importantly, DO-able projects.  Flipping through the book, I was already noting which projects I had the materials for in my stash, like these book pot holders/trivets.
At $20, this is a reasonably-priced paperback craft book, especially with 60 projects included.  For me, I love that the ideas in this book are a jumping point for coming up with ways to upcycle items from around my home or that I see in a thrift store. 

Wise Craft is And thanks to the author for including this cute little bunting made from fabrics used throughout the book.  It brightens up my living room!
This book trailer does a better job than me at showing you what's inside the book

(I'm so jealous of her studio space! )

You can learn more about Wise Craft via Blair's blog or by looking through the book on Amazon.com.
WIN IT!
One lucky reader will win a copy of Wise Craft.  Leave a comment on this post telling me something you've made this winter.  Get another entry by sharing the giveaway on Twitter and leave a separate comment. Contest ends March 12, 11:59pm EST. I'll contact the winner by email.  Good luck!
Disclosure: I received a copy of this book for review purposes. All opinions are my own.

February 7, 2024

Winter Boredom Buster: Unfinished Basement Playroom

Chris and I have spent some time, effort and a bit of money transforming our mostly unused basement into a functional and fun area for the boys to burn off some energy this winter.  I neglected to take "before" photos because 1.) the space was a bit frightening and 2.) I had my doubts whether we'd be able to transform it into something photographable anyway.
But we did our best, starting with relocating two large wheeled shelving units to the other end of the basement.  We focused on moving all of the tools to one end, where our furnace is, so that the largest area of the basement could be utilized.  It's an odd layout, with our furnace placed in the middle of the floor, rather than against a wall, so it was challenging to work around. 

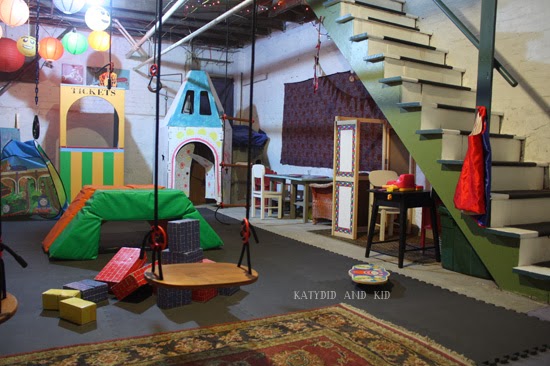
And while these photos may not look like much, to us, this space is a great addition to our little old house. It's fostered a lot of physical and imaginative play in our kids, as well as their friends.
The concrete floor got some puzzle mats, the kind used in gyms.  That was probably the most expensive part of the makeover, but we're confident that they'll be used in some manner beyond the childhood years, especially that we went with a neutral color.
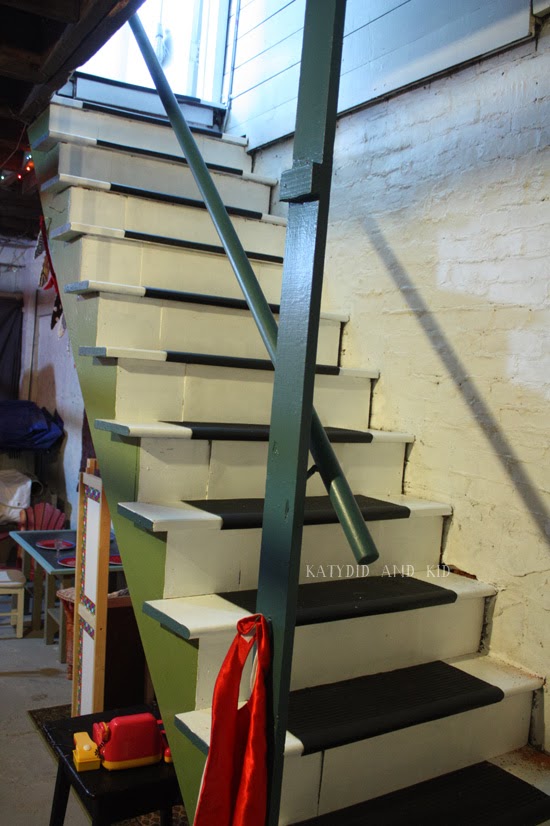
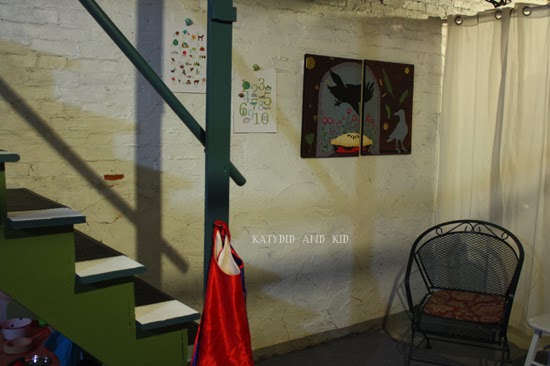
The steps got a fresh coat of paint. I really regret not taking a before shot of these hideous things; they were brown, dirty, with missing tread mats.
They are SO much more inviting now, painted white with teal and green accents.  And the new tread mats are so much nicer, and safer.  We still need to add a second handrail below the one that's already there, just for peace of mind that no kids will fall or purposefully jump under the railing.

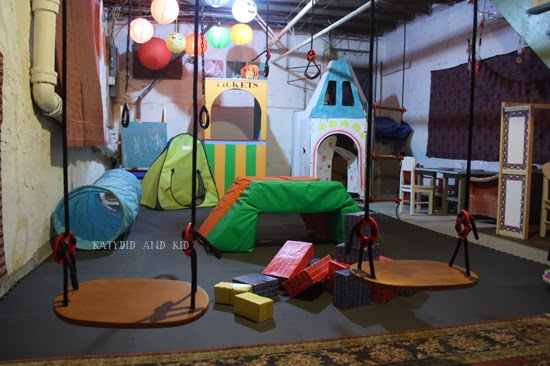
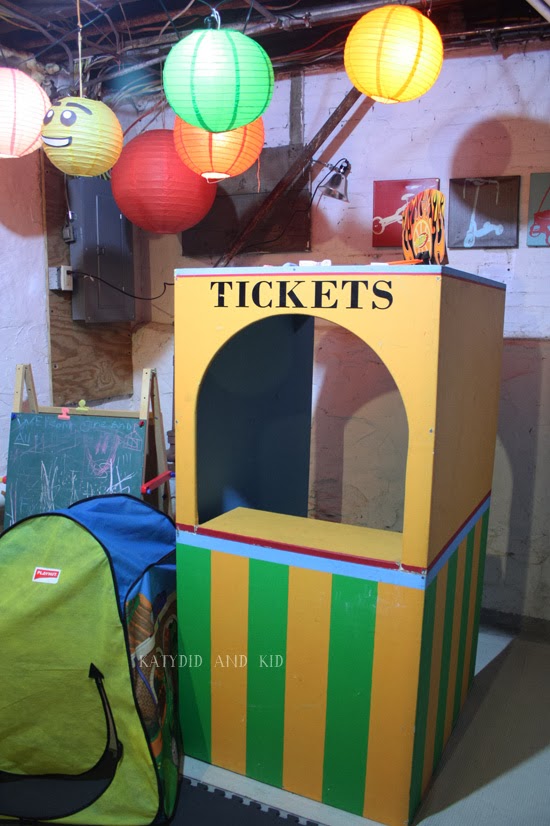
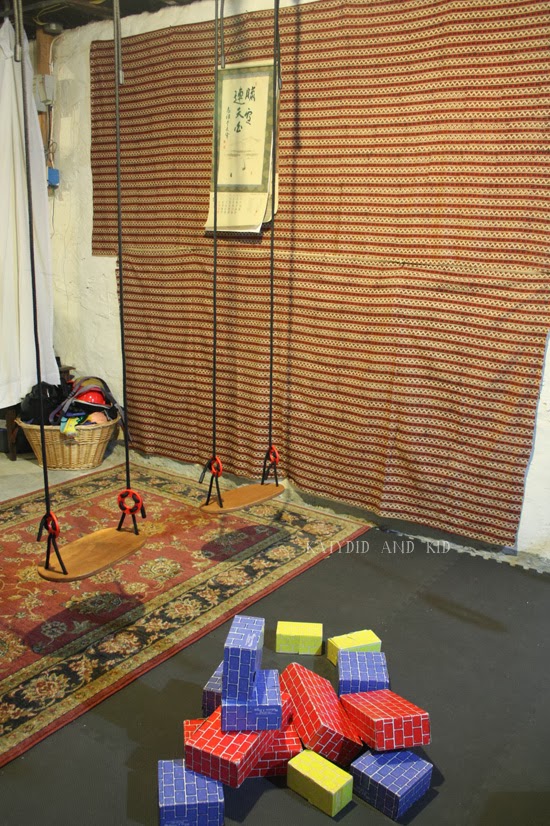
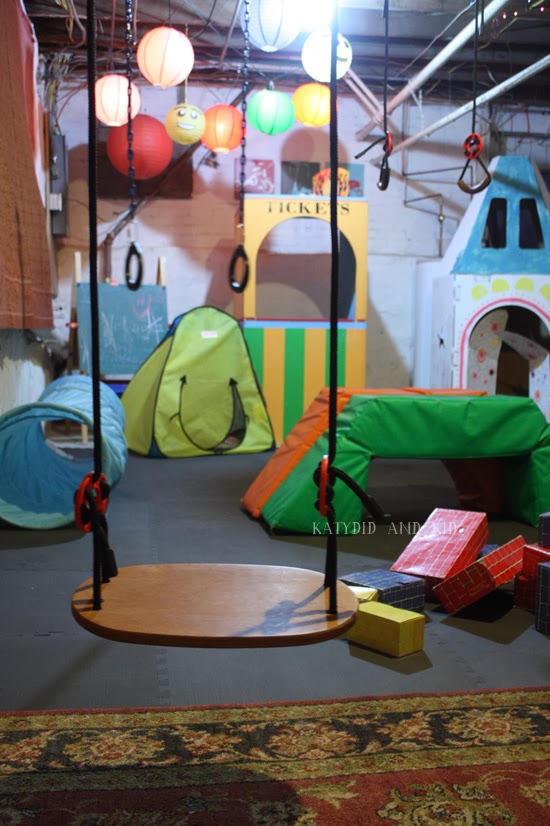
Most of the items in the play space were things I had in storage; the swings (from IKEA) were birthday gifts from a few years back that never were installed, the cardboard rocket was stored in the attic (with an occasional appearance in our small living room) the ticket booth, and the ticket booth was a cast-off from the days when I worked at an art museum.  It had been stored in our garage since I was pregnant with Soren, but finally got screwed back together to be played with.
The paper lantern lights were also in storage; I had saved them from my wedding and use them at birthday parties and other festivities. 

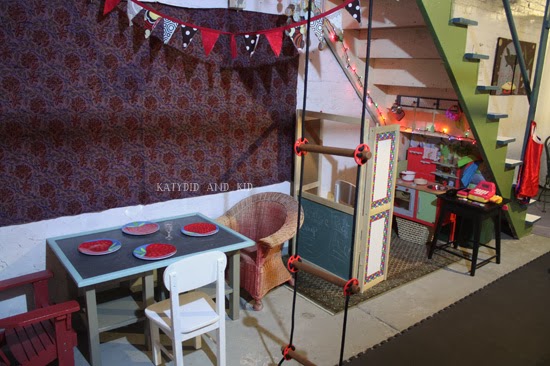
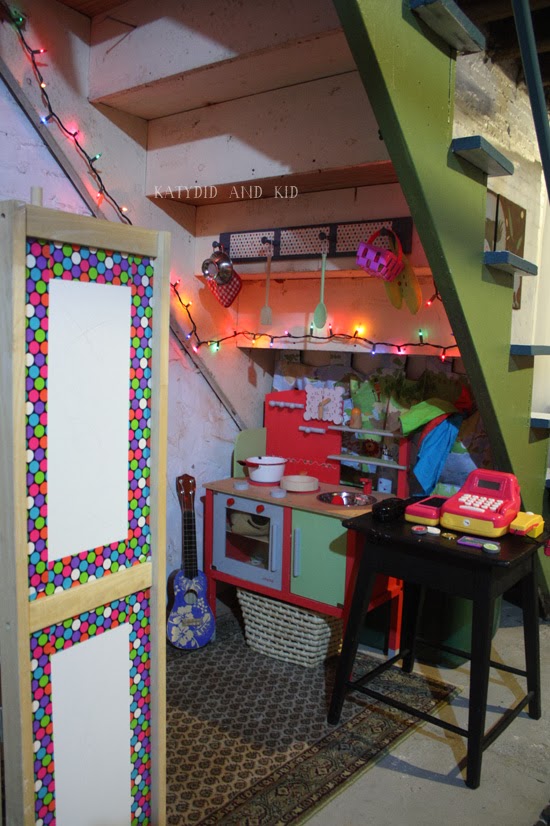
Under the steps, I set up a pretend area with the play kitchen, puppet theater, cash register and a table and chairs.
Christmas lights brighten up the space a little, but we could use some more substantial lighting under there.
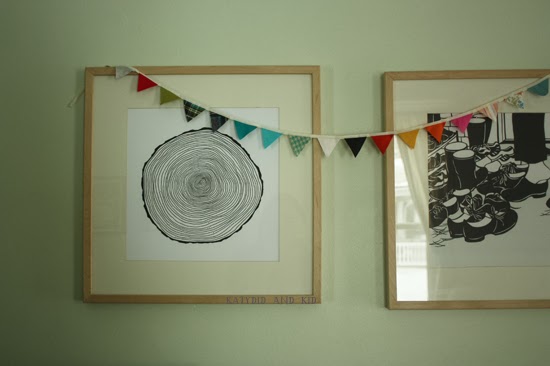
It's hard to believe, but many of these items were either found in the trash, thrifted, or hand made by me.  The wall hangings were things I acquired throughout my 20s (hippie chick, that was me) so it's nice seeing these funky things displayed again.
We brought in two lawn chairs that spend their summers outside; they make great seating for adults.  I've been known to knit and drink coffee while the boys play.
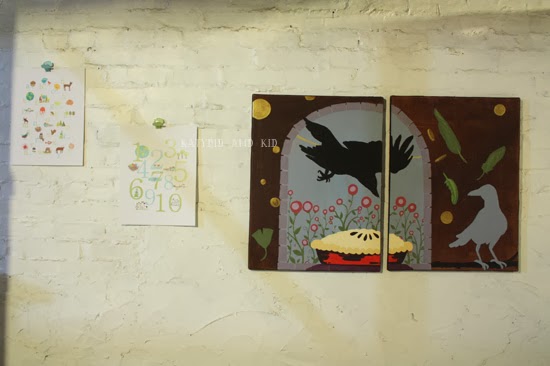
I added one of my old paintings too, which was just in storage in our attic.  Can you guess which nursery rhyme I was referencing?
This space will certainly evolve as the seasons change, and as the boys grow.  But for now, it is being enjoyed just as it is.  It's a great way to burn off energy after dinner and before bed, especially that the icy, snowy conditions outside have kept us indoors more than we'd like to be this year.
I encourage you to look again at any unused areas of your home; you just might find a playful refuge hiding within it!

February 6, 2024

Never Been Stitched {Giveaway}

This time of year, housebound with kids underfoot, I often look for a project that is quick and satisfying.  Sometimes that involves a sewing machine, but often it does not, since even sitting down at mine, uninterrupted takes effort.

Thankfully, Never Been Stitched by Amanda Carestio showed up at my door.  This book, filled with 45 no or low-sew projects is a great way to chip away at the winter doldrums.
There are instructions for home decor items like pillows, pictures and as well as clothing and accessories, like socks and scarves.  One of the simplest projects is the Map Bunting, which uses just scissors and glue to cut a map into a festive decoration.

Some of the other projects use items like fusible webbing, grommets, and wood embroidery hoops.  There are a few projects geared toward kids, like the Fleece Octopus and Felt Pencil Roll, which would be great for making with my son on a weekend afternoon.

I like that this book is a collaborative effort which includes projects from bloggers; it's interesting to see different styles and approaches to crafts within the same book.  The best part about Never Been Stitched is that it's a great way to quench my artistic craving when I'm bored and looking for a quick fix.

BONUS: Lark Crafts is generously sharing three downloadable projects for free via their website,
Click on over and get started on one of these creative projects.

WIN IT!
One lucky reader will win a copy of Never Been Stitched
Comment below with your favorite book from Lark Crafts.  Winner will be chosen on February 22nd, and I'll email the winner.  Share the giveaway via Twitter tagging @LarkCrafts for an extra entry, and leave me the link to your tweet.
UPDATE: WINNER is #2, Linda.
Disclosure: I received a copy of this book for review. All opinions are my own.
Related Posts with Thumbnails