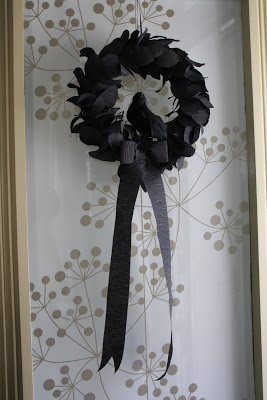
One of my favorite holidays is just around the corner--Halloween! I love everything about it, from the chill in the air, to crackly, curled up leaves on the sidewalks, to costumes and spooky decor. In the spirit of the holiday, I decided to craft a goth-like wreath for the front door, using stuff I found at the local dollar store.
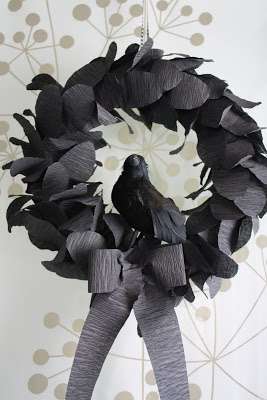
It cost all of 3 bucks to make, but I think the finished result looks quite elegant, almost like a feather boa.
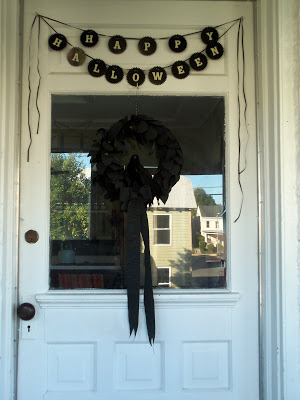 Here's the wreath hung on the back door
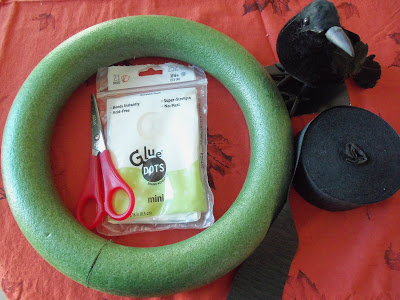
I purchased a foam wreath, a fake raven, and a roll of black crepe paper (it also came with an orange roll, but I need to figure out something to make with that). I also used scissors and
Glue Dots that I had on hand to use for adhesive, but you could certainly use hot glue, a stapler, or other binding agent (within reason).
I'm a big fan of black birds, crows, ravens, etc., so I thought this bird would look spooky perched on the wreath.
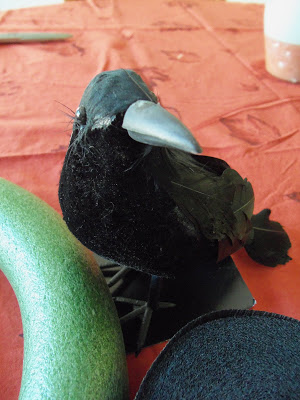
Now I can't get Edgar Allen Poe out of my head: "Quoth the raven, "Nevermore!"" Hence I leave you with the
Nevermore Wreath.
So here's what I did:
STEP ONE
Cut a length of crepe paper, roughly a yard long. Fold it in half and cut it at the end, fold it again and again until you have a bunch of pieces that are 3-4" long (on the left, in photo below). You could cut them individually, but I find that the folding method makes quicker work of it.
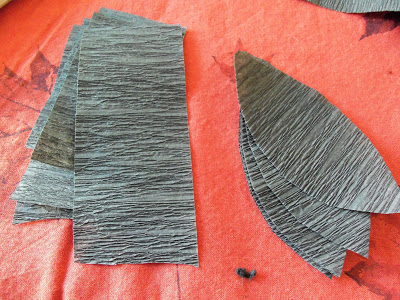
Holding the stack of crepe paper as seen above (on the left), cut out a shape that looks rounded like a feather. Get rid of those points on the end like in my photo!
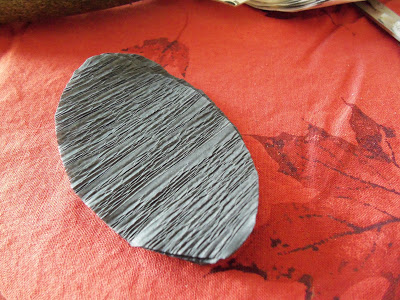
Ah, much better. Also, cut a stack of ones just slightly smaller. The variety helps make it look nicer, in my opinion.
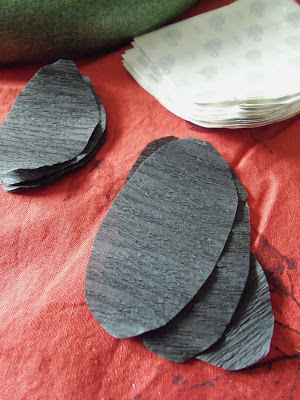
Now you have a stack of "feathers" to start adhering to your wreath form. I made more stacks periodically while creating the wreath.
STEP TWO
Before assembling your wreath, I highly suggest spray painting it black or wrapping crepe paper around it (gluing periodically as you go) to hide the green. An unfortunate result of gravity, the crepe paper feathers will "wilt" after a week or two of hanging up.
Once your wreath is ready to go, Glue your feather shapes onto the wreath. I started in the middle and worked my way to the outside, layering as I went. The Mini Glue Dots were really handy with this project.
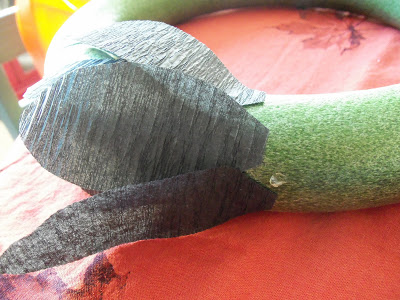
I kept up this pattern of layering all the way around the wreath, making sure to glue the next line of feathers overlapping the previous line by about a half inch.
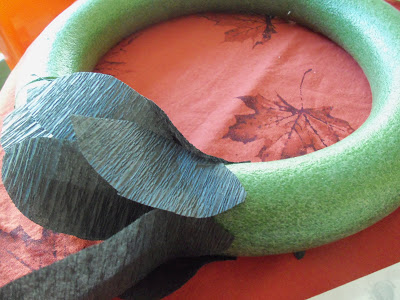
It's slow and steady work, but in all this entire wreath took me about an hour to do.
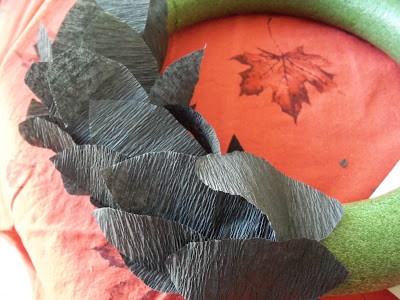 STEP THREE
Once you've made it all the way around, it's time to close the gap.
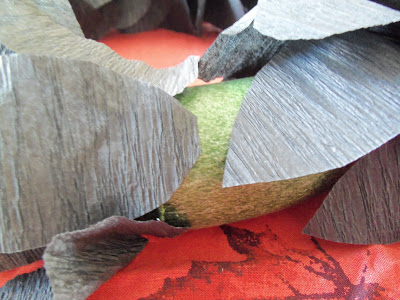
Gently tuck in some more feathers underneath the row you first started with. You might have to hold the wreath vertically and let those first feathers fall open to get the finishing feathers tucked inside (and glued, don't forget that!)
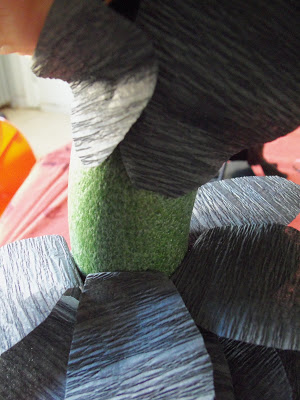
Fill in any other gaps or places you might see the green wreath peeking through.
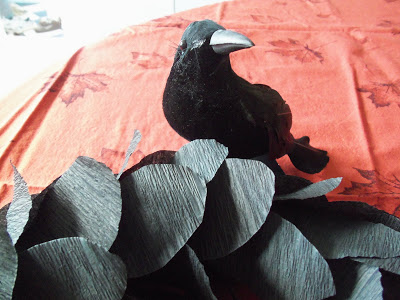 The raven, minding the gaps
STEP FOUR
Ta da! The wreath is done!
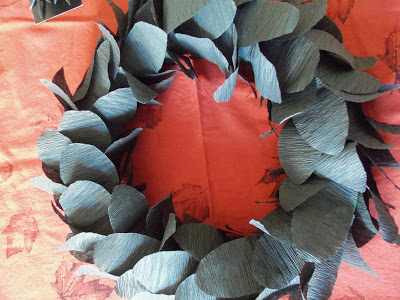
Now time to attach the bird. He has wired feet, so this is an easy task.
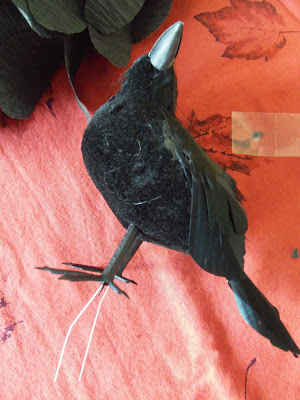
I clipped the wire a bit and just stuck the wire into the wreath where I wanted him.
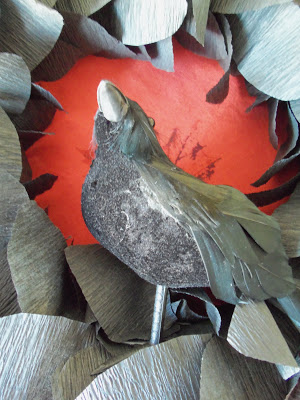 STEP FIVE
Add a ribbon. If I had found a nice, black, satin-y ribbon at the dollar store, I would have bought it. I thought I had some at home, but didn't (too many funeral gift wrapping projects--kidding!), so I just made a crepe paper ribbon.
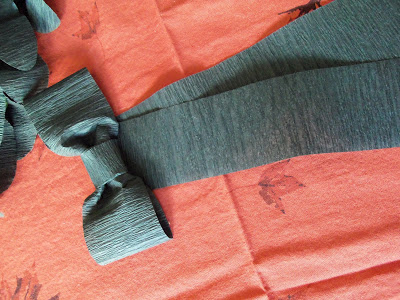
Take a long piece (about a yard) and two shorter pieces (6") of crepe paper.
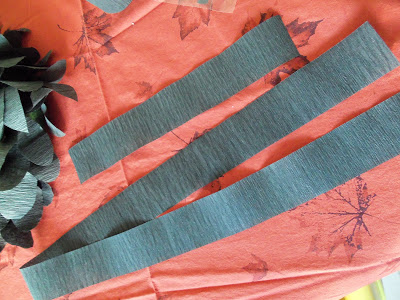
Fold the shorter piece into a loop and secure.
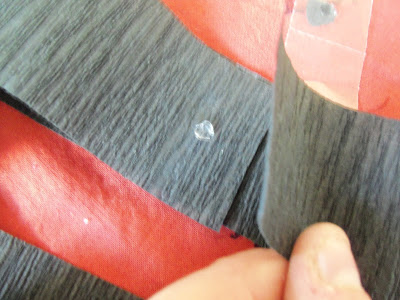
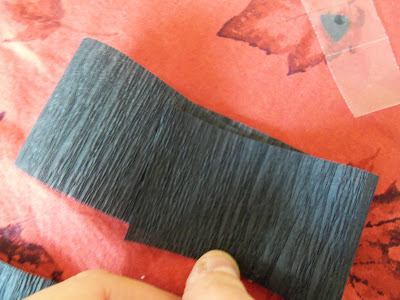
Pinch the "tube" in the middle, creating a bow tie, and secure the other short piece around the middle to hold it. Glue or tape it around the back.
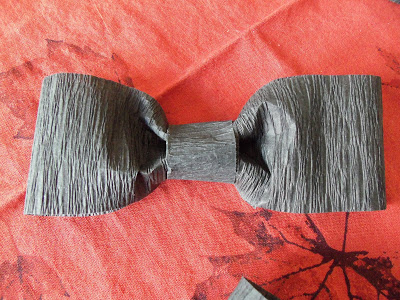
Cut a notch on each end of the longer streamer to make it fancy,
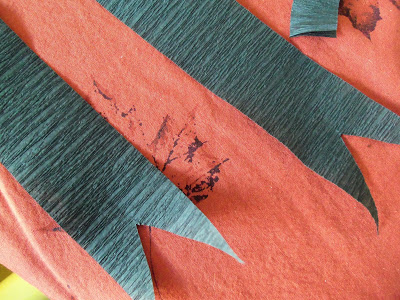
and glue to the back of the bowtie. Pin or glue the entire ribbon onto the foam wreath.
 STEP SIX
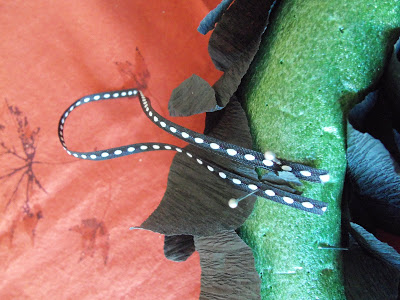
Add a piece of coordinating ribbon or a hanging hook to the back. I simply stuck two pins into the ribbon through the back of the wreath for hanging.
Fluff out your feathers, and display most graciously, I mean, ghoulfully!
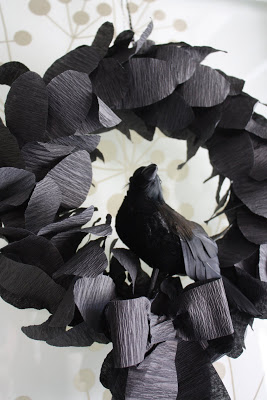
I can't wait to hang it up this Halloween! I have a feeling I might just have to make one for the back door too.



Your craftiness makes me wanna spit.
ReplyDelete*patooey*
Really, though I love this. I saw a bird like your fellow at Michael's a few nights ago and I held him thinking "I totally want this, but where would he perch?" Now I know I can put him in my black feather wreath {post Halloween sale purchase last year or the year before}. Thank you for the inspiration.
I love the way this came out! The bird definitely adds the perfect touch to it! Love the tutorial, I should probably make one for my mom and run it to her house while she is at work. She is absolutely petrified of crows and ravens.
ReplyDeleteLove this affordable Halloween decoration! Really digging the texture of the crepe paper leaves! Excited to be your newest follower and am having tons of fun digging into your older posts!
ReplyDeletebest!
Allison
Way cute Halloween craft idea!!! :)
ReplyDeletewow. i love this. perhaps i'll head to one of our local dollar stores tomorrow!..
ReplyDeleteLove this!!! I have 3 ravens from last year that I bought at Dollar Tree. I was thinking I need to get more and I definitely do. :)
ReplyDeleteVery cute! Crepe paper is so fun!
ReplyDeleteI LOVE THIS!!!! I am so going to do make one. I have 4 ravens I bought last year after Halloween and I can't wait to put them out. One is going to look super fab on my crepe paper wreath! Thanks for the tute!
ReplyDeleteI love your wreath! And so frugal! I have really been wanting a good BLACK wreath. Love yours!
ReplyDeleteKathleen! That is adorable! Well, adorable in a creep kind of way! I love it and I am definately going to make this. I'll be headed to Dollar Tree today to buy what I need. I never would have thought to use crepe paper! I really hope you continue to post some cool Halloween tutorials this Fall because I am all over it! Thanks for this post! I can't wait to make it!
ReplyDeleteI love how you used crepe paper. Smart thinking!
ReplyDeleteWhat a great idea!
ReplyDeleteSpooky and cute! Just $3.00 is amazing! I wonder what you'll do with the orange crepe paper.
ReplyDeleteoooooo
ReplyDeletewhat FUN and so perfect for all hallows eve- thanks for the tut!
What's creepier for Halloween than CROWS?! This turned out great. Thanks for sharing.
ReplyDeleteWarmly, Michelle
Wow, what a creative project. I love the layered leaves and monochrome scheme. Thanks so much for linking up!
ReplyDeleteGosh woman! You are so talented!
ReplyDeletePlease tell me you own a store!?
Love this idea! The bird is the perfect finishing touch! Thanks for sharing!
ReplyDeleteWhat a great idea!
ReplyDeleteseriously cutest thing i have ever seen.. i decorate with crows every year and have several of them -- no wreaths this is the cutest ... when I make i will link to your blog.. you are really good.. love your blog.. love your talent.. love it all!
ReplyDeleteWhat a creative idea! I love it! Saw you on Tatertots and Jello. Super idea and I love your blog. Stop by if you get the chance:
ReplyDeletewww.karismaheartsavannah.blogspot.com
This is perfect, I simply love it, and you can always make it cheery and springy by having a cute bird , and different colored paper. Brilliant. Would you be a sweetheart, and link up ** 6 weeks 2 Spook** my NEW party. Of course you can always link up anything else to my reg party, but this is perfect for my Halloween one. I would REALLY LOVE to have you :) Bella
ReplyDeleteKathleen MANY MANY thanks for being the first one to link up to my new party. I really appreciate it, and look FORWARD to many more of your creative posts. Thanks again, Bella :)
ReplyDelete**6 weeks 2 Spook** party
This turned out awesome! Love it! I'm your newest follower. :)
ReplyDeletePlease come link my Friday party sometime.
I love your wreath and I am not typically a wreath person.
ReplyDeleteI decorate with a black raven too. Instead of naming him Nevermore or Poe my husband named his Po'Boy after the sandwich.
Ooh I love it! The all-black is really stunning. I just clicked over from Tatertots and Jello and I'm so glad I did. I would love to link to this if you didn't mind.
ReplyDeleteI love wreaths, and I love this one! I want to make it right now!!!!!
ReplyDeletefantastic DIY! i love it. so cheap and cool!
ReplyDeleteTotally going to make one. Love this!
ReplyDeleteThis is the COOLEST Halloween type wreath-It's just so fun and REALLY easy to do (or so you make it seem LOL).
ReplyDeleteLove it. I am posting a collection of my favorite Halloween wreaths, I would love to link to this.
ReplyDeleteVery cool!
ReplyDeleteJust love your Goth Halloween Wreath. In fact, I love it so much that I will be featuring it on my post to go up early this month on MommyBlogExpert's Best Crafts for Halloween for Kids. You are truly creative. I also LOVE GlueDots having used them before with my own children.
ReplyDeleteVery cool project!
ReplyDeleteI ran to the dollar store today and purchased all the goodies to make one!! Now I must start cutting. :)
ReplyDeleteThank you for submitting this project to Dollar Store Crafts! I love it! I am featuring it in a roundup of Halloween wreath ideas - look for it to be posted sometime in the next week or two! :)
ReplyDeletethis is so great! I linked to it on my blog.
ReplyDeletehttp://lorajeansmagazine.blogspot.com/2010/10/free-halloween-challenge-fave-tutorials.html
I made one!!!! All my neighbors love it! You can check it out on my blog:
ReplyDeletehttp://myheelsarehigherthanyours.blogspot.com/2010/10/halloween-wreath-nevermore.html
And of course I totally gave you a link credit.
So cute, I featured this today! Loving the all blackness!
ReplyDeleteFeatured it:
ReplyDeletehttp://makinglemonadeblog.blogspot.com/2010/10/halloween-spooktacular-week-one.html
You are fabulous!
This is just too cute. And soooo cheap, you're my kind of gal! Thanks so much for sharing!
ReplyDeleteAwesome project. I have that same background fabric making a wall display in my family room. Ikea, right? :)
ReplyDeleteThought you might appreciate that I made one of these wreaths and have hung it on the door in the shop at the Edgar Allan Poe Museum in Richmond, VA.
ReplyDeleteIt turned out beautifully - thanks for the idea!
All the best,
Melanie A.
http://www.poemuseum.org
I love, love, love, this wreath! I'm into everything crow this Halloween so I'll definitely be pinning this bad boy :D
ReplyDeleteThanks for sharing!
Thanks for posting this idea! I'm going to make one.
ReplyDeleteStopping by to pin this wreath. Very cute.
ReplyDelete~Bliss~
I just happen to have some black crepe on hand, and I also love Ravens, so you've now given me a great weekend project! Love your blog!
ReplyDeleteGreat wreath! Definitely visiting my local Dollar Tree as soon as possible
ReplyDeleteThis is great! So making one this Halloween but I'll probably leave it up after Halloween is over LOL!
ReplyDeleteThis is great! So making one this Halloween but I'll probably leave it up after Halloween is over LOL!
ReplyDeleteKaty,
ReplyDeleteI don't think you are the owner of this Etsy shop -- but they have taken your project and your photos and are now saying they are making and selling this product. Here's the link: https://www.etsy.com/listing/165040909/spooky-raven-wreath?ref=pr_shop
She did the same thing with my Candy Corn Mason Jars -- which I actually do sell on Etsy. Thought I'd let you know. I suggest you report her to Etsy.
Thanks,
Linda
Thank you so much for alerting me to this. I'm looking into it.
Delete