Showing posts with label Arts and Crafts. Show all posts

October 14, 2023

Make a Personalized Trick or Treat Bucket

It's no secret that I'm a big fan of Halloween.  I love to cover my house in pumpkins, skulls and all other things spooky.  The fall tends to reignite my desire to craft, so naturally I make a few new things for Halloween each year.

This weekend I decorated buckets for my sons for Halloween.  Over the years, we've most used bags, but I love the look and durability of a bucket.
When Jam Paper contacted me recently about partnering with them on a fall-themed craft, I knew just what I wanted to make.  Fortunately, they sell reasonably priced and beautiful colored buckets (along with a huge variety of paper supplies, of course) which are perfect not just for trick or treating, but for so many other things.
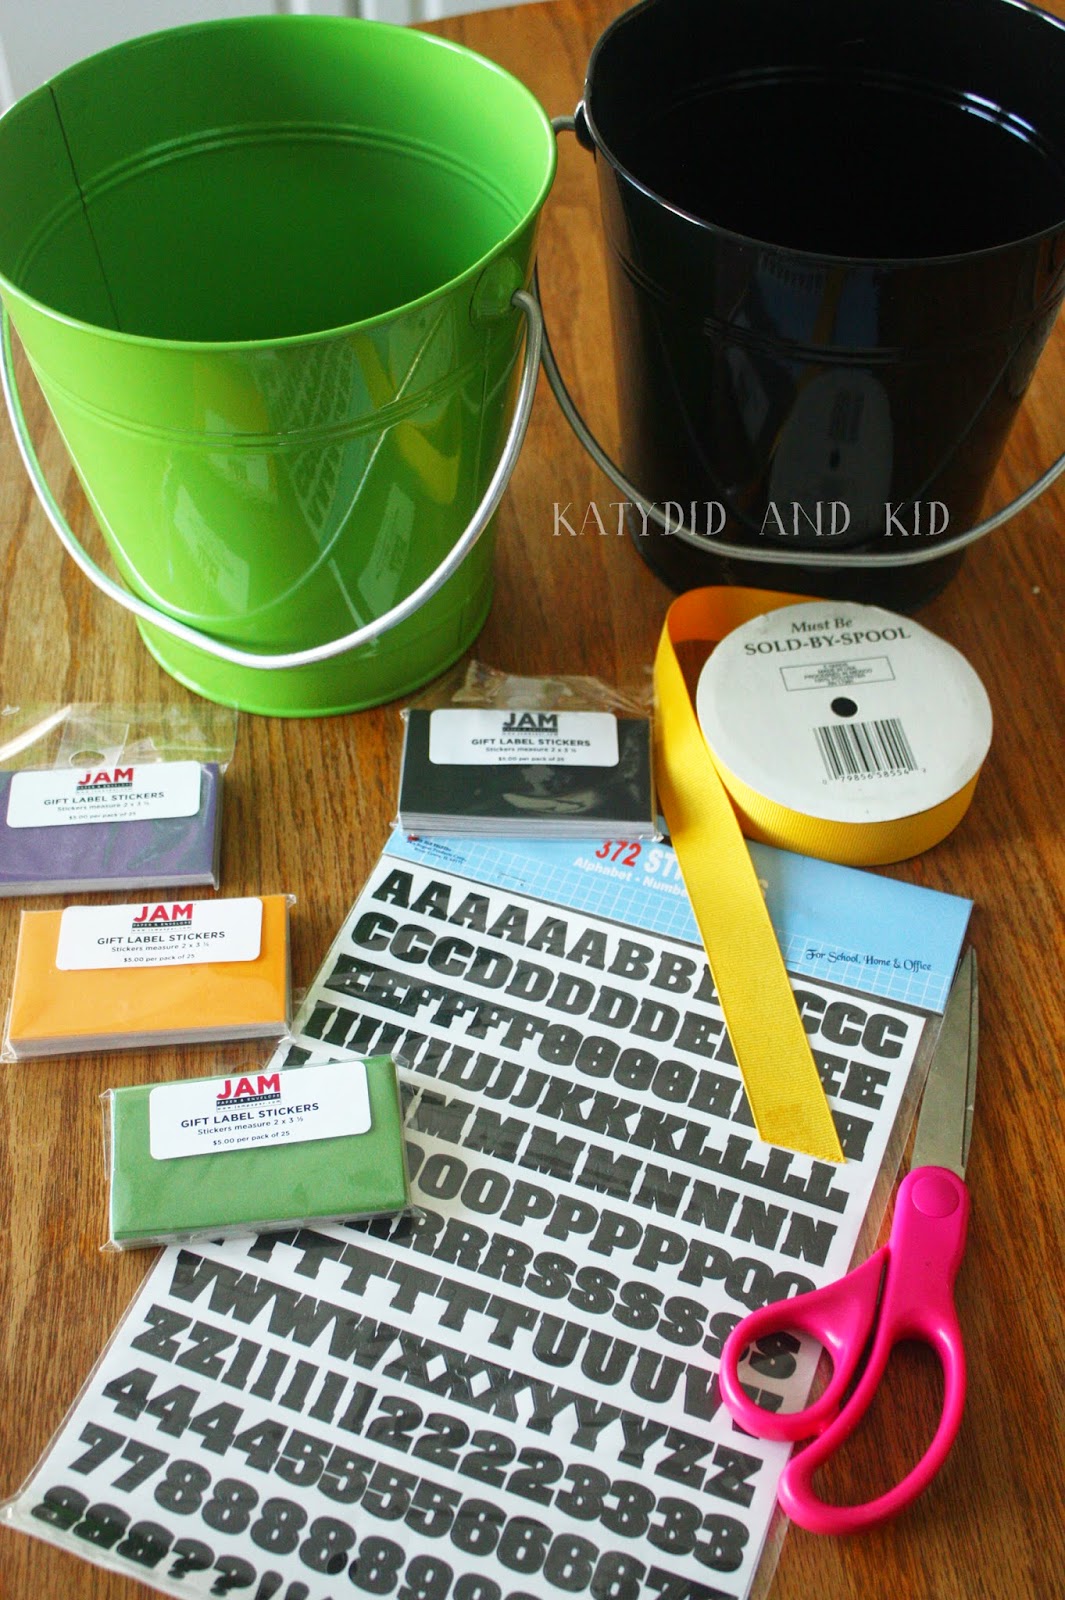
I started with two of their 
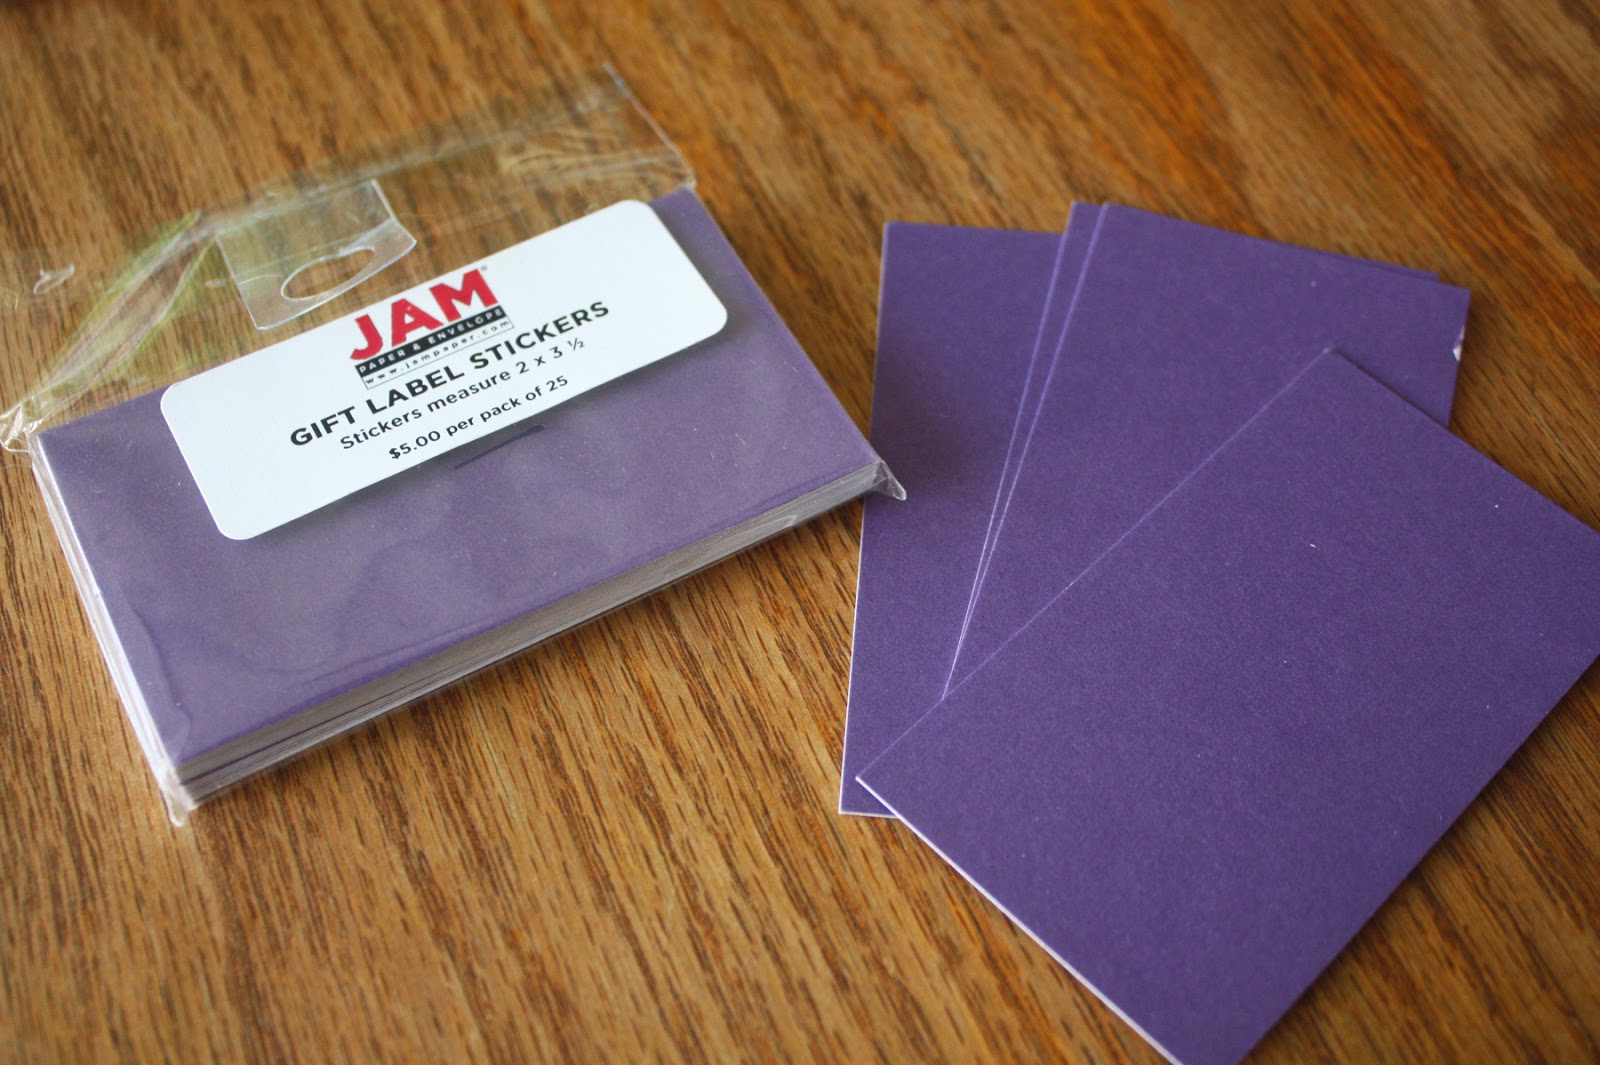
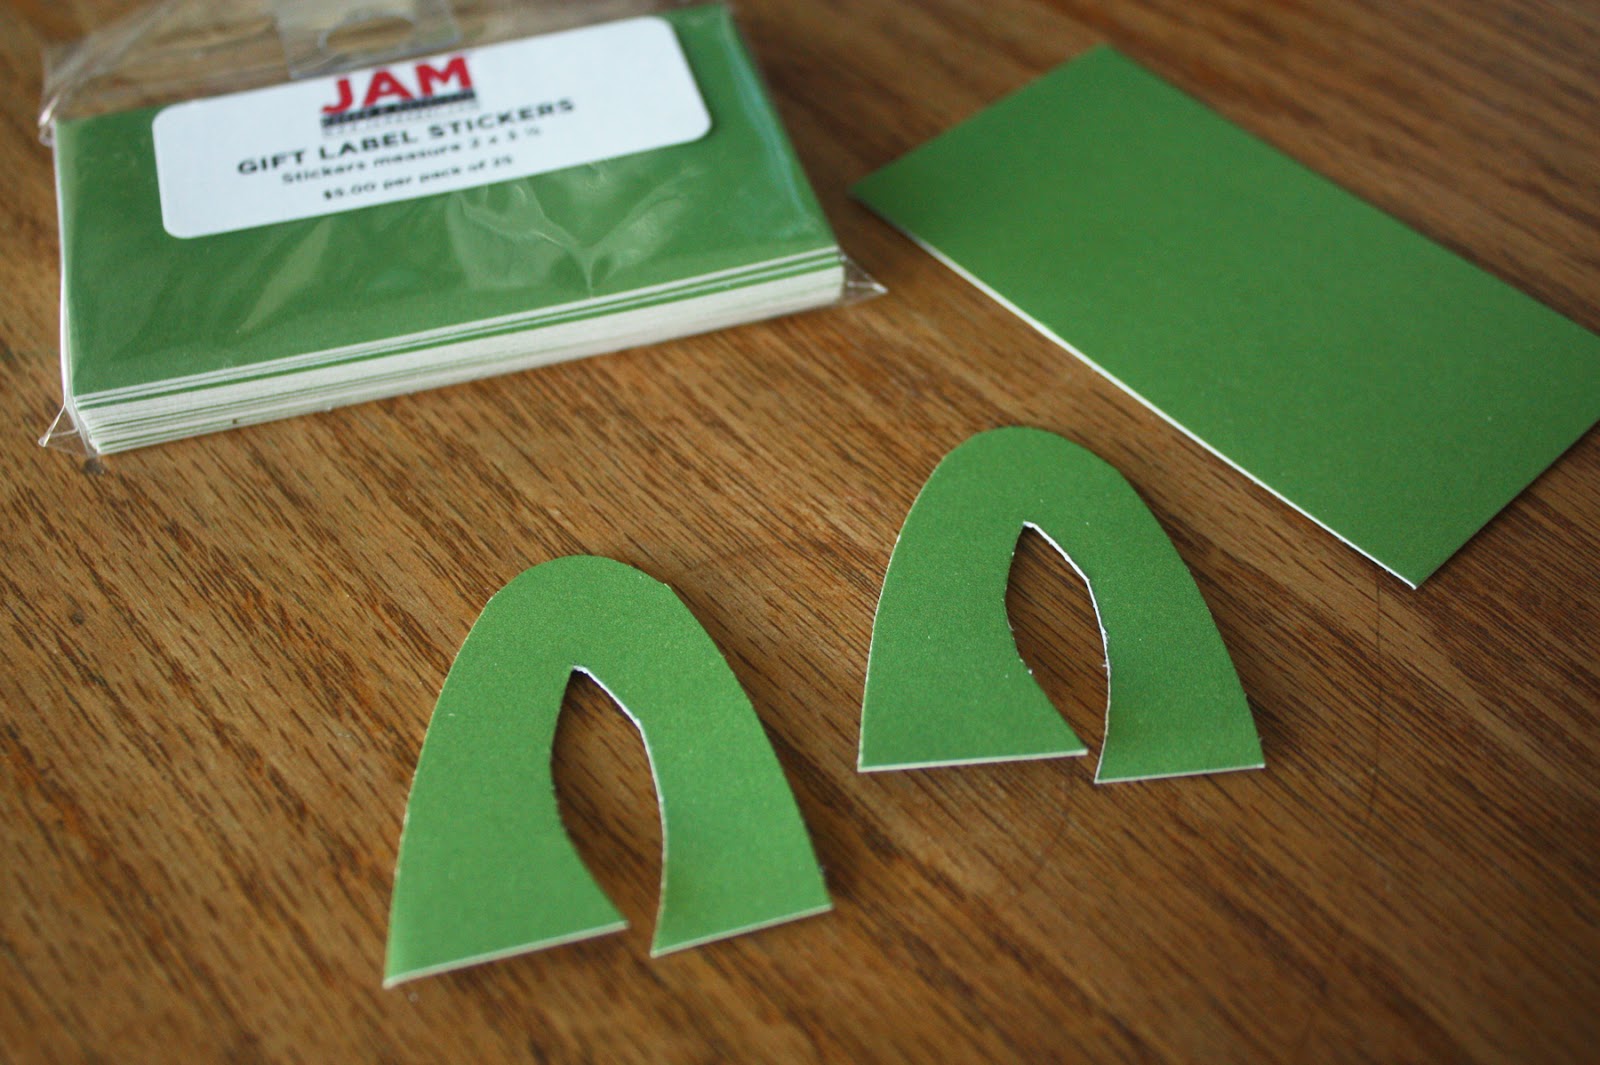
large colored buckets, one green, one black, as well as a few packages of colored gift label stickers.  I also chose a sheet of letter stickers to personalize the buckets with my sons' names.
I needed a pair of scissors and some yellow grosgrain ribbon for extra decoration too.

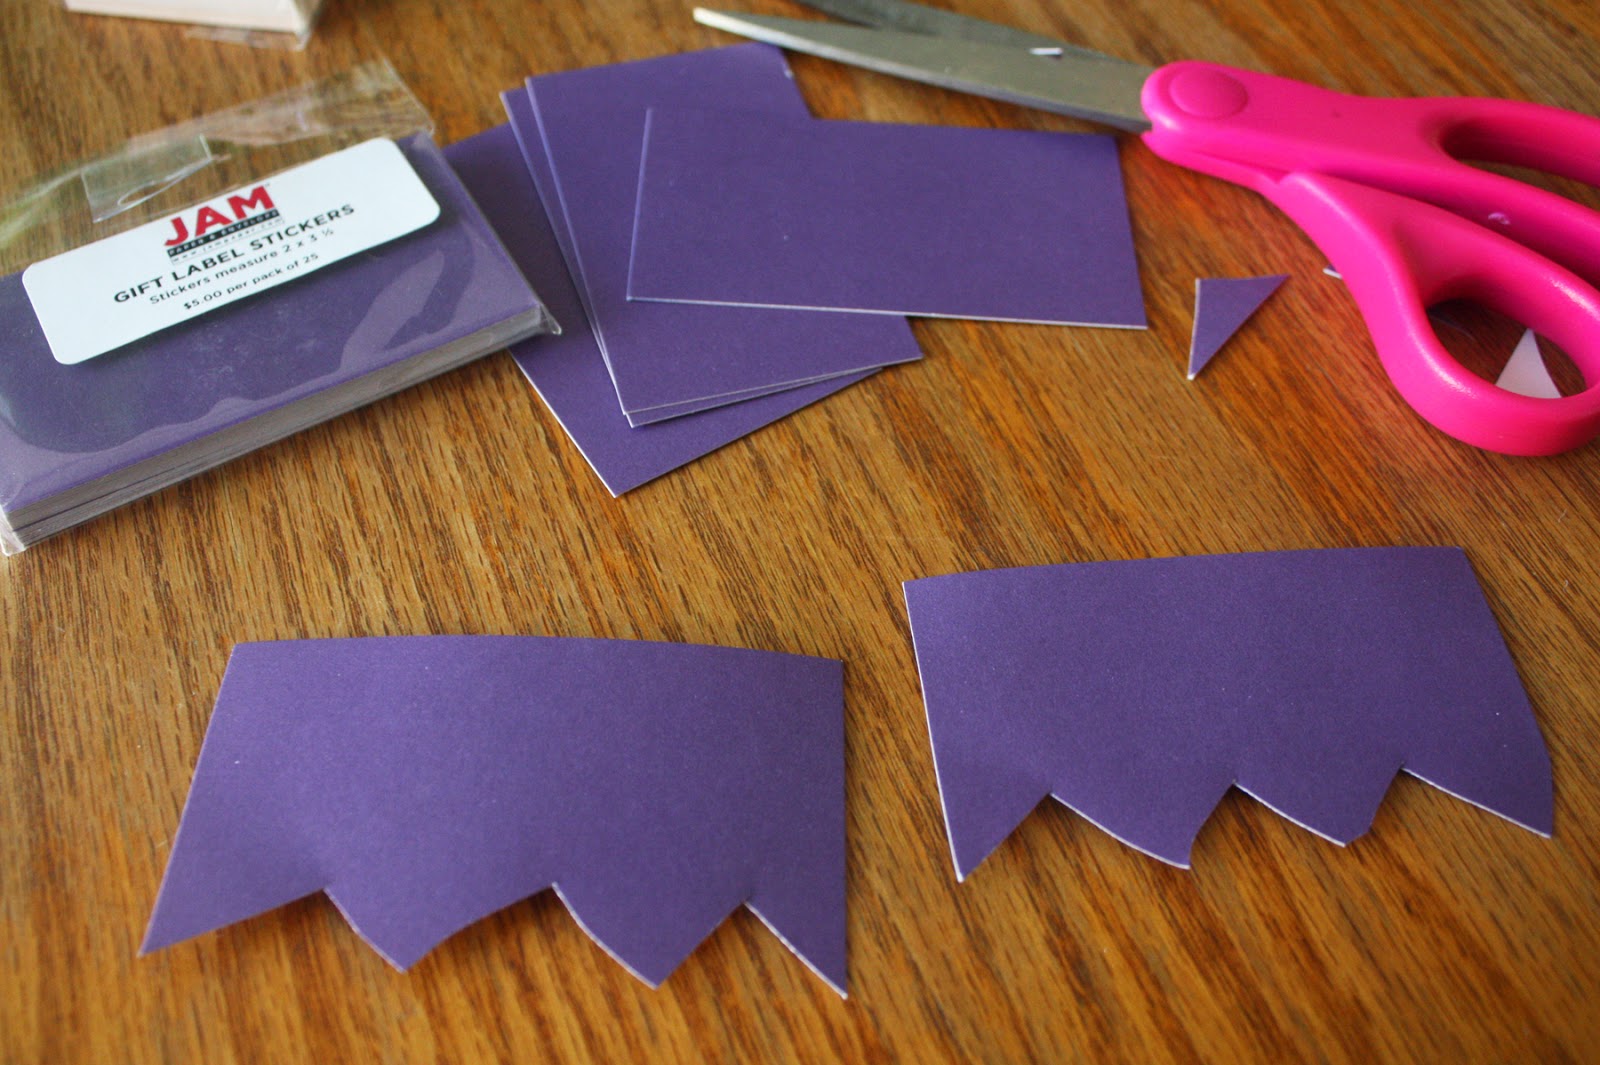
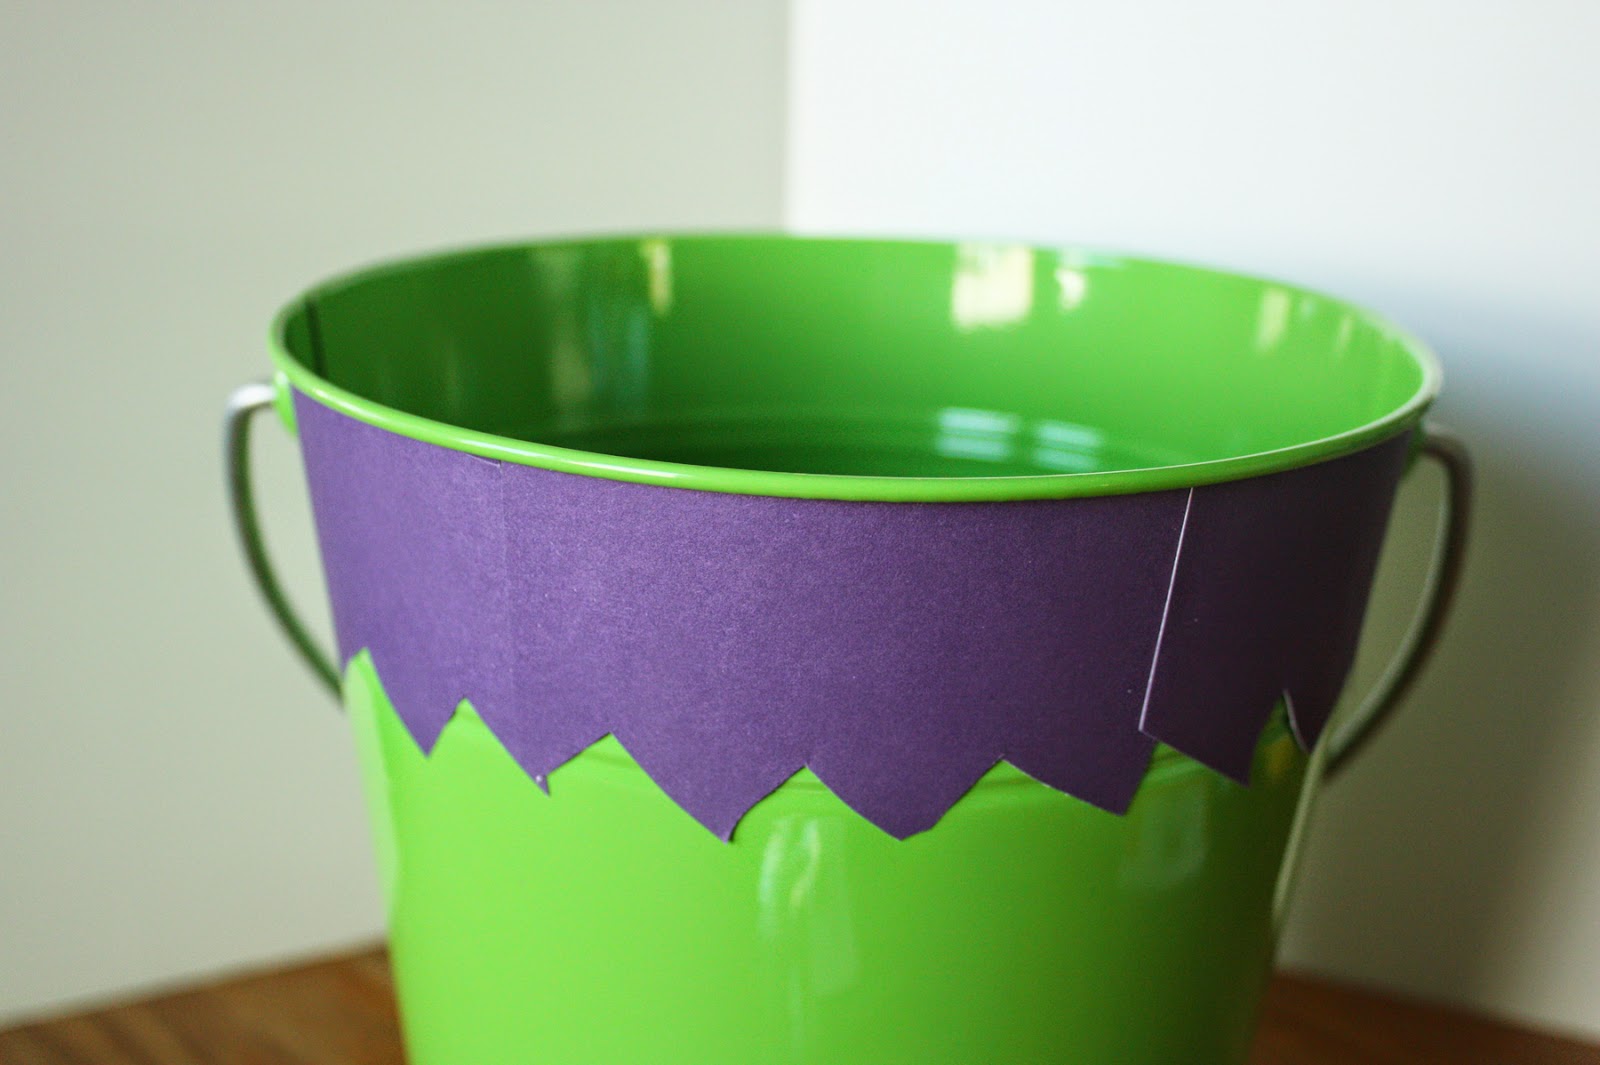
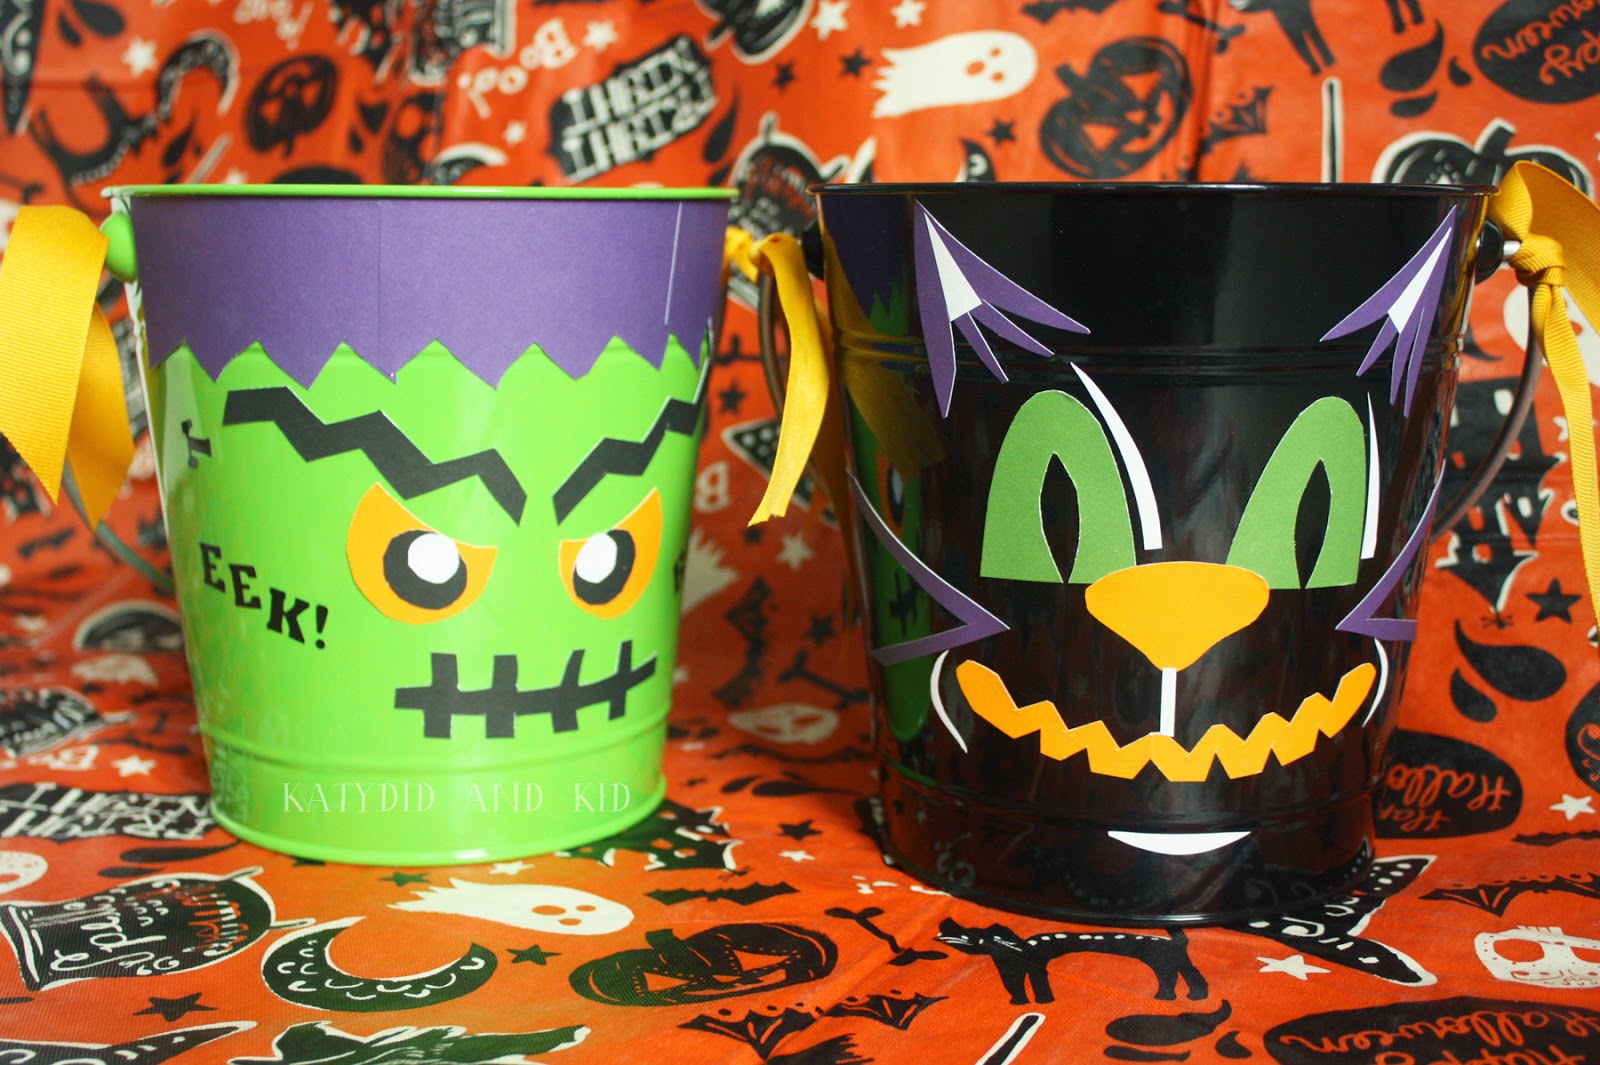
This was an easy craft to make, especially that you're essentially just creating a collage with the colored stickers.  I started on the Frankenstein bucket and made some jagged purple hair for my monster using the purple Jam Gift Label Stickers.
I determined that I'd need 4 to go across the front of the bucket horizontally, and then I make a jagged "hair line" along the bottom edge of the stickers.
It was as simple as peeling off the back of the sticker and lining the stickers up along the bucket rim to create Frank's hair.
You actually don't notice the seam in person; it's just noticeable here due to where the light was hitting it.

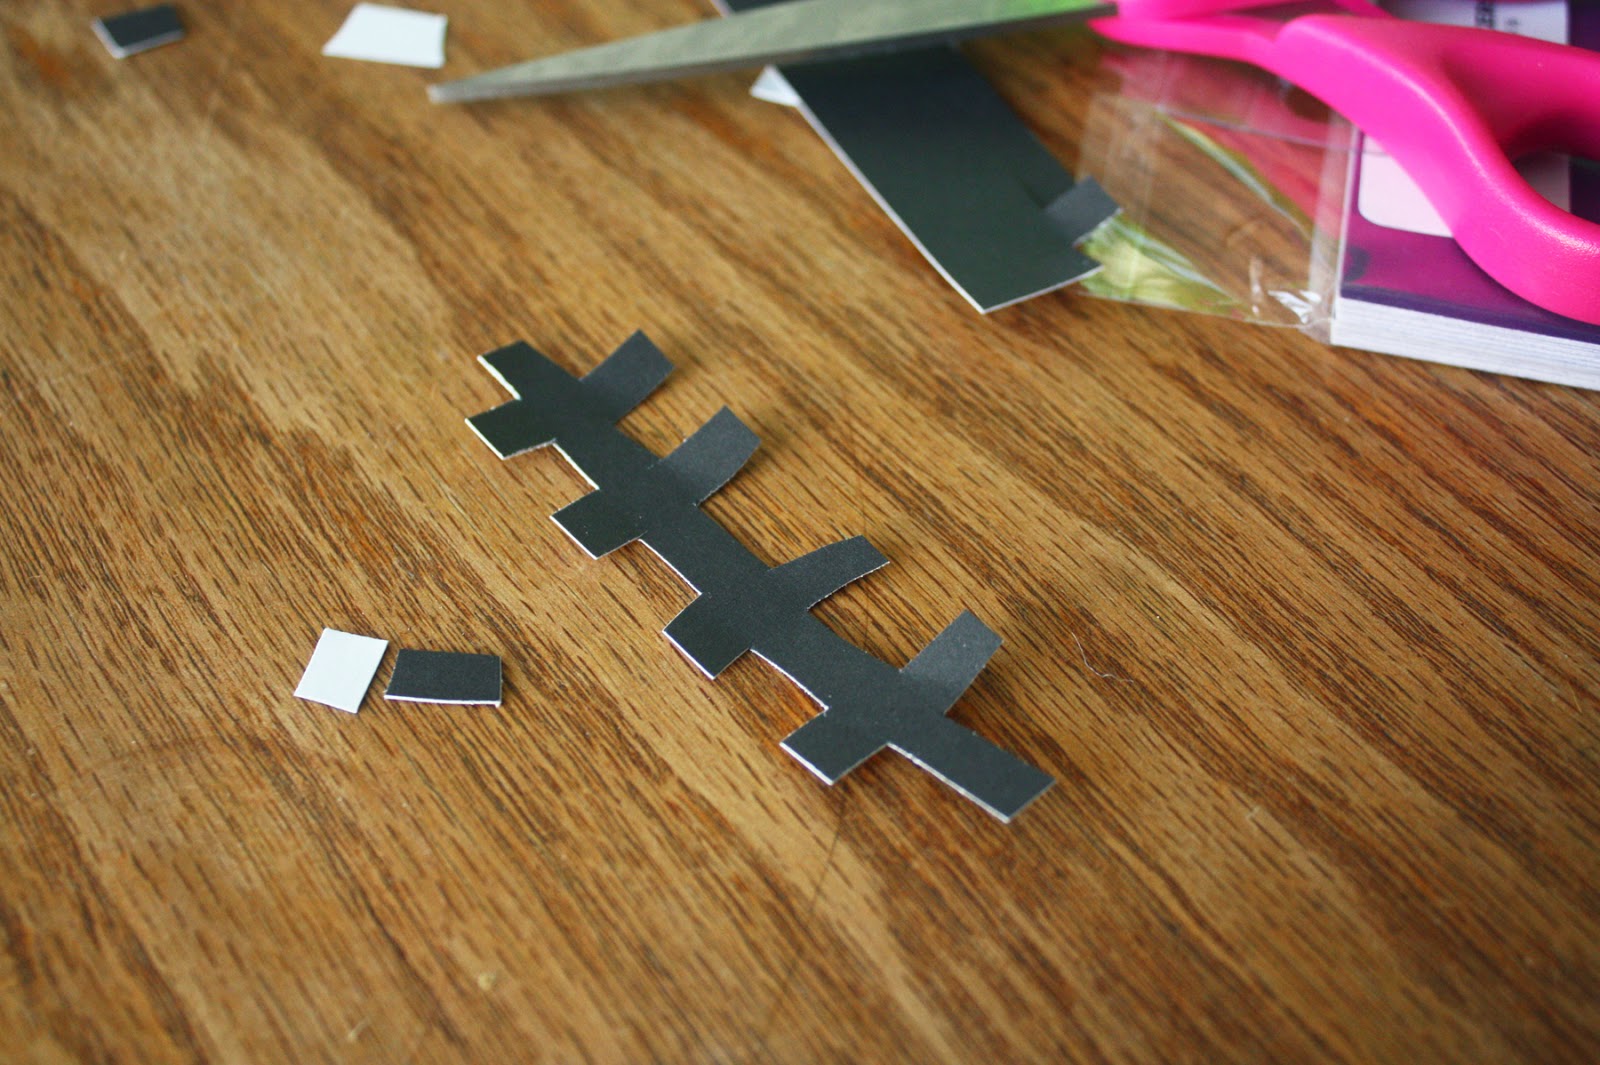
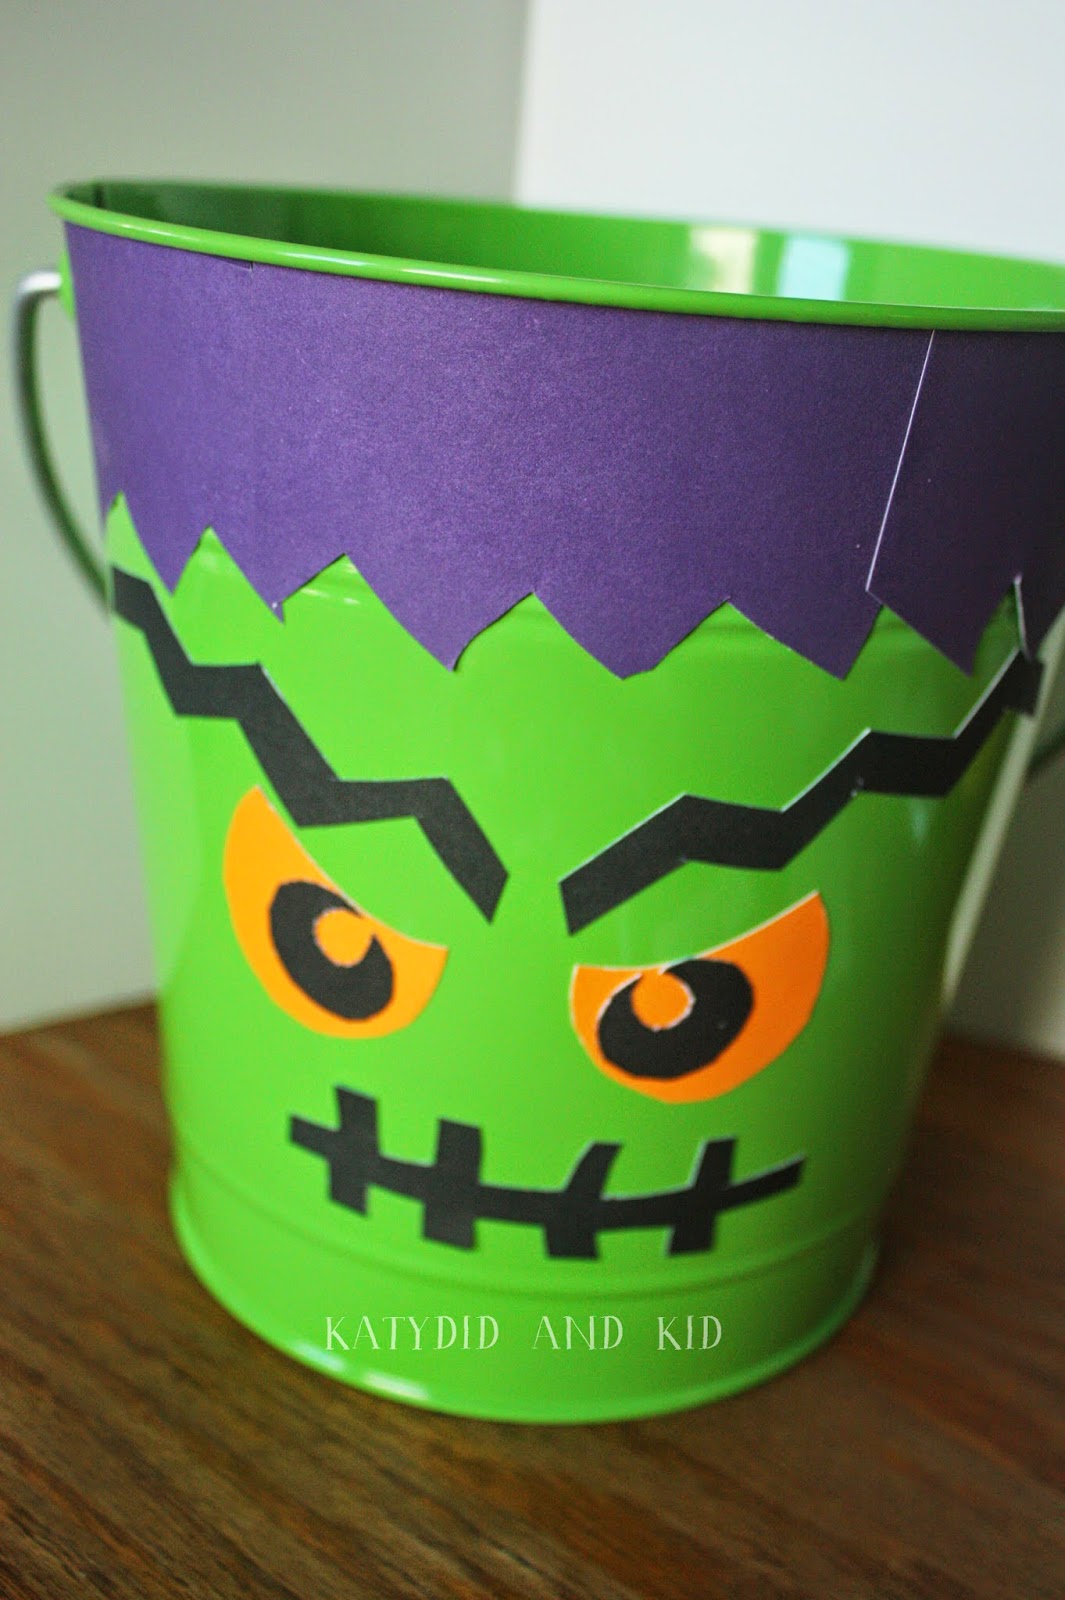
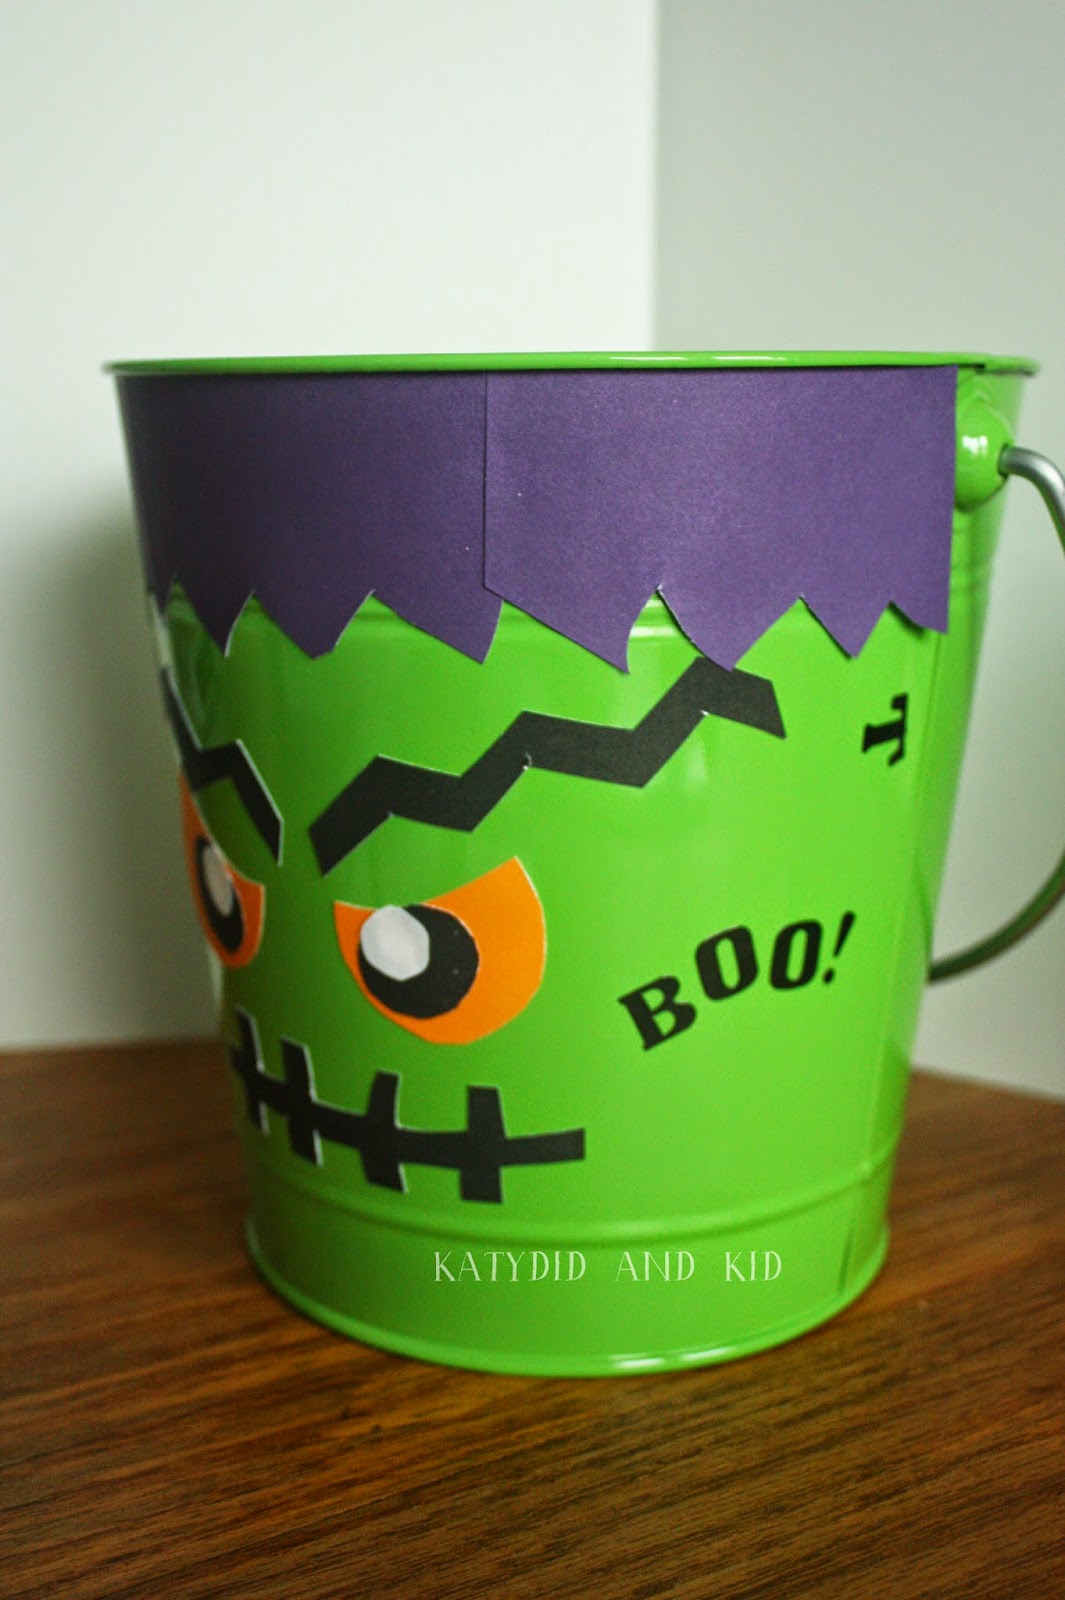
Continue making Frankenstein's face in the same manner, cutting some zigzag black pieces for the eyebrows and mouth, maybe orange and black for the eyes.
Then I stuck on the face.  In the case of this monster, I think the simpler the better when it comes to designing the face.
I did put a few spooky words like "boo!" and "eek!" along the sides of the head, and some letter "t's" made nice Frankenstein bolts.
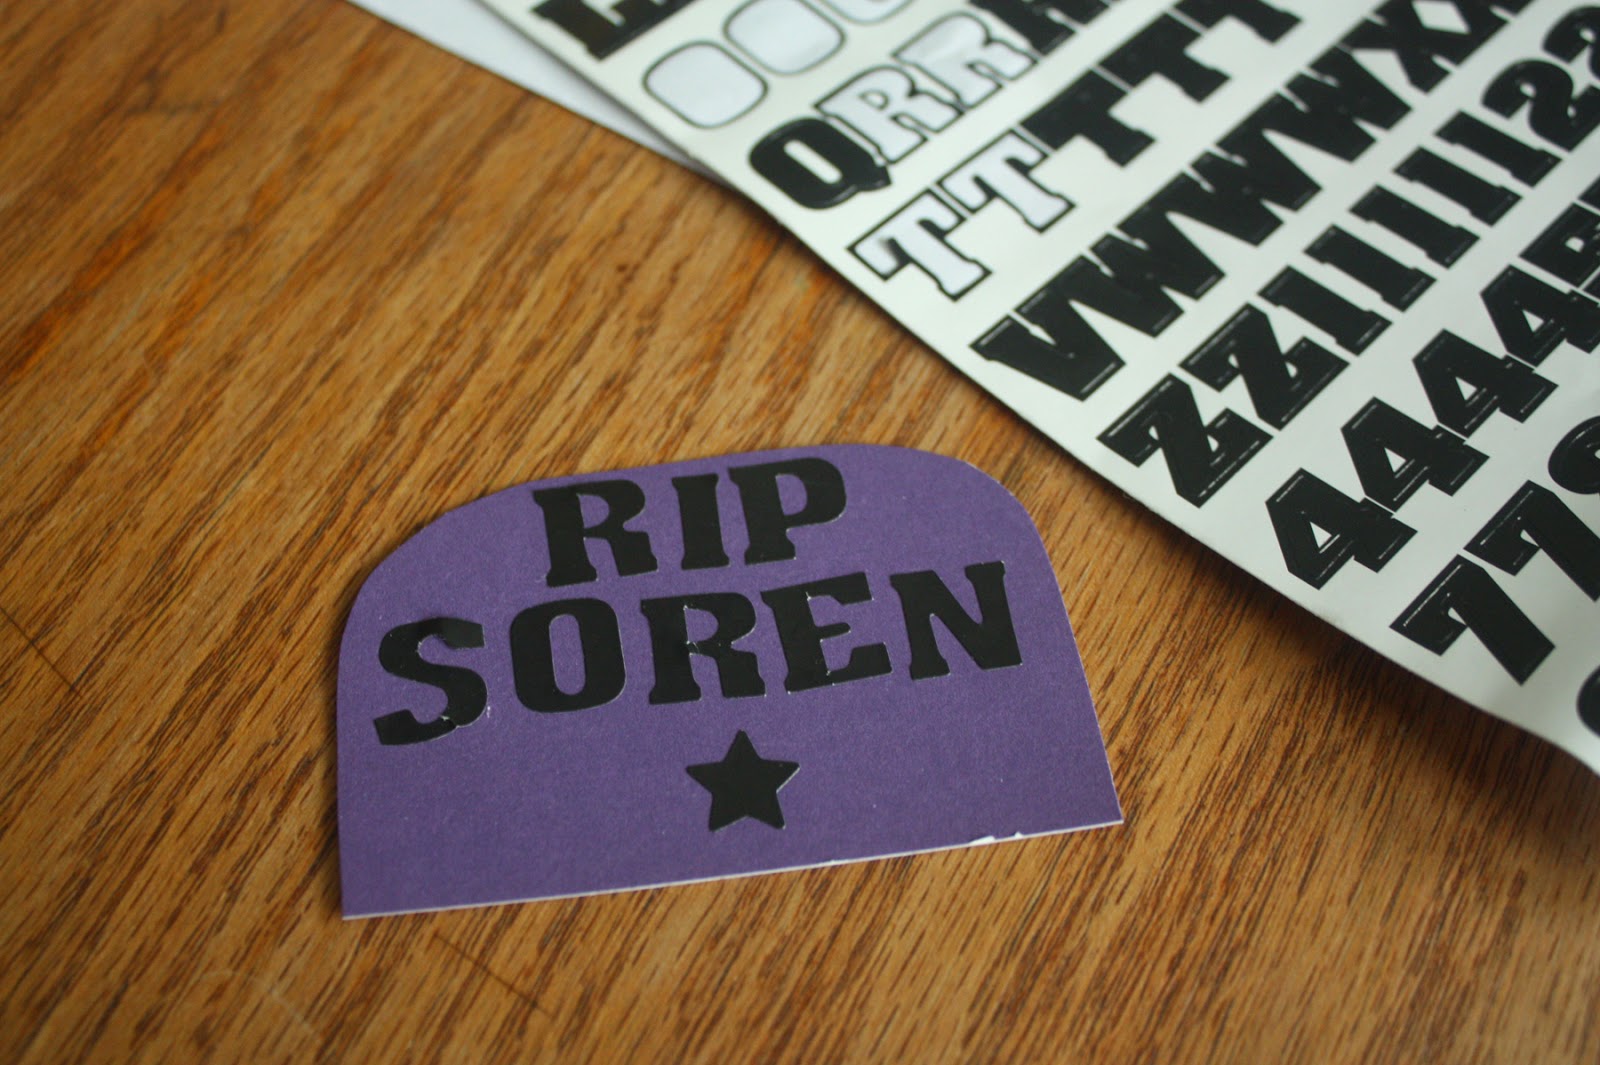
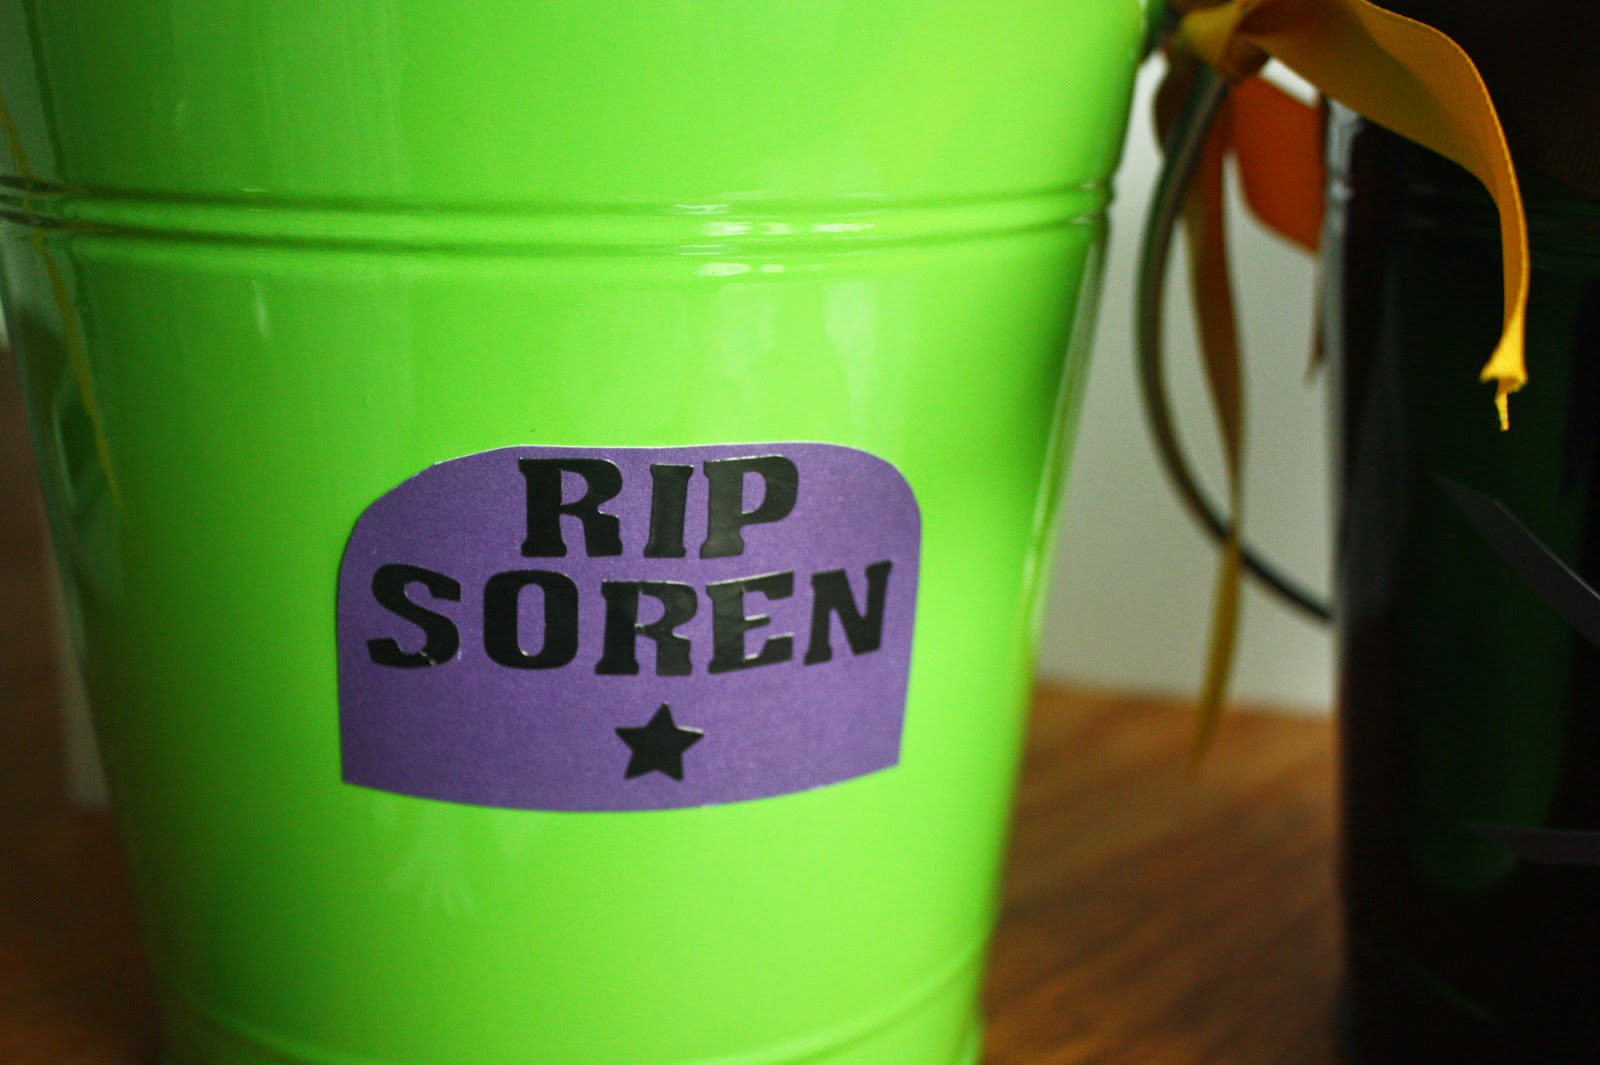
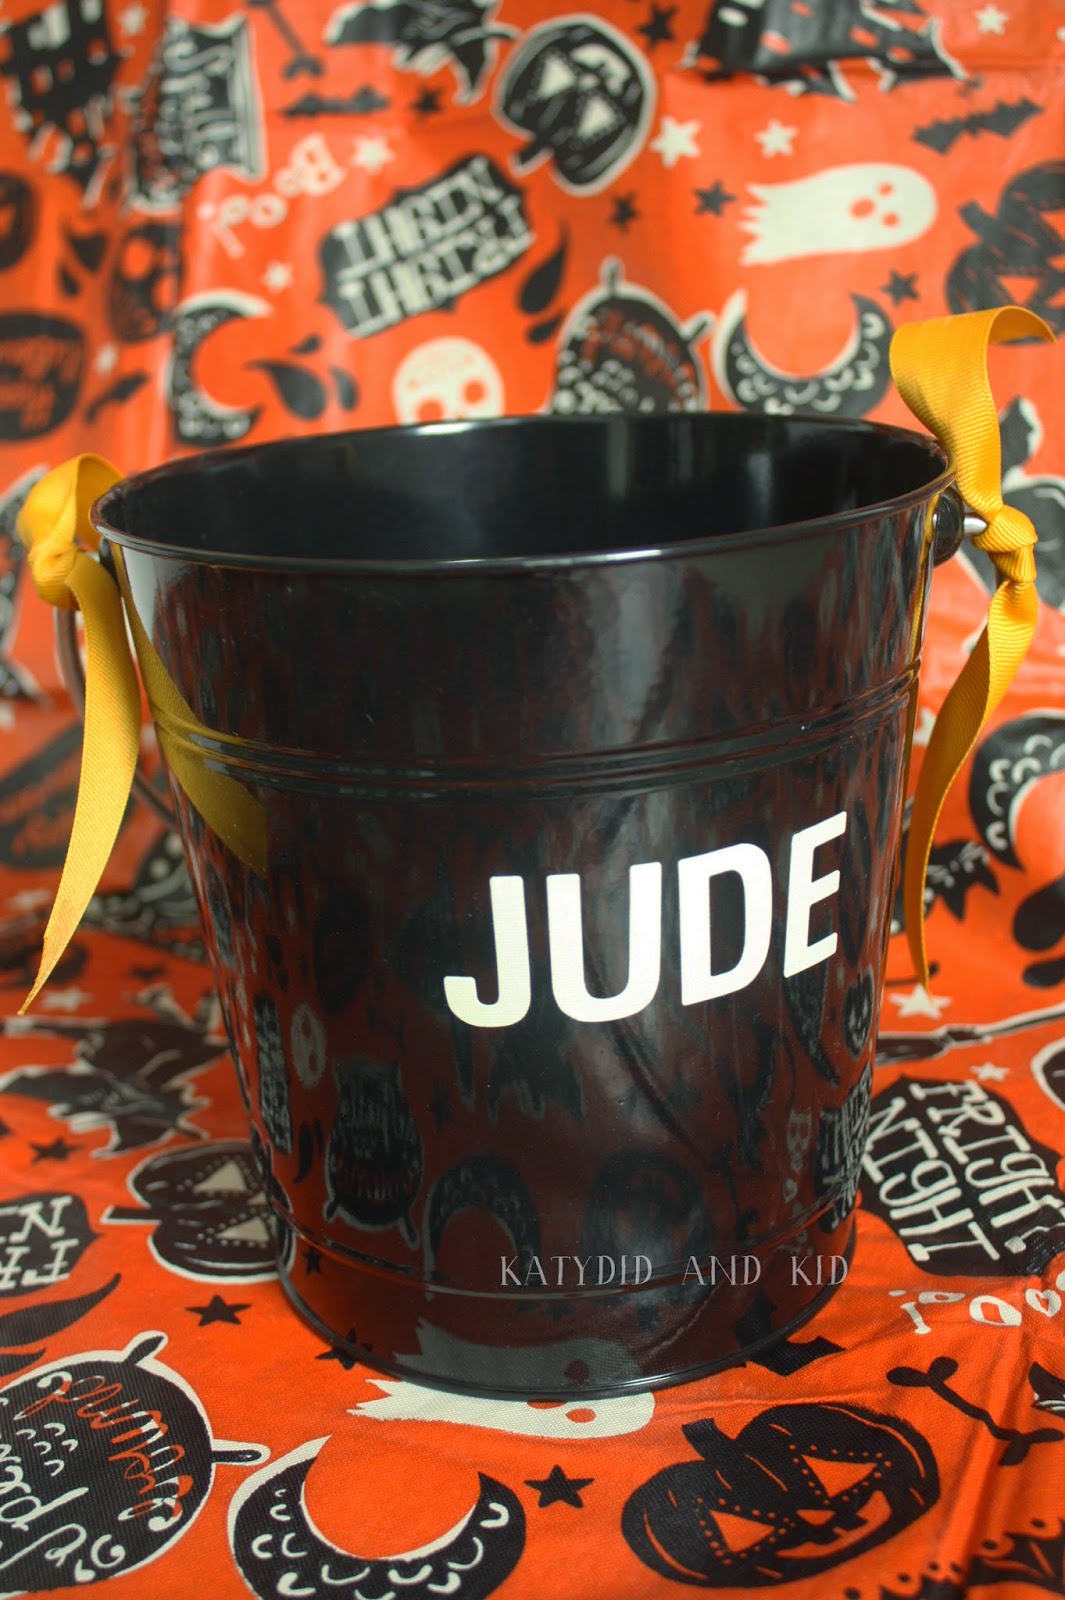
I added my son's name on the back too, by cutting out a tombstone shaped sticker and adding RIP plus his name under it.
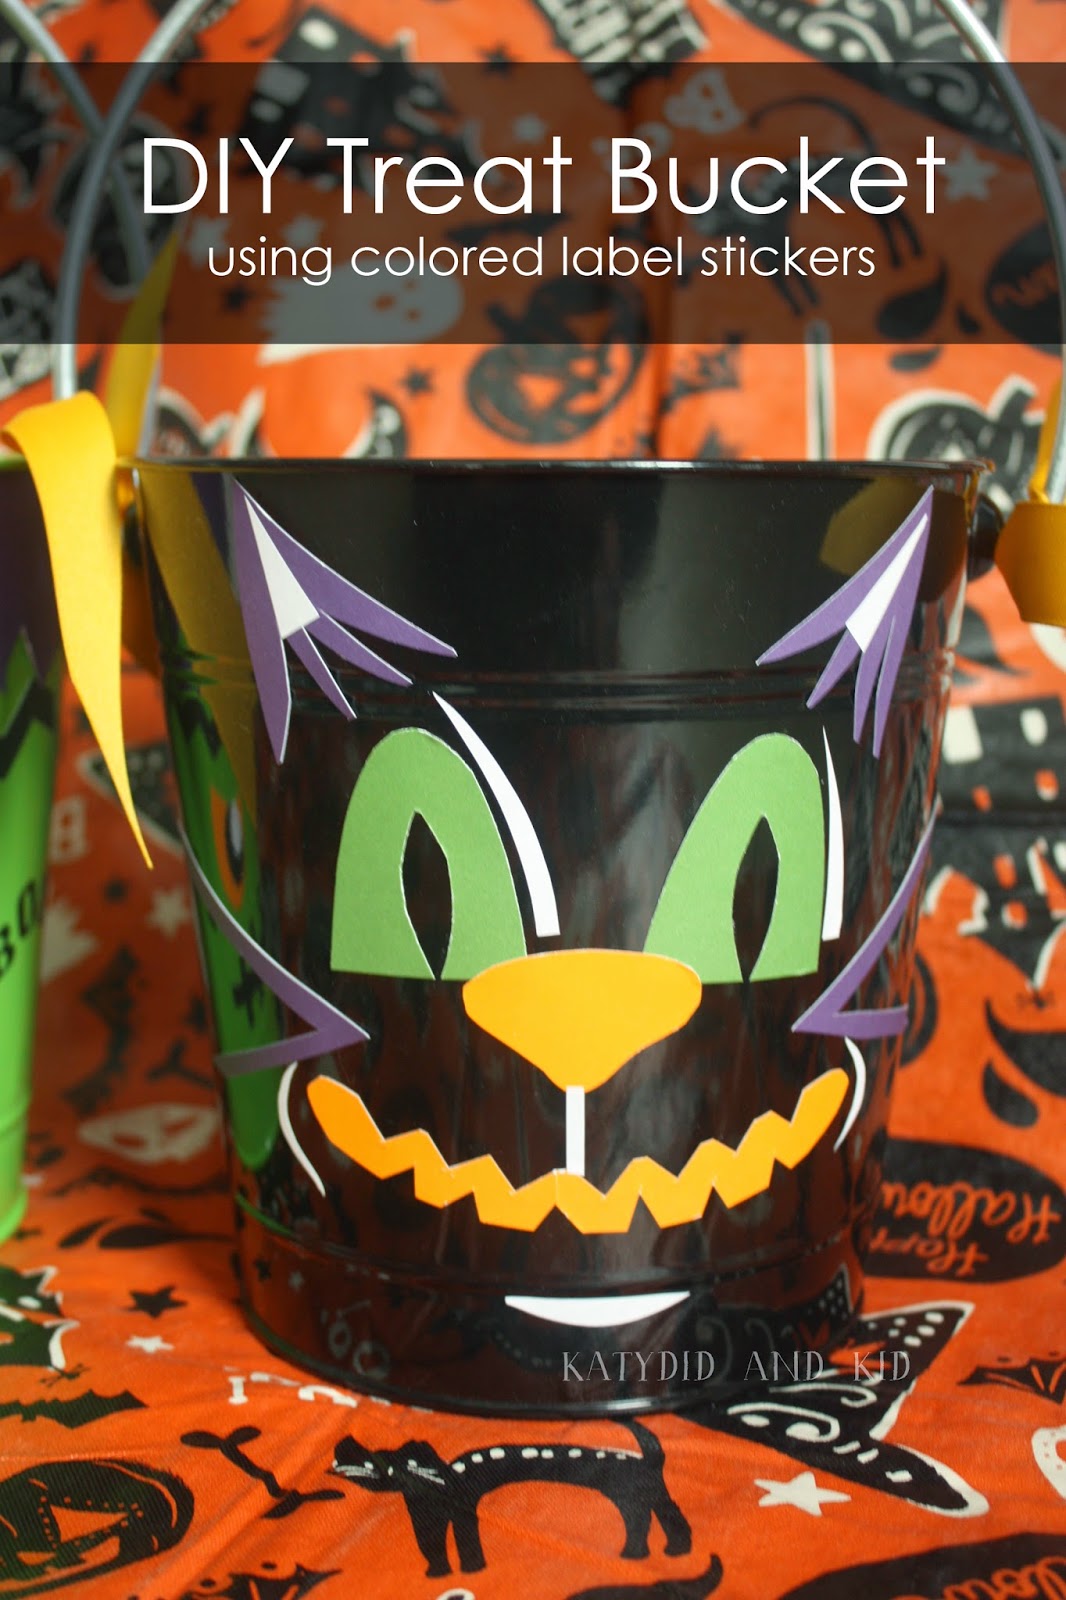
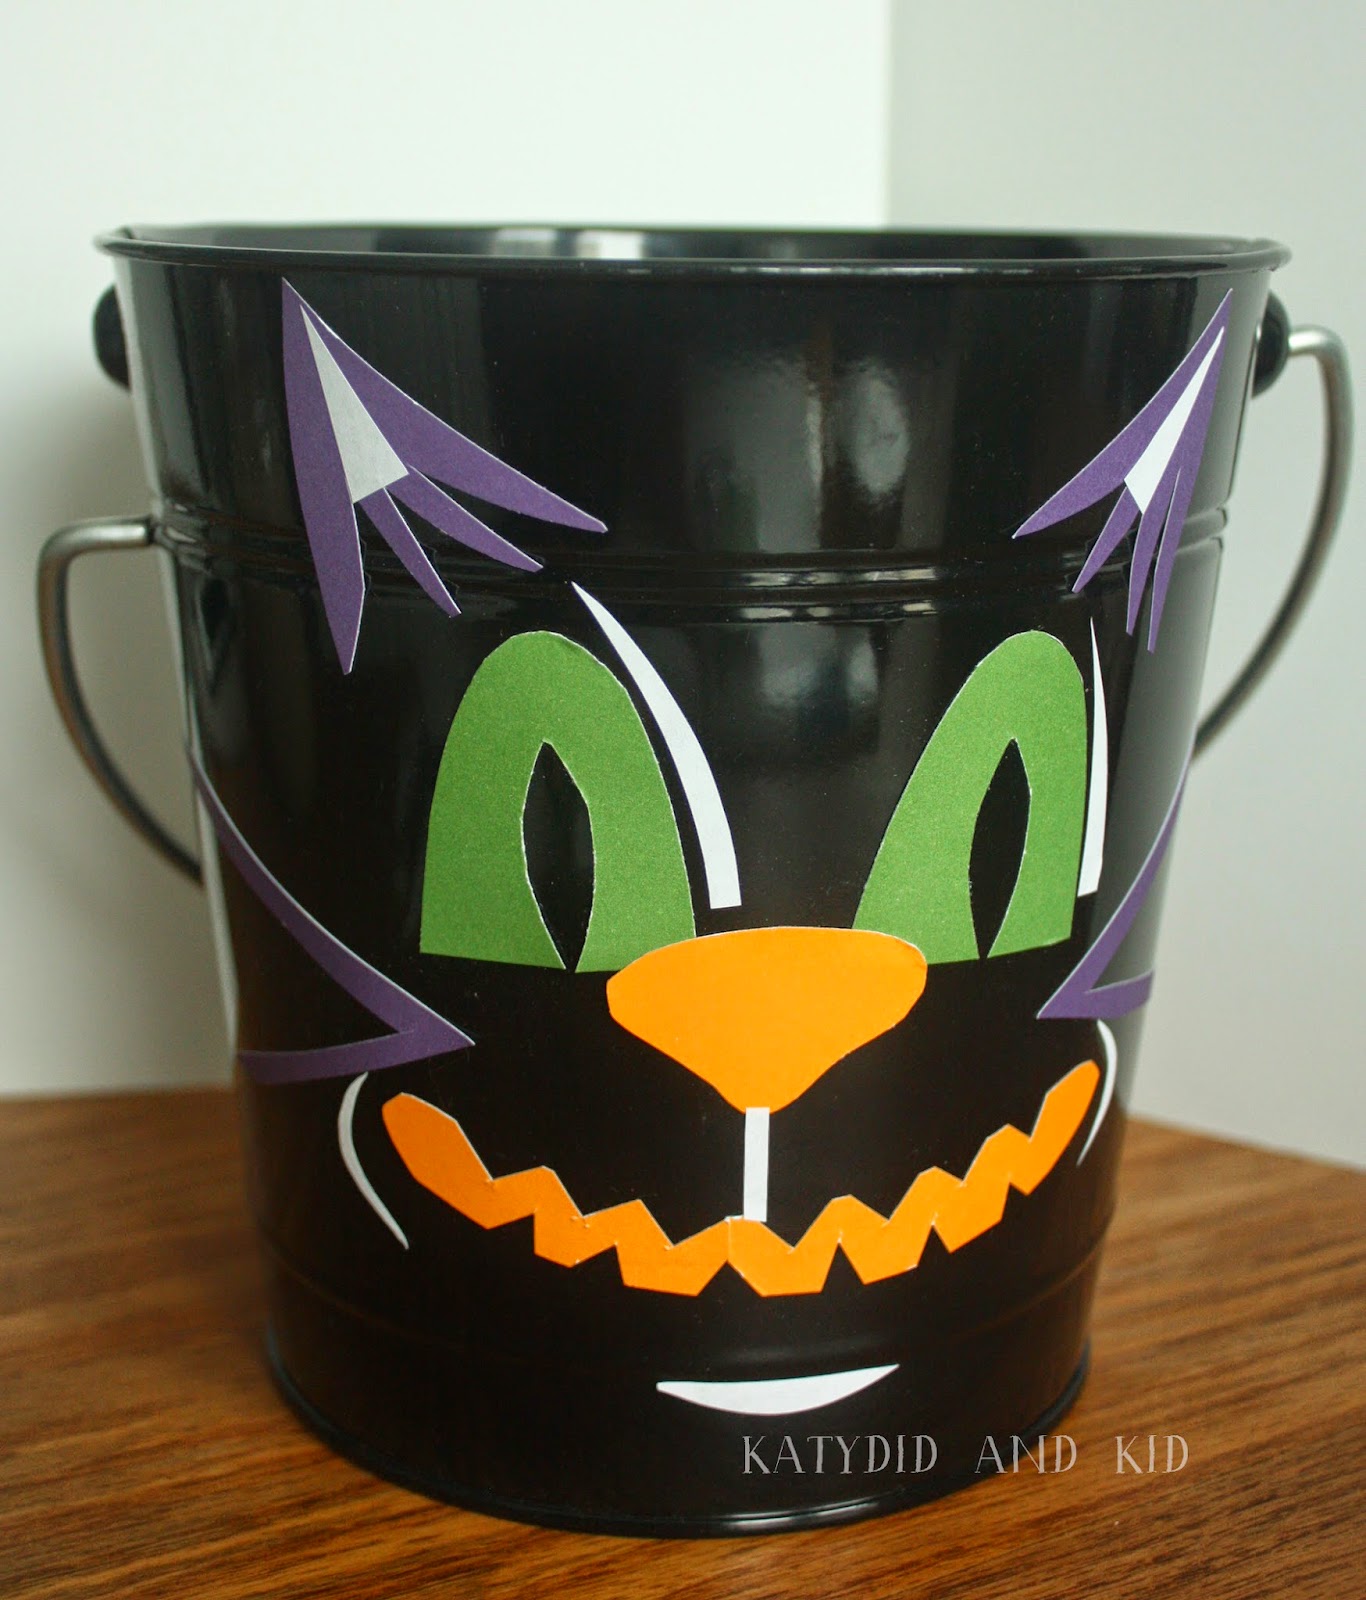
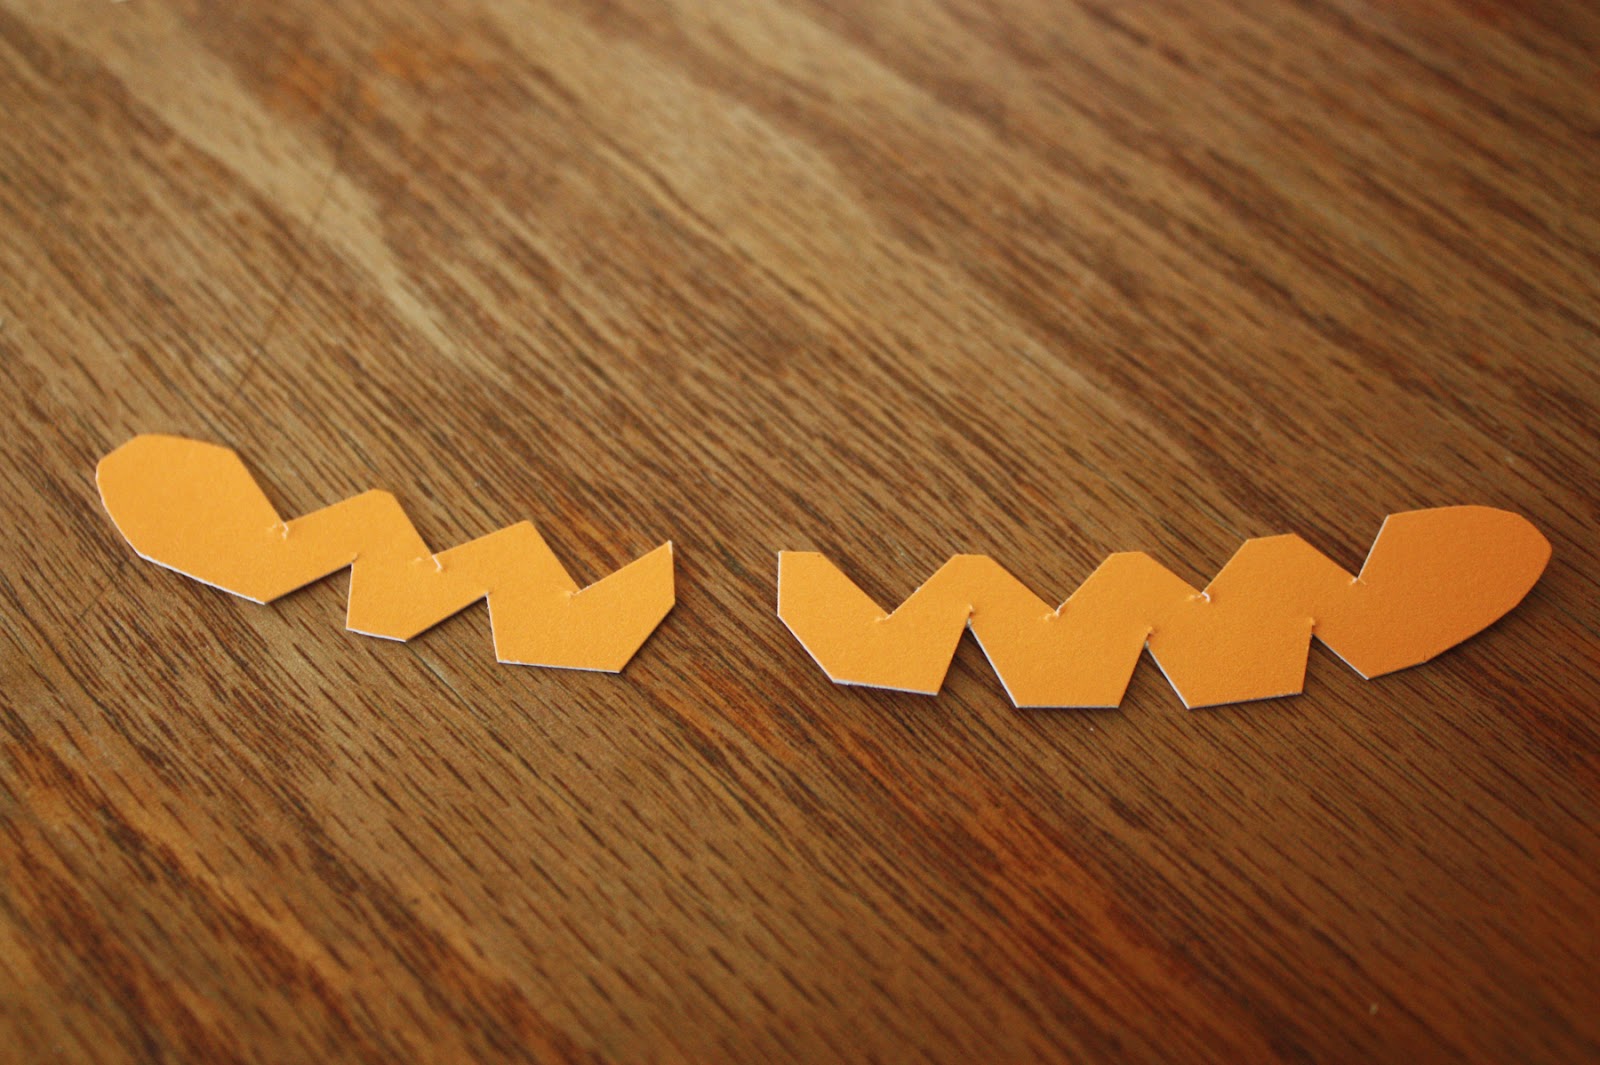
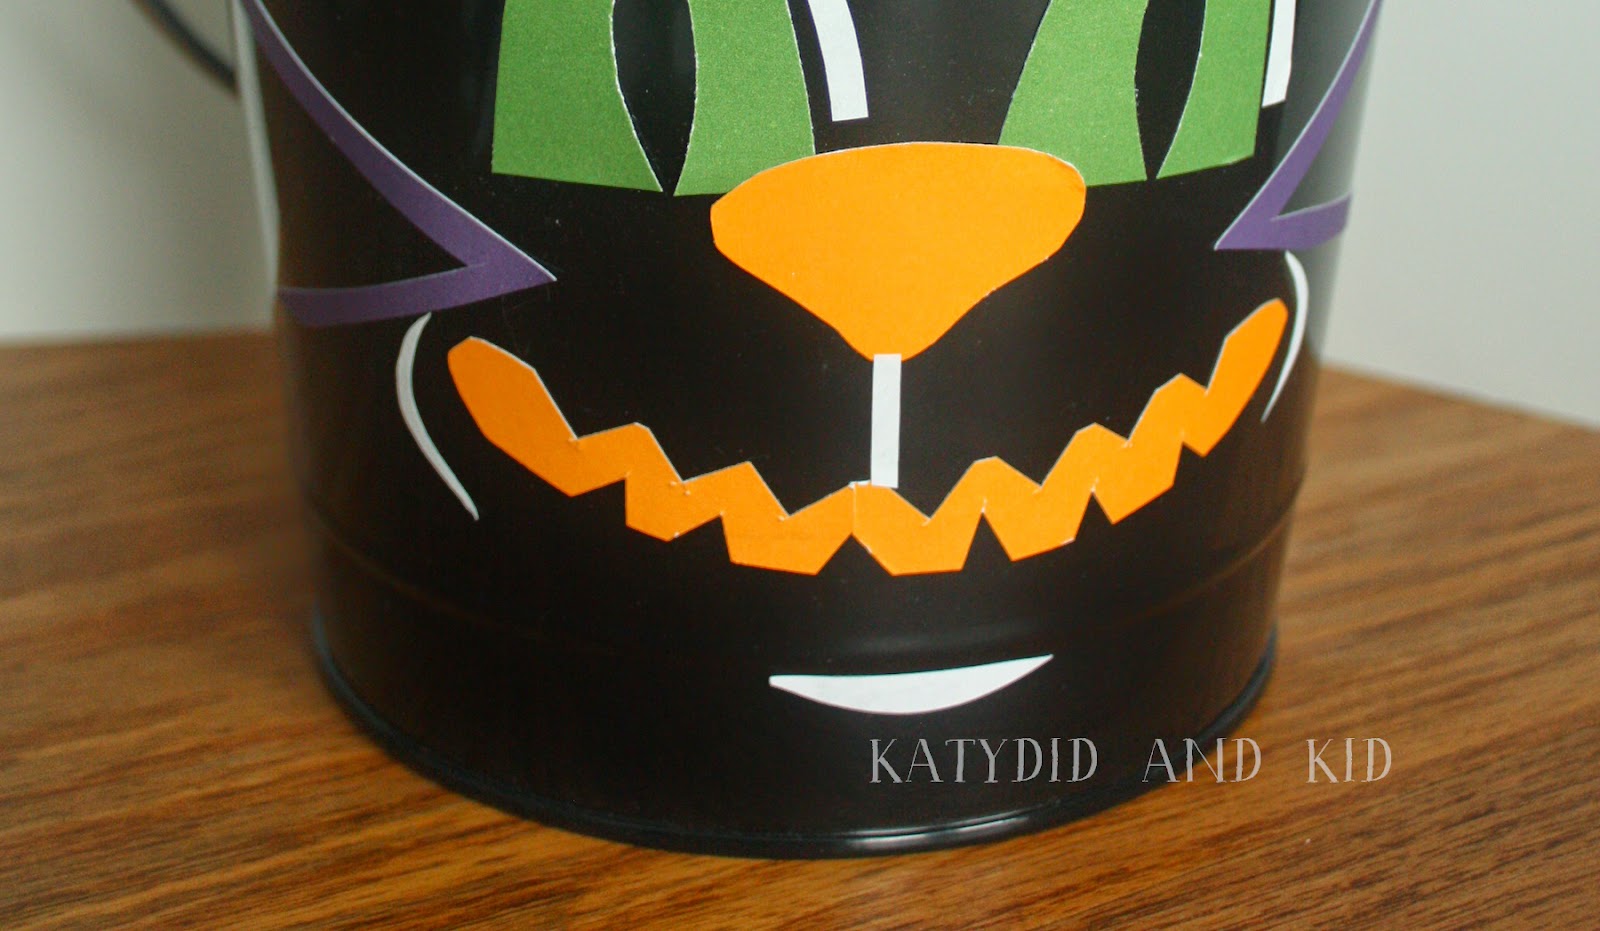
For the black bucket, I wanted to make it resemble one of those vintage black cat designs.  I used the same technique of cutting out pieces to create a cat face.
Green eyes,
an orange nose and a jagged orange mouth (made from two long strips of sticker pieced together)
and some purple ears and whiskers.  I added some white accents around the eyes, ears, and between the nose and mouth with white label stickers.
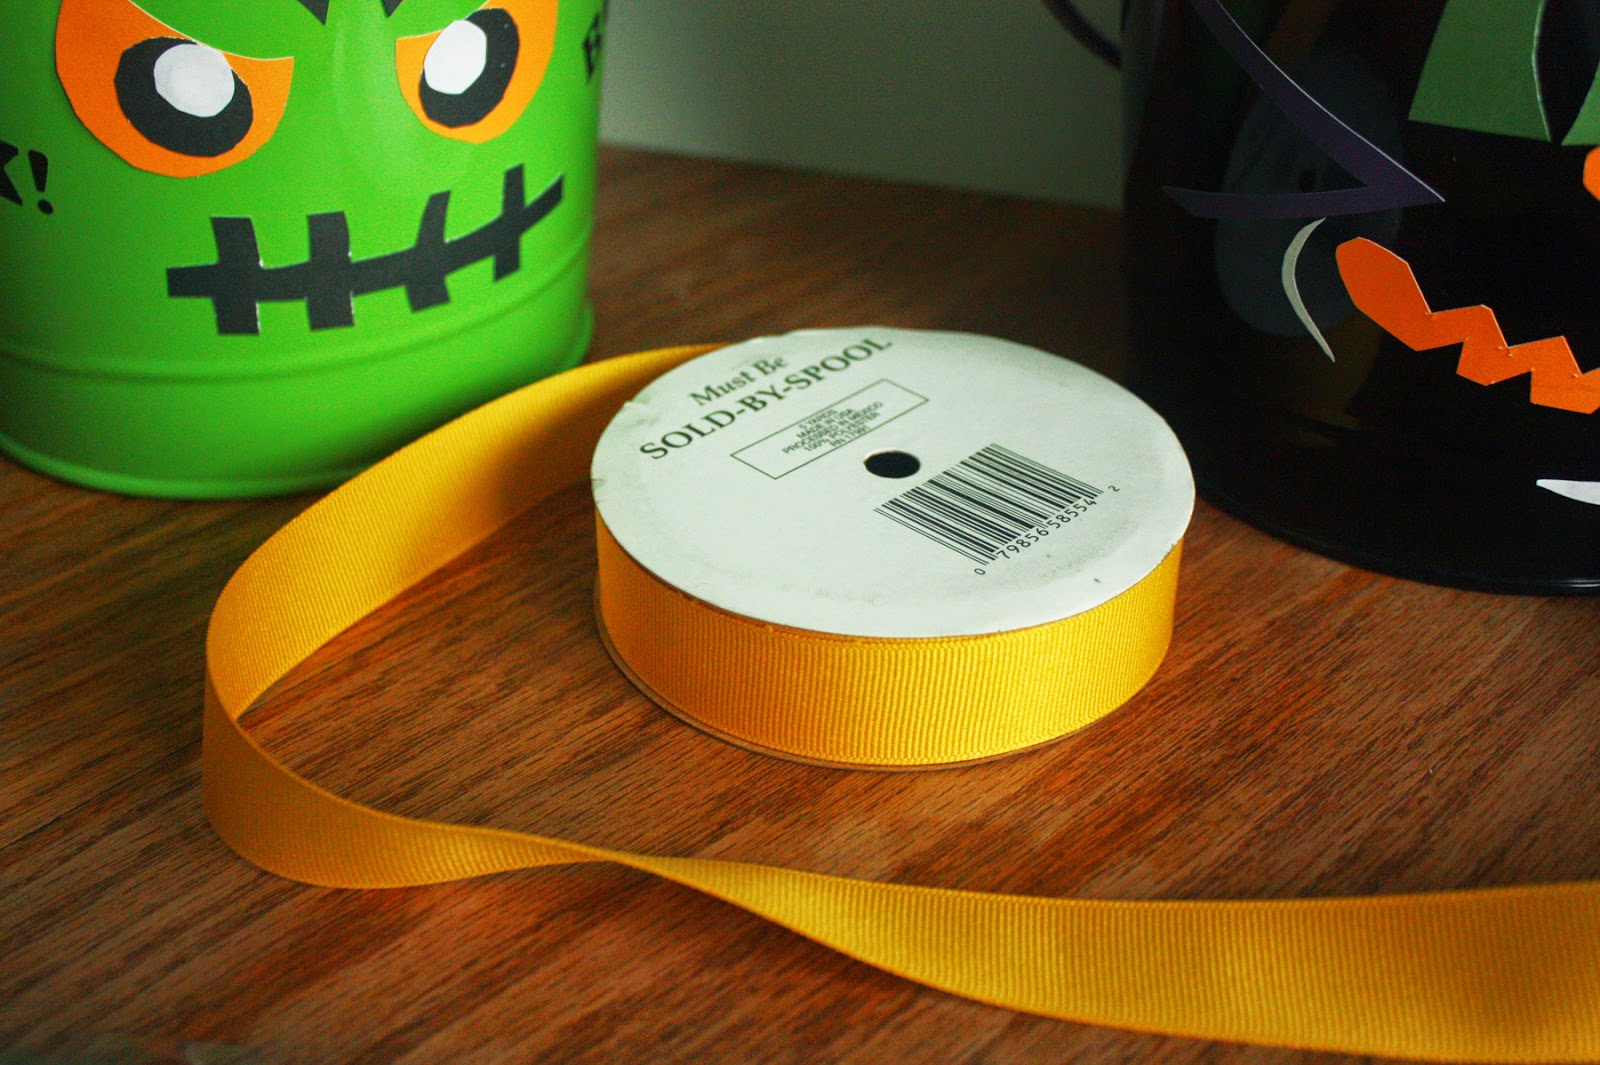
To add a bit more flair, I tied some strands of grosgrain ribbon on the bucket handles at each side.
I think they look adorable!  They'll be a great way to hold treats on Halloween night.
I happened to have some extra large glow-in-the-dark stickers lying around, so I used them to add my younger son's name on the back of his bucket.
The possibilities are endless for decorating these buckets, and because you can peel/wash off the stickers (they're sturdy, but still are removable) you could use this bucket throughout the year or change out the design each Halloween.

You can find more craft ideas on Jam Paper's blog, as well as on their Facebook and Pinterest pages.
Disclosure: I received sample products from Jam Paper and Envelope to facilitate the making of this project.  All opinions and ideas here are my own.

May 7, 2023

A Kids' Tinkering Kit

For Soren's birthday (over a month ago--this post is long overdue), I thought that turning six was a perfect time to give him his own tinkering kit, with "real" tools.
It would be a box of items that he will hopefully use for tinkering and building, especially that he is so drawn to that kind of creative play (um, Legos anyone?).
Here he is above, working in his "construction site."  Though you can't see them (they're buried or out of frame), he's repurposed a lot of old bricks, pipes and wood scraps to build tunnels and other things.  I had all intentions on taking him to the Maker Faire when it came to town last month, but unfortunately we had family obligations.

Speaking of family, I have fond memories of my Pap Pap and his barn/woodshop filled with all kinds of interesting and odd items that he used in carpentry and other projects.  It was always fascinating imagining what some of those items might be used for.   An old bicycle seat?  It could have make a fantastic head for a garden sculpture.

Though we don't have an extensive collection of oddities like my Pap Pap, I wanted to make a little tinkering kit that Soren would hopefully use for his own projects and creations.
We already had a set of kids tools, purchased at Home Depot a few years ago, so all we needed was a place to store them as well as some odds and ends to encourage tinkering.

I bought a toolbox online and decorated it with stickers I picked up at the Dollar Tree.
It's a roomy tool box, and sturdy too, as it's made of metal.  The top tray isn't too big, but it holds enough.

I also added a hand drill and drill bits, which is a safer way for him to make holes in wood and other materials (hopefully no furniture!).
I found a lot of other odds and ends at the dollar store, like zip ties, binder clips, and cotton string.
It's something that I'm sure we'll add to in the future, depending on things that interest him.

Here's a list of some of the items to get you started on putting together a tinkering box for kids
  • twine, jute or other strings with a variety of thicknesses
  • zip ties
  • wire
  • binder clips
  • tweezers 
  • padlocks
  • hammer
  • wrench
  • screwdrivers
  • pliers
  • hand drill and bits
  • tape measure 
  • scissors
  • bungee cords
  • apron
  • tapes of various weights and sizes (masking, invisible tape, duct tape)
  • ruler
  • sandpaper
  • plastic caps from bottles
  • balsa wood pieces
The list goes on and on, and of course your child's interests will determine what's in the box.  What might you add to this list?

And as for the box, you could get a fancy, sturdy tool box or just use a plastic tote, canvas bag, shoe box or other storage container.  The point is to have a go-to place for your child to find materials when inspiration calls.  I have hope that this tinkering kit will help my son re-imagine and remake his world!

March 13, 2024

Sandpaper Printed Shamrock T-Shirt

Hey all! Today I'm over at my friend Sheena's blog Sophistishe sharing an easy sandpaper printing craft for St. Patrick's Day.
Hope you enjoy it and make it with your kids (or for yourself!).

February 6, 2024

Never Been Stitched {Giveaway}

This time of year, housebound with kids underfoot, I often look for a project that is quick and satisfying.  Sometimes that involves a sewing machine, but often it does not, since even sitting down at mine, uninterrupted takes effort.

Thankfully, Never Been Stitched by Amanda Carestio showed up at my door.  This book, filled with 45 no or low-sew projects is a great way to chip away at the winter doldrums.
There are instructions for home decor items like pillows, pictures and as well as clothing and accessories, like socks and scarves.  One of the simplest projects is the Map Bunting, which uses just scissors and glue to cut a map into a festive decoration.

Some of the other projects use items like fusible webbing, grommets, and wood embroidery hoops.  There are a few projects geared toward kids, like the Fleece Octopus and Felt Pencil Roll, which would be great for making with my son on a weekend afternoon.

I like that this book is a collaborative effort which includes projects from bloggers; it's interesting to see different styles and approaches to crafts within the same book.  The best part about Never Been Stitched is that it's a great way to quench my artistic craving when I'm bored and looking for a quick fix.

BONUS: Lark Crafts is generously sharing three downloadable projects for free via their website,
Click on over and get started on one of these creative projects.

WIN IT!
One lucky reader will win a copy of Never Been Stitched
Comment below with your favorite book from Lark Crafts.  Winner will be chosen on February 22nd, and I'll email the winner.  Share the giveaway via Twitter tagging @LarkCrafts for an extra entry, and leave me the link to your tweet.
UPDATE: WINNER is #2, Linda.
Disclosure: I received a copy of this book for review. All opinions are my own.

December 12, 2023

Just Another Craft from the Medicine Cabinet

I love craft projects that use the simplest of materials, ones that you already have in your home.  This one was an easy, inexpensive one that Soren and I made a few weeks back which has been decorating our kitchen for some time now--snowflakes made from cotton balls and cotton swabs.
I imagine this will stay up long into February, as it is more of a seasonal decoration than a Christmas one.  And it certainly doesn't take much in way of materials or artistic ability to make it.

You'll need:
  • Wax paper
  • White glue
  • cotton swabs
  • cotton balls
  • string for hanging

Tear off a piece of wax paper.
Arrange 6 cotton swabs into a star formation.
Add a large puddle of glue into the center, making sure the tips of the swabs are all stuck into the glue.
Add some more swabs, crossing them in any way you'd like or extending the "arms" of the original 6 swabs.
You could add the cotton balls at this point too, if you'd like.

Generously add more glue on top of the areas that are overlapped.  Don't worry if a lot of it spills out underneath. Just be sure the joints are saturated.
Allow to dry, usually overnight is enough.  Then gently peel off of the wax paper, tie on a string or ribbon, and hang.  With a needle, I "sewed" on some more cotton balls on the end of the string I used (see the first photo at the top).
Super simple craft with lots of possibilities for using as home decorations or even tying onto a present.
Enjoy creating with your little ones!

November 29, 2023

Handmade Gift Idea: Hex Sign Cork Coasters

Our wooden end tables have been taking some abuse from the many cups of hot tea and coffee I've been consuming in the last month.  I might perch my hot cup on a magazine, but sometimes I'm guilty of just setting it on the table.

A friend gave me some crocheted coasters, which I've used at times, but they always seem to be tossed like frisbees around the living room by my boys.  I think one of them is still under our sofa.

I thought maybe some less-inviting ones might be worth a shot.  I saw these swakny glass ones at Target the other day, but of course glass+boys=second thoughts.
I saw some nearly identical ones in the dollar store the other day, but plastic with cork centers.  They begged to be decorated, and at one dollar for four and weighing about 5 lbs less, I thought they were worth a try.  I'm pleased at how they turned out.
Living in a Pennsylvania Dutch town, I'm inspired by the arts and crafts and designs that make up this region's heritage.
So I had a little fun creating my own versions of hex signs.
I have a book on Pennsylvania Dutch designs that proved helpful, but you can search online for hex sign designs and find plenty of options.

It was a very inexpensive project, considering I only had to buy the coasters since I had the rest on hand.  Here's what I used:
  • Cork coasters 
  • Acrylic paints or a paint marker
  • brushes
  • pencil
  • Mod Podge (for sealing the paint onto the coaster)
First off, I found a simple design that I liked and used that as a starting point.  I wanted to copy a hex sign I have on my wall, but change the colors.
Then I lightly sketched it onto the coaster with a pencil.  I apologize for not snapping photos of the craft in progress, though I think you can fill in the blanks with your imagination.

Next, I painted the design.  You could make it all one color, like white, or use a lot. I went with primary colors and white, and I made sure that some of the cork was visible underneath. I like the contrast of the natural brown color and the brighter hues.

Once the paint dried, I added a thin layer of Mod Podge to protect the paint.
They're not perfectly painted (I was lazy and didn't meticulously measure my designs), but I like the handmade look.
So far they haven't been whipped across the room, but if/when they are, I'm not worried about them shattering into pieces or clunking someone on the head.

I definitely see more sets of these in my future; they would make great Christmas gifts.  If you're not so artistically inclined, you could always use or make a stencil to add a monogram to the coaster. 
Related Posts with Thumbnails