Showing posts with label Green Living. Show all posts

March 18, 2023

The Great Kombucha Experiment

It's time for a new science experiment in the house.  I've done the no-shampoo thing (still doing it with good results), attempted sauerkraut last week, and now I'm trying to make another weird fermented food--kombucha.
If you've never had it, it's essentially like a naturally-carbonated, fruity/vinegary fermented tea soda.  It's really hard to describe, but I like it.  It's a great source of probiotics, among other healthy things, but it's such a unique and enjoyable drink (and expensive when purchased in health food stores) that I wanted to learn to make my own.

In its gestating form, it's kind of disgusting, as you can see in the photo above (you don't actually drink the slimy stuff; the liquid is strained).  You need a SCOBY (Symbiotic Culture of Bacteria and Yeast) mother, which you can buy from here or get from someone you know who makes their own kombucha (mine is from a teacher at my yoga studio).  Here's what I got:
It's like raw chicken meets placenta.
The SCOBY was packed with some of the starter liquid from its original kombucha batch, and the watery blob smelled a lot like vinegar.  It really didn't bother me too much, looking at it, oddly enough.

I followed the recipe shared by the yoga teacher, which she got from Kombucha Kamp (she got her SCOBY from there).  I found a similar recipe and instructions from this website (it's a less-spammy looking one).

Here's what I used:
SCOBY :: Wide mouth Gallon jar :: 5 organic green tea bags :: 1 cup organic sugar :: tightly woven cloth and rubber band to cover the top of the jar

The process of making the tea was easy.  I boiled 4 cups of filtered water, then steeped my tea bags in it for 10 minutes.
Then I removed the tea bags and stirred in 1 cup of organic sugar until it dissolved.
In went 8 cups (64 oz.) of filtered water to the tea, which brought down the water temp so I didn't kill the SCOBY.
Next, I poured in all the contents of the bag, including the liquid.
Yes, that looks disgusting, like a fetal pig floating in formaldehyde.  Did I burn your eyeballs?  If not, here are some more shots
It apparently doesn't matter where the SCOBY floats, bottom or top. 
I gave it a stir, then capped it with the woven fabric and tightened it with a rubber band.
 
Then I stuck it in my pantry where it's dark.  That spot still gets some airflow due to opening and closing the door throughout the day.
I'm hoping that when I taste it in a week (yes, I'm going to taste it!) it will be sweet and bubbly.  The next step is to strain it, add fruit juice and bottle it.  I'll post about that part of the experiment then.

What do you think? Does this give you the heeby-jeebys?  Have you ever tasted kombucha?  Would you?

December 11, 2023

Give the Gift of Essential Oils {Giveaway}

As much as I like the smells of the holidays (baking, evergreen, citrus) I prefer natural scents to perfume-y candles and air fresheners.  I use eco-friendly cleaners in my home, so I am drawn to products made from all-natural ingredients.

I keep an assortment of essential oils on hand to use in everything from personal skin care to massage to cleaning.  When Puritan's Pride, an online provider of supplements, vitamins, natural beauty products, healthy snacks and more, contacted me about trying out some of their essential oil products, I thought it would be the perfect opportunity to create some all-natural, handmade gifts for the holidays.
Aromatherapy is a way to manage stress during this often-stressful season, so I was delighted to try their aromatherapy products.  I was sent a bottle of their Wonder Oil (an amazing citrus-y fusion of oils, herbs and fruits for the body, including Olive, Sunflower Seed, Wheat Germ, Sweet Almond, Sesame and Jojoba Oils, a ScentBall plug-in aromatherapy diffuser, and three 100% essential oils in lavender, peppermint, and eucalyptus.
Puritan's Pride began over 40 years ago, with the mission of making the finest quality nutritional supplements available at the best value to their customers. Today, the company remains true to its original commitment and serves millions of loyal customers. Puritan’s Pride manufactures thousands of  vitamins, minerals, herbs and other nutritional supplements in their state-of-the art facilities located throughout the U.S. As part of the company’s commitment to quality, Puritan’s Pride only uses ingredients from suppliers worldwide that meet their Quality Assurance Standards, as well as Good Manufacturing Practices food quality standards.
I love all three of these scents, and thought that used alone or combined could make a wonderful gift set for a teacher, friend, or neighbor.
Packaged in a decorated clementine box, this gift basket is both inexpensive and easy to make, and is a handmade, thoughtful gesture.

You just need a few plain or fancy jars to put the items in, as well as a spray bottle for the room spray.  Here are the recipes I created.

FRESHENING CARPET POWDER
  • baking soda
  • 100% essential oils (I used peppermint, eucalyptus and tea tree oil, which I had on hand)
  • Parmesan cheese jar, or just save the cap from a plastic Parmesan container and screw it onto a mason jar (it works!)
Fill your jar halfway with baking soda, then add 5 drops of each essential oil to the jar.  Cover the top and shake well.
Fill the rest of the way with baking soda and shake again to combine.  Add a pretty label, as well as an instruction one on the back that says something like "sprinkle on your carpet, wait 5 minutes, and vacuum as usual."

REVITALIZING FURNITURE OIL
  • 1/4 cup Wonder Oil (a blend of olive oil and other great-smelling essential oils) or plain Olive oil
  • 1/4 cup white vinegar
  • 5 drops of eucalyptus oil
Combine all ingredients in a glass jar.
Cover and shake well.  
Add a pretty label as well as instructions to "Shake well.  Pour one tablespoon onto a clean, soft cloth and wipe onto wood.  Buff with a dry cloth. Repeat process monthly."

SOOTHING ROOM SPRAY AND REFRESHING ROOM SPRAY
  • Distilled water
  • Lavender essential oil for soothing spray and peppermint and eucalyptus for refreshing spray
Add enough distilled water to fill your spray bottle halfway.  Add 8 drops of essential oil into the water, then top with more distilled water.  Shake well and include instructions for user to shake well before use.
The addition of a diffuser into this gift basket is a really nice touch.  The ScentBall diffuser plugs into the wall and comes with reusable pads that you add 5 drops of essential oil onto.
It plugs into an outlet and gently warms the pad, releasing a subtle, pleasant scent.  I have mine in our bathroom, where it works to mask unappealing odors without the chemical cloud that typical air fresheners use.

I packaged all these home care items in a clementine box that I had decoupaged with scrapbooking paper, and added a scrub brush and a cloth diaper (for cleaning, they make the best reusable rags).
Tuck in a few evergreen branches, some pine cones and tie on a pretty ribbon, and you have a lovely seasonal gift that will make the recipient's home smell fresh and clean.
Puritan's Pride has so many other delightful essential oils to choose from, as well as other products to create a holistically healthy lifestyle.

You can learn more about Puritan's Pride via the Puritan's Pride Facebook page as well on Twitter @PuritansPride.

One lucky reader will win an assortment of aromatherapy products from Puritan's Pride.  Please enter via the Rafflecopter widget below.
a Rafflecopter giveaway

Disclosure: I received sample products from Puritan's Pride for review purposes.  All opinions are my own.

April 17, 2023

Shower Salad

No, I haven't started a Kramer tradition from Seinfeld, saving time by preparing salad while showering.  I'm back to the no 'poo experiment, which I tried unsuccessfully two years ago.  Despite its unfortunate name, it's an interesting method of ridding shampoo from your shower routine and scalp. Let's take a look at the method below:

When I shower, I pour a solution of 1 cup water +1 tbsp baking soda over my hair and let it sit for at least a minute.  Then I rinse it out and pour a mixture of 1 cup water + 1 tbsp apple cider vinegar over my hair and let that sit for a minute.  I keep these solutions in two squeeze bottles in the shower.  It's like my very own salad bar, since there is also an olive oil mixture in the bottle on the far left (more on that later in the post).
Last time I had success with the method, but then went on a trip to Florida and was lazy about packing my supplies.  Plus I had gotten a haircut and the stylist had used shampoo on my hair, thus upsetting the PH balance on my scalp.  I just didn't want to invest the time in retraining my scalp with this method (it took about 3 weeks total for me to have hair I liked).

Back to the drawing board.  I wanted to revisit this method again, not because I'm against the harshness of shampoo, but I felt my hair was looking dull and I was tired of washing it every other day because it was greasy.  I liked how it looked when I tried the method years ago, and thought that I could muddle through the first few weeks to get that soft, silky hair I once had.

Here's my head, 10 days into the treatment.  I'm pleased with the results (despite the bad iPhone photo).
It was much easier this time around 1). because my hair is shorter and 2.) I'm not dealing with that mass of thick pregnancy hair.

My hair gets extra curly and the roots are no longer greasy, though I think that I still need to work some of the oiliness out of the rest of my hair.  Using a boar bristle brush helps.
It will most likely look better in another week or so, and I won't have to wash it as frequently (right now I'm at every other day with the no 'poo method).

In addition to the no 'poo method, I thought I'd give the oil cleansing method a try.  You can find a lot of info via an online search.  I think I may have come across this at some point on Pinterest.  Essentially you use oil to clean and soften the skin on your face.

I use a blend of olive and castor oil, but I must say the results have been much less pleasing than the no 'poo experiment.  My combination skin did not like this, despite trying it for 10 days.  It broke out, and just never felt great.  It might be that I need to experiment with the blend of oils.

One other issue I had was that I think it was allowing me to get sunburned.  We've had some nice days here, and despite using SPF on my face, or only being outdoors without a hat or sunscreen for 20 minutes I was still getting red. I wonder if it was acting like a baby oil suntan method (yikes!).

Hence I've given up on the oil cleansing method and am back to my usual baking soda wash, which has been good for my face (you can see my cheese sprinkler of baking soda in the shower rack in the photo above).  I still don't use soap on it, and usually just wash my face with water before bed.

So that's my shower salad, which is more than you've probably wanted to know about my showering habits.  Have you ever tried these methods?  How did they turn out for you?

June 25, 2023

On the Hunt in the Fridge

Have you ever taken note of the abundance of plastics all around us?  From our toiletries to our food packaging, they're everywhere.  As part of a blog tour sponsored by Evergreen, I was encouraged to take a look in my fridge and really pay attention to the kinds of cartons that food is packaged in.
Without looking in my refrigerator, I would have guessed that plastics dominate the packaging in there.  I've thought about (and became depressed) about this before, the fact that we're mostly forced to buy excessive packing materials in our food shopping.

Surprisingly, about half of the food is packaged in plastic, the other in glass.  Starting with the fridge door, I noticed that the condiments are about half glass and half plastic.
The one item that bugs me the most, not just in writing this post but when shopping every week is that the eggs at our grocery store don't come in cardboard cartons anymore.

Inside the fridge, I found a mix of plastics, cartons, and glass.
I like that in my town, glass and plastics #1 and #2 are recyclable.  However, much of our food items are sold in #5 plastics (like yogurt) which we aren't recyclable in our town.

I had no idea that paper cartons can be recycled.  I found out this info from the Evergreen website.  Unfortunately, we can't recycle milk cartons in our town, unlike paperboard.  I was surprised to learn a lot about paper cartons that I hadn't known before.

DID YOU KNOW?
  • Over 41 million households have access to carton recycling, and that number is on the rise. In addition, cartons are made from renewable materials - more than 70 percent of the carton is made from paper, all from trees from responsibly managed forests.
  • Packaging plays a very important role in keeping food and beverages fresh. The environmental impact of a package is just as important as the contents inside. 
  • Cartons are recyclable where facilities exist. The paper fiber contained in cartons is valuable. Recycled cartons are used to make products such as tissue, office paper, wall boards and other building materials.  To learn if your community accepts cartons for recycling, please visit www.recyclecartons.com or check with your local recycling program.
  • Cartons are made with renewable energy. More than 50 percent of the energy used to make the paper in Evergreen Packaging’s cartons comes from biomass.
  • Responsible forestry promotes new forest growth, and these forests help to diminish greenhouse gases. Forests remove carbon from the atmosphere and store it in trees. In the US, due to both increases in the total area of forest land and increases in the carbon stored per acre, an additional 192 million metric tons of carbon are sequestered each year through responsible forest management programs nationwide. This offsets roughly 11% of the country’s industrial greenhouse gas emissions, the equivalent of removing almost 135 million passenger vehicles from the nation’s highways.
Given the choice, I'd prefer to buy paper cartons in place of plastic since they seem more eco-friendly in their production and efficiency.  Considering that we buy our milk (organic and soy) in paper cartons, since they're unavailable to us in other forms, I wish we were able to recycle them.

You can learn more about Choose Cartons via Evergreen's Facebook and Twitter pages.  For every #ChooseCartons fact you share in a tweet using that hashtag, Evergreen will make a donation to Habitat for Humanity. Win/Win!
Disclosure: I wrote this review while participating in a campaign by Mom Central Consulting on behalf of Evergreen and received a promotional item to thank me for taking the time to participate.

February 23, 2024

Dirty Hippie Hair Experiment: Update

So week one of my Dirty Hippie Hair Experiment has ended, with mixed results.  My hair doesn't look terrible, yet it doesn't feel great either.  I actually cheated over the weekend and rubbed a bit of shampoo into my lower locks, because they just felt so blah.  I figured that it wouldn't much affect the oils in my scalp, but might just clear out some of the gunk that's moved down my hair.
Today, before my doctor's appointment, I'd had enough. Call it the emotions, but I was just sick of thinking about my hair, (and secretly worrying that the doctor would notice it!). Really, when I was on the shampoo routine, I barely gave a second thought to my hair, after showering and letting it air dry.  But today it was just feeling so knotty and gnarly, and gritty, (though surprisingly not oily) after dumping too much baking soda on it yesterday in the shower.  Despite a mighty-dousing of vinegar, I just couldn't get it all out.  I'm convinced that my hair is just not meant for baking soda--it's just too thick and hard to rinse out.  It was always super-easy to comb when wet, but as it dried it just got tangled and difficult to manage.  It's like my hair wanted to turn into dreadlocks.

Honestly, my hair never really looked bad, as you can see from the photos, but it just always felt weird, which made me worry about how it looked to others.
So I did the inevitable this morning and washed it a bit with some castile soap.  Yikes! I thought it would end this mess, but no.  My hair still feels gunky, not from grease but from weird build-up.  If I had gone another week without shampoo, I think my hair would have settled out fine, since it was feeling soft on some days, then rough on others.  Call me a wimp, but I just didn't have the resolve to continue, at least now. 
All in all, I'm glad I did this, and I really see myself washing my hair less with shampoo, and maybe doing a weekly vinegar/baking soda washing.  I'm hoping that this experiment was a detox for my head, and that maybe after a few more days of regular shampooing, that my hair will return back to normal, well at least MY normal.  Right now, it's just feeling a little like someone smeared frosting on the back of my head.  Ugh. I'm ready to not think about hair for a while.

February 16, 2024

Presenting Kathleen: Dirty Hippie

So I'm undertaking yet another wacked-out thing to cause my parents to wonder how in the world they ever wound up with me as their spawn.  I'm giving up shampoo.

In fact, I just might be giving up soap too.  Well, not entirely.  Just on my head and most of my body---hands and um, lady parts, excluded (TMI, I know. Apologies especially to the in-real-life friends who are readers).

I've read quite a bit of blog posts, forum discussions, and other articles about giving up shampoo (sometimes referred to the no 'poo challenge), and even soap, and dare I say, I'm intrigued.  I have fussy, sensitive skin that breaks out easily, as well as hair that just seems oilier as of late.  Why not try this out for 2 weeks and see how it goes?  I'm up for a challenge, especially one that's not so risky or dramatic, and can be abandoned at any time via a hot, soapy shower.

My showering routine already was on that path to this--washing my hair every other day or every 3 days, using a vinegar rinse, and only using soap on my body (arms, legs, torso) once a week, which seemed to help a lot with dry skin (hey, it's not like I'm digging ditches and running marathons around here, sweatin' it up). I also don't use hair products or makeup (only on special occasions), and let my hair air-dry all the time, so I wasn't concerned about having to wash product build-up out of my hair without soap.

Today was my first non-shampoo shower.  Rather than just go cold-turkey and shower with only water, I massaged some baking soda into my wet hair, then poured apple cider vinegar over it as a rinse.  I also washed my face with a baking soda paste, rather than soap, which Chris has been doing too with great success for the occasional eczema on his face.

The results of day 1? I'm actually pretty impressed.  I was concerned that I'd look like one of The Outsiders, without the jean jacket, however my hair feels softer and has more curl in it.
It does feel a tad greasy, but if all goes according to plan, the natural oils in my hair will calm down once my scalp adjusts over a week or two.  But in the photo above, it really looks fine, at least to me.

My face feels a lot softer and less dry too. I just used baking soda, then patted it dry and added a drop of Weleda Pomegranate Oil to it, and it's really feeling soft and clean.  And according to Chris, I don't smell, though my hair does look a little greasy (I beg your pardon!).

The key to this method of hygiene is that it's not reveling in stink and dirt and avoiding showers (a la the hippies of the past) but keeping clean with water.  I'm not quite ready to give up baking soda and vinegar just yet, but am hoping to try it sometime soon. 

I plan on updating my progress through the challenge, in case you might be interested in seeing the results.


So am I crazy? Would you do this?

January 21, 2024

The Beauty of Baking Soda

I'm in love with baking soda.  As someone who tries to live a green lifestyle, baking soda is my product of choice for eco-friendly living, from laundry to cleaning to freshening and of course beauty.
Arm and Hammer baking soda is such a versatile product, and I was eager to try out some of the beauty tips they sent me, along with this gorgeous gift basket filled with spa-like delights and of course Arm and Hammer products.
I've been a faithful user of baking soda scrubs for my face and body, so I was eager to try out some of the other beauty tips, especially that I'm pregnant and I just don't seem to have that "glow" during this pregnancy.  I'm eager for any kind of natural help! 

The basket came with baking soda and 2 great containers for them, which are air-tight and have small holes for sprinkling (I tend to always dump too much from the box).
Also included was a spa washcloth, headband, teas and a mug, a soy candle, nail polish, a manicure set, Lavender essential oil and a booklet of beauty tips.
There is so much you can do with baking soda for personal care, including freshening breath, manicuring your nails, and maintaining healthy skin.
So far, I've indulged in a facial scrub and body exfoliant.  My face felt smooth and free of dead skin, though I did make sure to follow up with a moisturizer, since it is dry skin season and all.  Here's the recipe that I used:

Facial Scrub and Body Exfoliant
For smooth, radiant skin, give yourself a gentle facial and body scrub with ARM & HAMMER® Baking Soda. Make a paste of 3 parts ARM & HAMMER® Baking Soda to 1 part water.  Rub in a gentle circular motion to exfoliate skin and remove dead skin cells.  Rinse clean.  Gentle enough for daily use!

While in the shower, I also experimented with baking soda on my hair, which worked well in removing shampoo and conditioner build-up.  Another recipe:
 
Hair Care
Get rid of product buildup by sprinkling a small amount (quarter-size) of ARM & HAMMER® Baking Soda into your palm along with your favorite shampoo.  Shampoo as usual and rinse thoroughly.  The ARM & HAMMER® Baking Soda helps remove the residue that styling products leave behind so your hair is cleaner and more manageable.

Here are some additional ideas for using baking soda in a beauty regimen:
Soothing Bath Soak
For a relaxing ending to a long day, add 1/2 cup of ARM & HAMMER® Baking Soda to your bath to neutralize acids on the skin and help wash away oil and perspiration.  Your skin will feel silky smooth!

Home Pedicure Foot Soak
Start your home pedicure by dissolving 3 tablespoons of ARM & HAMMER® Baking Soda in a basin of warm water and soak feet.  Gently scrub with a paste of ARM & HAMMER® Baking Soda.  

Pearly Whites
For gleaming smiles, brush teeth with ARM & HAMMER® Baking Soda. . Just sprinkle baking soda into your palm, dip a damp toothbrush into it, and brush*. For a refreshing mouthwash, use 1 teaspoon baking soda in ½ glass of water. Swish the solution through your teeth and rinse.
*ARM & HAMMER® Baking Soda does not contain the anti-cavity ingredient fluoride. Use it where water is fluorinated or when non-fluoride toothpaste is desired for adult use or as directed by your dentist of physician.

Hand Cleanser
Soften skin with a paste of 3 parts ARM & HAMMER® Baking Soda to 1 part water.  Forget the harsh soaps and gently scrub away ground-in dirt and neutralize odors on hands with 3 parts ARM & HAMMER® Baking Soda to your liquid hand soap.  Then rinse clean. 

Clean Brushes and Combs
For lustrous hair with more shine, keep brushes and combs clean with ARM & HAMMER® Baking Soda.  Remove natural oil build-up and hair product residue by soaking combs and brushes in a solution of 1 teaspoon of ARM & HAMMER® Baking Soda in a small basin of warm water.  Rinse and allow to dry.

Natural Deodorant
Dust ARM & HAMMER® Baking Soda under arms as needed to feel fresh all day.  The magic of ARM & HAMMER® Baking Soda actually absorbs odors instead of just covering them up.  

Be kind to yourself, indulge and enjoy, all for under a buck!
Disclosure: I wrote this review while participating in a blog tour by Mom Central Consulting on behalf of Arm & Hammer and received a beauty basket to thank me for taking the time to participate.

July 17, 2023

Cereal Box Stationary Organizer {Tutorial}

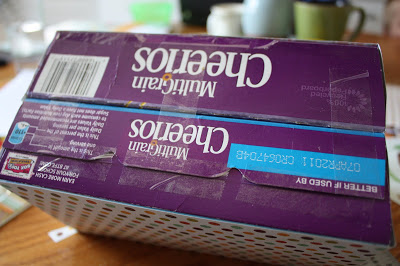
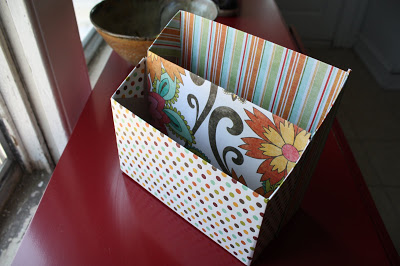
Are your kids bored? Looking for an eco-friendly and cheap project to keep them busy, and something that they can use during the school year? Look no further than this stationary organizer, made from a Cheerios box.
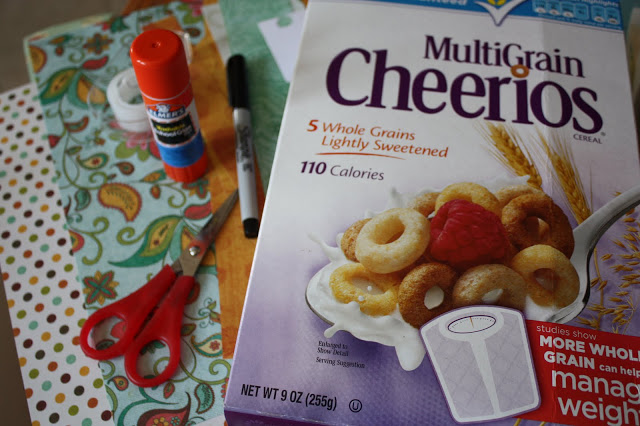
Materials
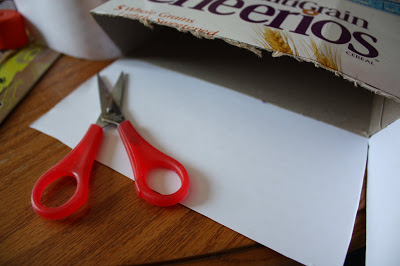
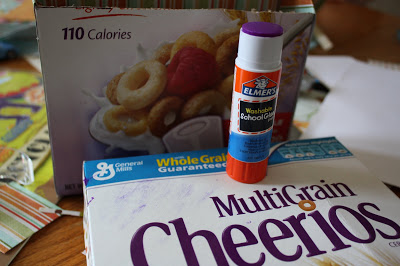
  • a cereal box (I used a small, 9oz. one that's about 7" wide)
  • scrapbook papers or construction paper
  • Elmers glue stick
  • pencil or Sharpie marker
  • transparent tape
  • X-acto knife or utility knife
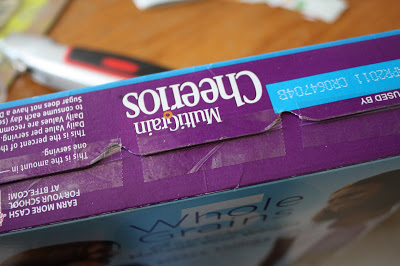
STEP ONE
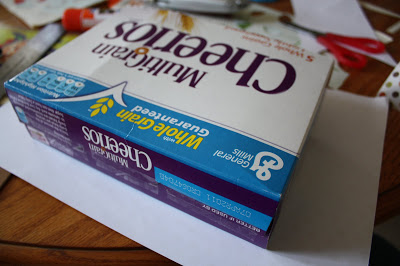
With the glue stick, glue the top of the box closed, then reinforce both the top and bottom with tape.
STEP TWO
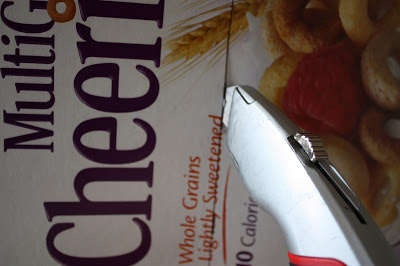
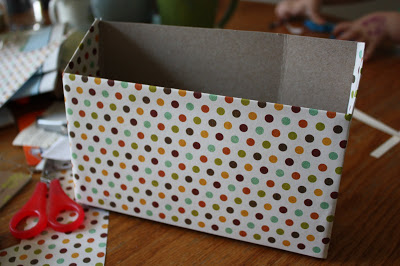
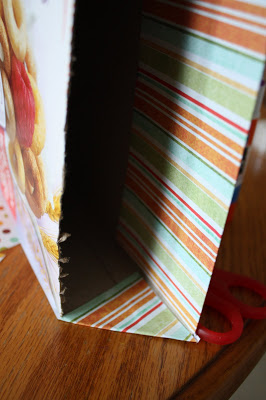
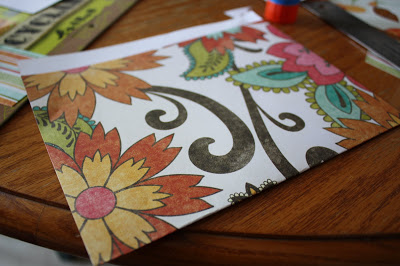
Measure and draw the line on the cereal box that you'll be cutting. You're going to be cutting the box in half to make 2 boxes for the organizer. The sides will be cut at an angle though, as seen in the photo at the top.

On the front of the box, measure about 5 1/2" down from the top and make a mark along one side, then the other.
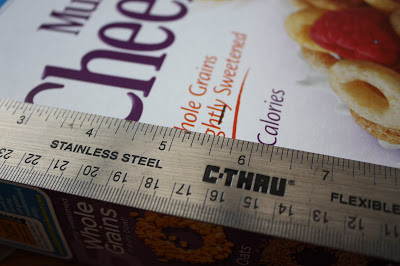
Connect those two marks using a ruler so you have a straight line.
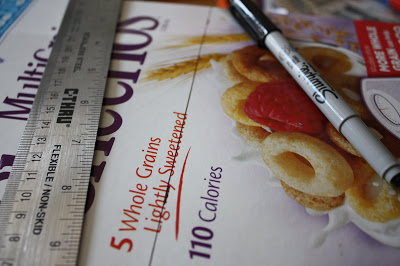
Flip the box over, and draw the marks about 4 1/2" from the top (or 1" less than what you measured on the front), and draw another line.
Your lines will not "line" up; the one on the back will be higher up on the box. This difference in heights will create the side angles.

You'll then turn the box to the side and draw a diagonal line connecting the line on the front to the line on the back. Use your ruler and do this on both sides of the box.
STEP THREE
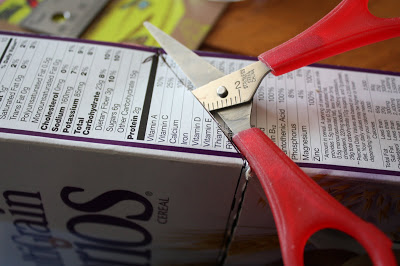
With an X-acto or utility knife, cut into the front of the box along the line. Parents obviously will want to do this for the kids.
You can either continue to cut along the line around the box with the knife, or switch to scissors, which work a little better along the edges and would be fine for kids to use.
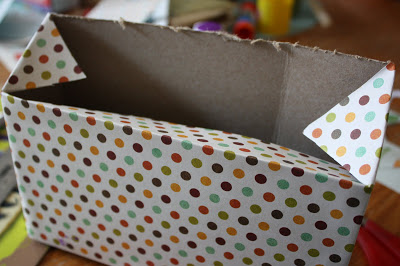
After you've cut all the way around, you should have something that looks like this:
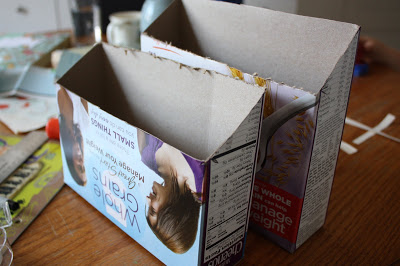
Don't worry too much about cleaning up the edges; they'll be covered with paper.

STEP FOUR
Time to cover the box with paper. It's almost like you're wrapping a present. We'll start with the smaller of the two boxes.
You'll want a piece of decorative or colored paper that is 2" taller than the front of the smaller box (the one in the front of the organizer), and will fit around the sides. Don't worry about the back, since that will not be seen as it will be glued to the other part of the box.

A note about paper: consider buying one of those $20 pads of scrapbook paper. They're great to keep around for projects, and all the papers are already coordinated. Plus you can usually get a 40% off coupon at Michaels or AC Moore and only pay 12 bucks for it.

Line up the paper, then crease the edges around the sides. Cut lines along the folded edges up to the point where the top of the box begins. You'll be folding this flap down on the inside of the box later.
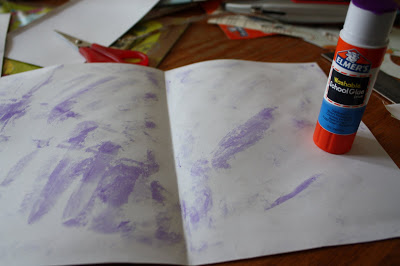
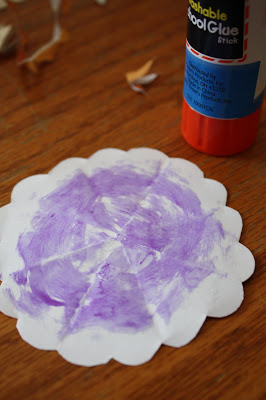
Get your glue stick and spread glue across the paper, and put some on the outside of the box too just for good measure.
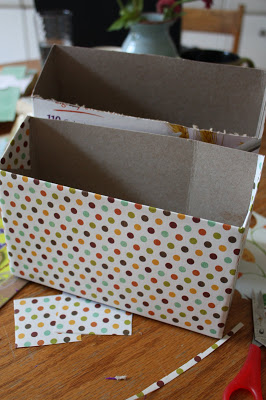
Then adhere it to the front of the smaller box and press well. Cut off excess paper on the sides, then fold down and crease the side and front flaps.
Glue them into place.
One down, one to go. It will eventually be placed like this against the other part of the box.
STEP FIVE
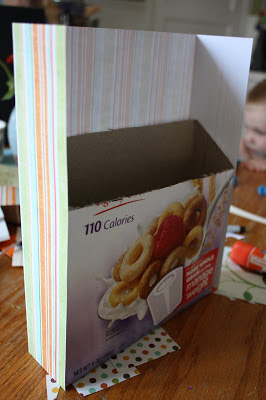
On to the larger box. You'll essentially do the same thing with this one, except instead of not covering the back, you'll not cover the front, since it will be hidden by the other box. I chose a coordinating stripes paper, but you could certainly use the same pattern that you used for the front.
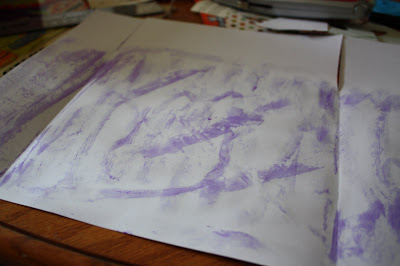
The visuals, again
(please ignore the scrappy mess---I'm not very good at keeping things neat when making stuff)
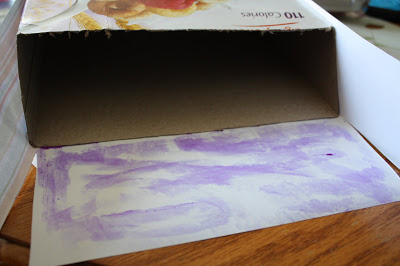
More gluing and folding
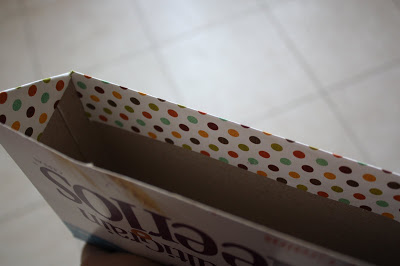
Ta da! Back box is done.
STEP SIX
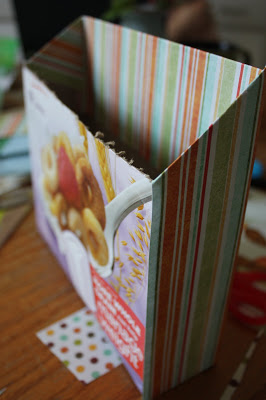
Now it's time to sandwich your boxes together.
With your glue stick, spread a generous amount of glue on the back of the small box and on the front of the large one, then press them together.
Reinforce the inside divider with transparent tape
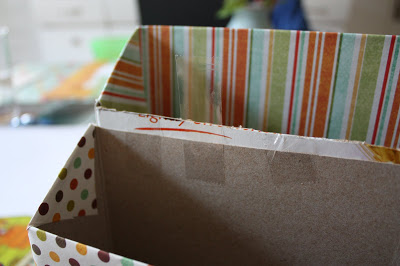
as well as the bottom.
If you want, you could cover the bottom with paper too, but since it's not going to be seen, I just left it exposed. Kind of neat for someone to notice that it was recycled from a cereal box.

STEP SEVEN
Cover the inside of the box with another piece of coordinating paper to hide the cardboard and finish off the box. I measured the width of the inside of the box (7.25")
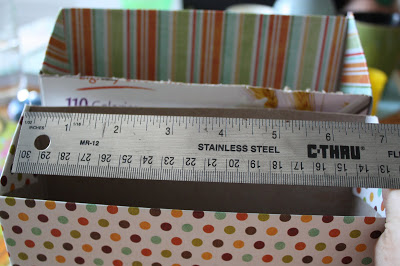
and cut a piece of paper slightly smaller. I made sure it was long enough to fold over the divider inside the box.
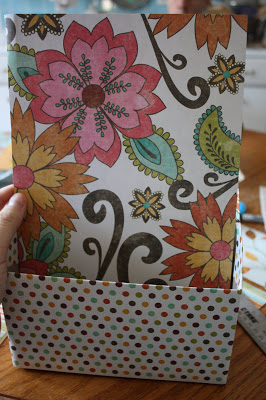
I made a folded mark where the top of the divider was,
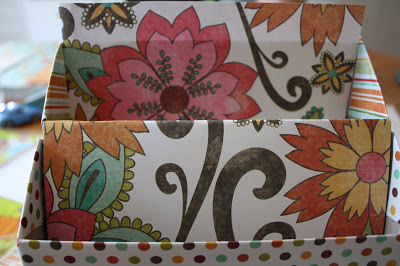
Then took the paper out so I could give it a proper, creased fold.
Trim any excess paper, then glue the heck out of it.
Fold it over the divider and smooth into place.
Your stationary organizer is finished. Yay! Now you might want to decorate it a little more, maybe with initials or a flower like I did. I just used scraps that I saved from other projects (including this one).
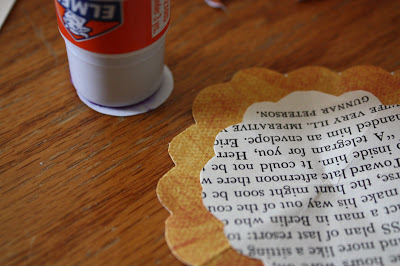
I used a page from an old book and a piece of scrapping paper to make a layered flower. Just cut a square, fold it half and in half again (like cutting a snowflake), and scallop the edges. Glue them together and add a circle to the center.
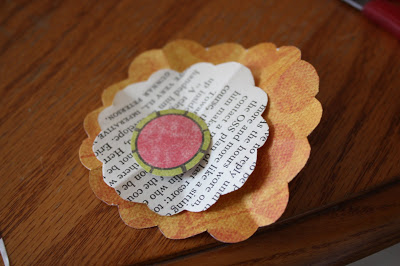
Then attach to the front of your organizer.
I also used a leftover piece of the striped paper behind the flower. The possibilities are endless, and this is usually the really fun part for kids.


Enjoy making this pretty and useful craft!.
Disclosure: I wrote this post as an Elmers Bag It Forward Ambassador.
Related Posts with Thumbnails