September 27, 2023

Pumpkin Spice Whoopie Pies

The smells of fall are intoxicating--wet leaves, the inside of a freshly carved pumpkin, bonfires, and of course the smells coming from fall baking in the kitchen.

Pumpkin bread, spice muffins, maple scones, apple cakes, I've made them all.  But I ventured to try something new this week: Pumpkin Spice Whoopie Pies.
I live in Pennsylvania Dutch country, so we come across whoopie pies at nearly every Mennonite or Amish farm stand in the area.  While I tend not to be a fan of this dense, grainy, and super sweet confection, the ones I made using Wilton's recipe and tools were delicious.
I was sent a Harvest Whoopie Pie pan and a variety of embellishments like sprinkles, melting chocolates and sanding sugars to create some delicious treats.

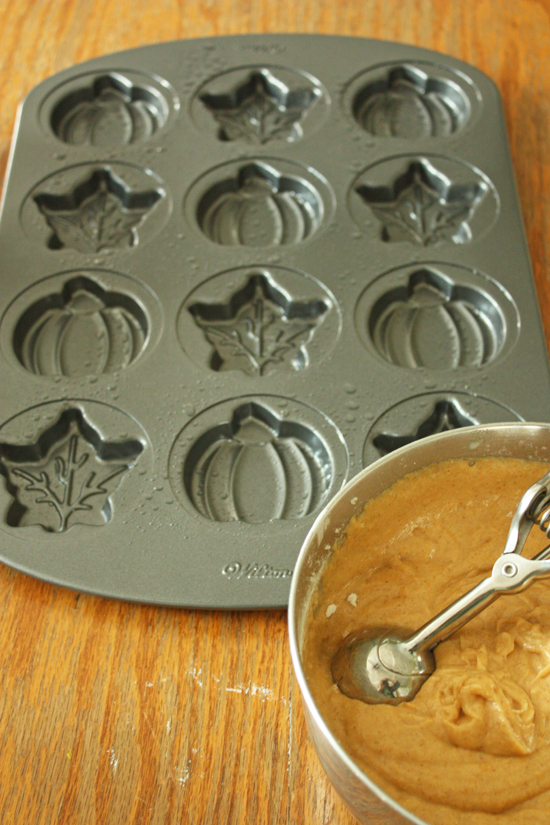
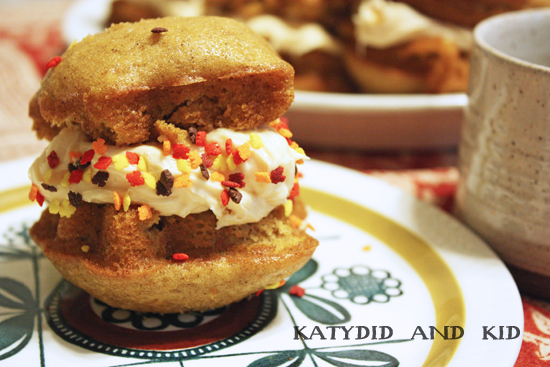
Wilton's Pumpkin Spice Whoopie Pies are light and reminiscent of a pumpkin bread sandwiching a cream cheese filling.  The Harvest Whoopie Pie pan and its pumpkin and leaf shapes makes the dessert even more special.

PUMPKIN SPICE WHOOPIE PIES (makes 15)

Ingredients:

  • 1 1/2 cups all-purpose flour
  • 1 teaspoon ground cinnamon
  • 1 teaspoon baking soda
  • 1/2 teaspoon baking powder
  • 1/2 teaspoon salt
  • 1/4 teaspooon ground nutmeg
  • 1/8 teaspoon ground cloves
  • 4 tablespoons (1/2 stick) butter, softened
  • 1 cup granulated sugar
  • 2 eggs
  • 1/2 cup solid pack pumpkin
  • 1/2 cup buttermilk
  • Filling
  • 1 package (8 ounces) cream cheese, softened
  • 1/2 cup confectioners' sugar
  • 1/2 teaspoon clear vanilla extract

Instructions:

Preheat oven to 350 degrees and spray the pan with vegetable oil (I recommend flouring the pan too, to prevent sticking).  In a medium bowl, combine flour, cinnamon, baking soda, baking powder, salt, nutmeg and cloves. In large bowl, beat butter and granulated sugar with electric mixer until fluffy. Add eggs, one at a time, beating well after each addition.

Add flour mixture to butter mixture alternately with pumpkin and buttermilk, mixing thoroughly after each addition.  Fill pan 1/2 full, spreading batter to edges of cavities.
Bake 7-9 minutes or until toothpick inserted in middle comes out clean.
Cool in pan 5 minutes; remove to cooling rack. Cool completely before filling.
For filling, beat cream cheese, confectioners’ sugar and vanilla together until well combined. To assemble, spread filling on one cake and sandwich with another.
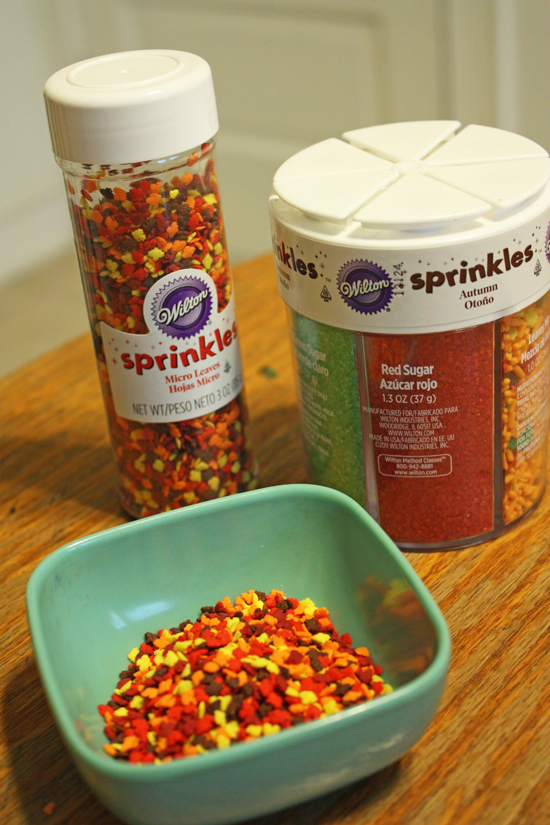
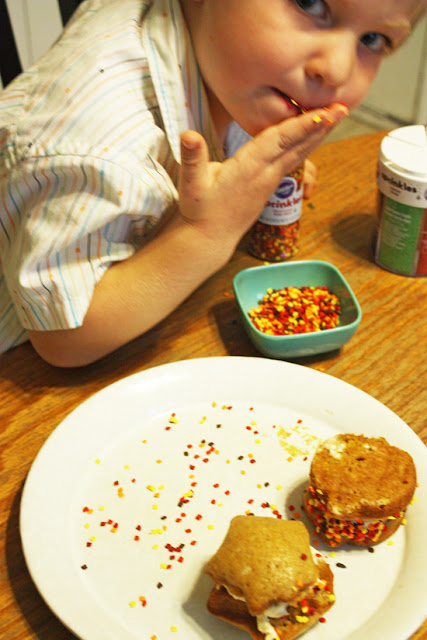
I embellished mine with some leaf sprinkles by dipping the edges in a bowl of them.
 I had a little sprinkle-tasting help.  They passed inspection with flying fall colors.
Wilton's Pumpkin Spice Whoopie Pies are a delicious way to add some variety into your fall baking.  I can definitely see using the pan for other fall treats like cookies and shortbread.
You can find more recipes, materials and baking inspiration at Wilton.com or via their Facebook page, Twitter, and Pinterest.

Disclosure: I received sample products from Wilton to facilitate this review.  All opinions are my own.

September 26, 2023

Wordless Wednesday: At the Fair

Chris forgot his "Real Men Wear Babies" trucker's hat at home.  Happy Wednesday!

September 25, 2023

Halloween Felt Suzani Wall Hanging with RIT Dye

My favorite crafting time of year is here!  Fall and Halloween provide lots of opportunities for creating all kinds of costume and home decor projects.  If only I had more hours in my day...

I did make time to create something using wool felt and RIT dye--a Halloween wall hanging styled after a Suzani textile.
I've long admired Suzani textiles, which originate in Central Asia.  The embroidered textiles, which were sewn by brides as part of their dowry, are so beautiful.  I love how their designs radiate from a central motif, similar to a mandala.
In creating this Halloween wall hanging, I took some short cuts (forgive me, but minding 2 babies and a preschooler doesn't leave much time for full-on crafting).  I used wool, which can be cut easily, doesn't fray, and doesn't need hemming and also receives RIT dye very well.  My second shortcut is that I glued my wall hanging rather than embroidered it.  I really, really wanted to fancy it up with embroidery floss and stitches, but again, the time thing always gets in the way.

I started out with a rainbow of RIT dyes, one yard of 100% wool felt, sharp scissors and tacky glue.
I wanted to use Halloween colors, so I chose black, purple, yellow, orange and green, then mixed the liquid dyes according to the instructions.  For the largest piece, the background, I chose purple and mixed up my dye bath in a large tub.
For the smaller felt pieces, I cut the white felt into smaller pieces and dyed them in recycled yogurt containers. 
RIT dye works best on natural fibers like wool and cotton.  The colors looked great after they came out of the dye bath and were rinsed.
The black unfortunately looked more brown than black, but the color would still work well for the bats on the wall hanging.  I probably would double or triple the time that I left the black pieces in the bath next time.

Once all of the wool was dry, I started cutting out pieces of felt to create my design.
I worked free-handed, but if you're a little more particular (or less confident in your cutting skills), you could certainly make paper patterns to follow from your own drawings or cookie cutters. Or even do an internet search for "Halloween silhouettes" and use those as patterns.

For the center, I made a yellow "full moon", surrounded by jack-o-lanterns, then skulls and bats.  To cut out the faces on the skulls and jack-o-lanterns, I just folded the felt in half and cut half circles or half triangles or whatever.
They weren't perfect, but they worked out just fine.
I added some leaves to the corners, and some crescent moons and spooky clouds too.
I kept the design symmetrical, and played around with how I wanted to arrange it.  The beauty of felt, like those felt boards you may have played with as a kid, is that it sticks to itself, so it's easy to play around with your design.  I think this would look equally stunning with a spider web as the central motif, since it would fit the symmetrical design nicely.

Once I had my design how I wanted it to look, I started gluing the pieces down with tacky glue.
SMILE!
I kept the pieces in place, just so I could remember where they went because I had so carefully spaced them out.
For the finishing touch, I cut 4 long strips of felt to go around the border of the wall hanging, then scalloped the edges and glued them to the sides.
To hang it, I stitched a dowel rod in three places to the back along the upper edge, then hung it on the wall with the dowel rod balanced on two hooks.  You could also use this as a table decoration on as a pillow if you sew a backing to it, though you may want to really glue the pieces on well.
My preschooler LOVES seeing this hanging on the wall.  His Halloween salivating gland is triggered whenever he walks by it. :)
You can find more RIT dye projects on their website, as well as through their Twitter, Facebook and Pinterest updates.  There are also other bloggers participating in this campaign, so check out their projects via the linky below. Happy crafting!


Disclosure: I wrote this post as part of a paid campaign with RIT Dye and Blueprint Social.  All opinions in this post are my own.

September 20, 2023

Last Splash

I'm lucky to have two water bugs living with me, who, unlike their father, will migrate to water like kids to candy. 
Though we're beyond swimming weather here in the Northeast, the boys are still enjoying finding puddles and water collected from a rainstorm to play in .
The delight that these two have with water is worth running back inside to grab the camera.
And worth peeling off cold, wet clothes from shivering bodies.
Hope you're having some outdoor fun where you are!

'Dem Duck Tape Bones {Giveaway}

With both Halloween and Lego Ninjago on his mind, Soren was really excited to find some paper mache bones in the attic amongst the fall and Halloween decorations that we were sorting through over the weekend.

We made them last year using a simple technique I came across last year on Inner Child Fun, where you cover crumpled newspaper with gluey paper napkins. 
This year, I was all set to paint with glue, but then remembered I had won a boatload of Duck Tape when I was at the BlogHer conference. I was surprised and impressed with the variety of designs that they make.
I thought it would be even easier to make bones out of Duck Tape than messing around with glue.  It just required newspaper, scissors and tape.
I first had Soren roll and crumple up a sheet of newspaper to make a bone shape.  Then we taped the ends in place.
Next, we wrapped the bone in white Duck Tape.  I debated using the Glow in the Dark tape too, which would be cool in the dark.  However, we stuck with the white.  I pulled the tape off in foot long pieces, then gave them to S for wrapping.
Don't worry about wrinkles.  It give the bone character. :)
This was an easy and durable craft, and out of a roll of Duck Tape, you can probably get 10 leg bones. 
Now if we can only get "Dem Bones" out of our heads.  And the endless question from S about "why are they dry bones and not wet?".  Sigh.  Even I'm not sure about that.
We've been using these mostly for pretend play, but I would think they'd be great for decorating a porch for Halloween, especially that Duck Tape is resistant to moisture.  I'd love to see what you do with these, if you make them. 

There are so many great Halloween-related items, like decor and costumes that you can make with Duck Tape.  They even have some Halloween decorating tips on their website.  I love these ideas, all of which can be found on the Duck Tape website:
Duck Brand Tape is sponsoring a Stick or Treat Jack-O-Lantern contest for Halloween, where you could win $1000 for submitting a Halloween creation using Duck Tape.
Details are on their website.
WIN IT!
One lucky reader will win a 6 pack of Halloween-themed Duck Tape.
It will be perfect for your fall crafting activities.  Please enter via Rafflecopter below:
a Rafflecopter giveaway

Disclosure: I received a variety of Duck Tape as part of a raffle.  I was not obligated to post about it, but was eager to share what I made with it.

September 19, 2023

Side by Side {Book Review and Giveaway}

Whenever I come across a book or website that encourages art making in children, it pleases me, hoping that it might foster a lifelong love of the arts in a young person.  Even more exciting is when the activities invite adults to create alongside children.  After all, we adults need to reconnect with that imaginative side that often lies dormant under the obligations of everyday life.

Most recently, I had the chance to review Side by Side: 20 Collaborative Projects for Crafting with Your Kids, a new book by blogger Tsia Carson from Roost Books.
This book is a great resource for parents and caregivers for creating art with their children using simple, fairly open-ended projects that don't require fancy materials or specialty tools.

Tsia Carson, who blogs at SuperNaturale, (a blog that I now eagerly have subscribed to, having only discovered it through this book) is keen on encouraging a collaborative art-making relationship between children and adults.  That doesn't mean that we caregivers are stuck making googly-eyed puppets along with the kids.  The projects in this book are suitable for both adults and kids, and are adaptable for all ages, like the Pom Pom garland.
 And how cool is this giant newspaper snowflake?  I totally want to make one!
Carson focuses on using natural and recycled materials throughout the book, which also pleases me.  From objects collected on a nature walk to things found in our own kitchens, the projects in this book are inspiring and beautifully photographed.
 

Side by Side is a great addition to your home library; I'm eager for my boys to pull it out on an "I'm bored" day to engage in some creative "together time".
WIN IT!
TWO lucky readers will win a copy of Side by Side!  Please enter via Rafflecopter below
a Rafflecopter giveaway

Disclosure: I received a copy of Side by Side for review purposes.  All opinions are my own.

Under Glass

As much as I adore autumn and its cool air, colors and pumpkins, I do get a little sad thinking about the garden and how much I'll miss it.  A major impetus for becoming a homeowner 6 years ago was to have a yard of our own to tend and enjoy.  I love plants, and think I'm somewhat successful at cultivating flowers and vegetables.  Well, mostly.  Avert your thoughts away from the "potato harvest" of last month. :(
Anyway, despite the love I have for our home, its lack of natural indoor light is depressing (you may have seen me struggle with indoor photos of the kids and other stuff here on the blog).  We have windows with Eastern and Northern exposures, (and with narrow window sills to boot), so we don't have great light for most houseplants and herbs.  The kids really don't allow for indoor gardening anyway, but I do miss having African violets in the windows and tending a little school of plants.

Rather than pine over my would-be plants, I thought Soren might like to create a terrarium garden to display in the kitchen, where we do get some morning sun.  I used a bunch of stuff we had on hand, like gravel, a spray mister (thanks Tara!), and a jar (I switched it out to a larger one mid-way through the activity since the one in the photo it was too small).
I picked up a few low-light terrarium plants at a local garden store for under $5 and thought we could use dirt from the backyard in case we wanted to add some insects or worms at some point (potting soil isn't good for that).

The activity couldn't have been easier (I think the hardest thing was trying to keep my camera clean), and what kid doesn't like to be told to go dig in the dirt in the name of science?
To begin, we put about an inch of gravel on the bottom of the jar.  We actually used some leftover bonsai soil from Chris' dormant dream of cultivating a bonsai collection. 
Next we put about 2-3 inches of soil on top, dug straight from the yard.  Then Soren made a few small holes in the dirt where he wanted the plants to go.
After he situated the plants, I filled them in with dirt to hold them in place.  He tamped them down, then added some finishing touches, including shells, river stones, a plastic dinosaur, and of course, a Lego mini figure.
Once it was in place, we watered it, misted the leaves with the spray bottle, and put the top on.  It now sits in our kitchen, with daily tending from its keeper.
Hopefully it will add some life to our long winter. If anything, at least the Lego man will have fun re-enacting Jurassic Park.
Related Posts with Thumbnails