Showing posts with label Holidays. Show all posts

March 29, 2023

Quick Craft: Easter Egg Snowflakes

Despite its paradoxical name, Easter Egg Snowflake, this craft is quite appropriate for this winter/spring here in the Northeast.  We're still freezing, stuck indoors most days.  But that hasn't stopped us from keeping busy with supplies from the craft cabinet.
To make these super-simple Easter silhouettes, you just need two things: scissors and paper.
It requires a bit of folding, just like snowflakes you'd make out of paper.  First fold the paper in half lengthwise.
Then cut out half of an egg shape.
Then fold in half again, and again so you have a wedge-shaped folded piece.
Don't worry about the edges not lining up.

Next, cut out some shapes on the sides, cutting through all the layers.
Open it up, flatten out the creases,
and hang up.  They look really pretty in windows.  Happy Easter!

March 20, 2023

Watercolor Pysanky Painting for Kids

For years, I've admired and wanted to create beautiful Pysanky eggs at Eastertime.  I'm assuming it's my Eastern European DNA (Polish though, not Ukranian) that inspires my admiration of this traditional art form.  I've had this kit sitting around for years, and I just might get around to trying it this year.
In the meantime, I created some Pysanky-inspired artworks using crayon resist and watercolor.  It's a fun, non-frustrating project for kids and adults alike, and they finished result would look festive in your home during Easter gatherings.
You probably have all the materials you need already, especially if you have kids and an art supply stash.

Materials

  • Construction paper
  • White cardstock (copier paper would be fine too)
  • Watercolor paints and brushes
  • Crayons
  • Scissors
  • Pencil
  • Pysanky designs (LearnPysanky.com is a great resource).  My sheet of designs came from my kit, found at a local craft store
  • Glue stick

STEP ONE 

Choose a color for your painting's mat (the paper that "frames" your painting). I chose purple, as seen below.  Fold the paper in half lengthwise and lightly draw half of an egg shape with the fold in the middle. 
Cut this out and open it up.  Place your white paper underneath and trace the egg shape onto the white paper using either pencil or crayon.
Set the purple paper aside.

STEP TWO

Draw your Pysanky design onto the paper using a crayon.  I used white for my first example, to be more traditional, but it's hard to see so I recommend yellow or another light color.
Symmetrical designs, spring motifs and swirls all work well.  You can find lots of examples in an online search, but for kids, the simpler the better.
Here's my finished design on my yellow version.  Be sure to connect all the lines (no gaps) so that the crayon provides a resist for the watercolor paints (meaning they won't bleed into each other).
  

STEP THREE

Paint! Add color to different areas of your design.  The areas where the crayon is will prevent watercolor from covering those areas.  It's a magical process for little kids to witness.
You can work with different colors even as other areas are drying. Just be careful not to cross the crayon lines with your brush.
These would make thoughtful Easter greeting cards to send to friends and loved ones.  Or if you make a dozen of them in a smaller size, you could string them together in a garland.

STEP FOUR

Allow your painting to dry, then with the piece of construction paper that you originally cut an egg shape out of, create a mat for your painting.  Attach it with glue stick or tape to the front of the painting.
Then display as you'd like.  You could even add decorations or words to the frame with crayons.
Here is the one my four-year-old created.
Hopefully this craft will inspire a love of Pysanky art in your family.  Enjoy!

January 26, 2024

Stitchin' Valentine Cards {Tutorial}

I miss the days of exchanging Valentines with classmates at school.  Making the fancy boxes adorned with red and pink paper, picking out the box of cards at the drug store, and handing out specially-chosen cards to my friends.  How fun that I can relive that a bit now that Soren is in school.

He's still a little young to get the whole concept, and after taking him down the Valentine aisle at Target with little interest on his part in picking out cards, I decided it would be fun to make them with him.

I wanted to come up with something fun and unique to give to his classmates, no candy or junky little toys that get quickly get thrown out.  Since S has been taking an interest in one of my passions--needlework--I thought it would be fun for the kids to have their own needle, yarn and plastic canvas for stitching.
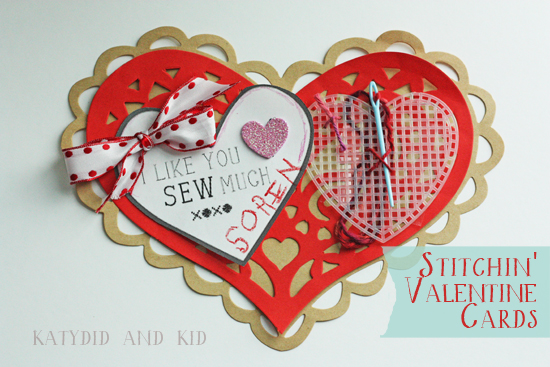
Soren enjoys stitching alongside me when I'm working on something, and he really liked this project,, which you can see in the photo above.  I'm hopeful that his classmates will like it too, especially that they each get their very own plastic needle.  Here's how we finished the Valentines for giving.
If you'd like to make some for your own friends, they're really simple to make, and you can dress them up any way you'd like, tucked into a card or stuck to some pretty paper.
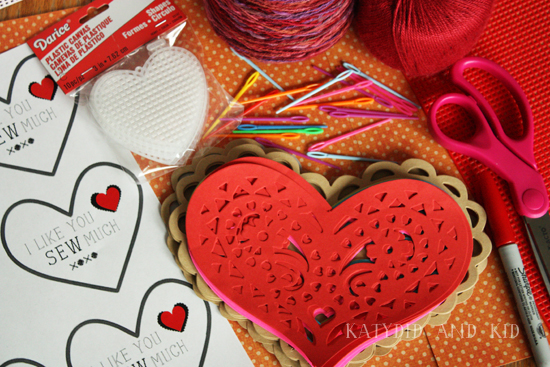
MATERIALS:

  • Plastic Canvas (either heart shaped or sheets that can be cut into hearts.  The heart ones I bought were $2 for a package of 10 at a craft store).
  • Plastic yarn needles (purchased here as a pack of 40).
  • Yarn
  • Scissors
  • Paper doilies, construction paper, or scrapbook paper
  • Printable tags, if desired.  I'm sharing the ones I designed HERE
  • Clear Tape, pencil or markers for signing the cards
  • Stickers, etc. for embellishment, if desired (we used some glittery foam hearts)
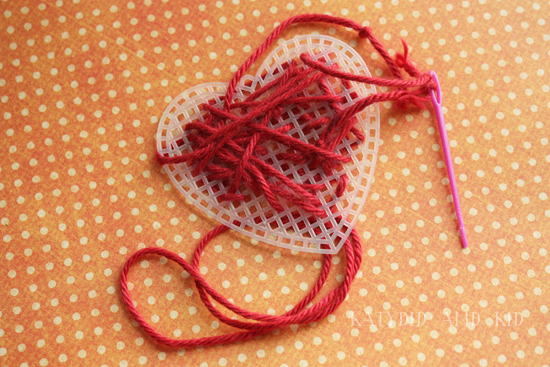
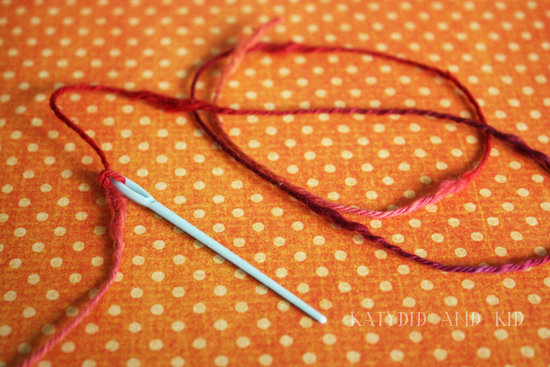
STEP ONE

Cut a 12" length of yarn and tie to the needle so it doesn't slip off in transit.
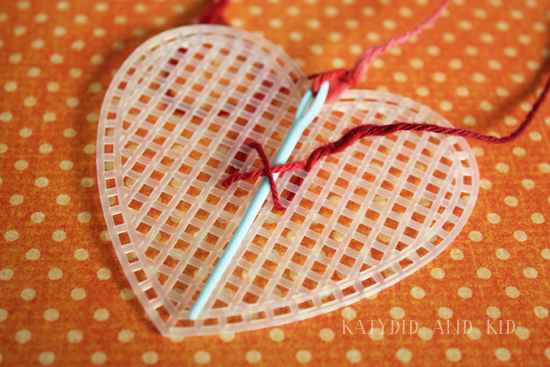
Then make a few stitches onto the canvas heart (or have your child do it, which is more fun for them).  I made a simple "X" in the center, just to hold the needle.
Then just tuck the needle into the "X" and fold the rest of the yarn nicely around the back and secure with a piece of tape.

STEP TWO

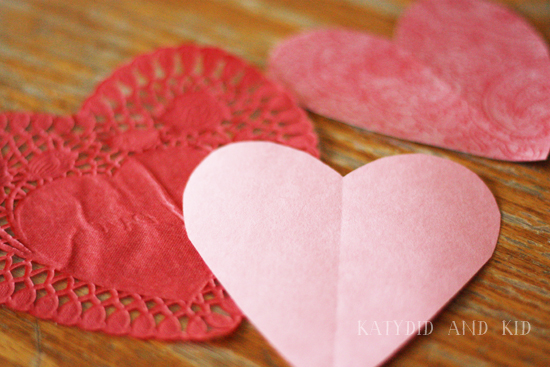
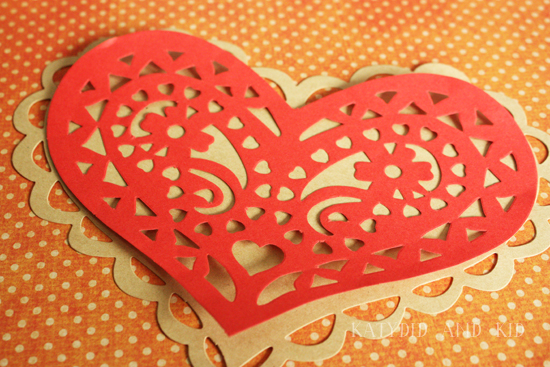
Create a backdrop for your heart out of paper hearts, either doilies, construction paper, or other paper.  I picked up some paper doilies in a variety of colors at Target.  It also came with two sized of doilies, which I layered on top of each other.
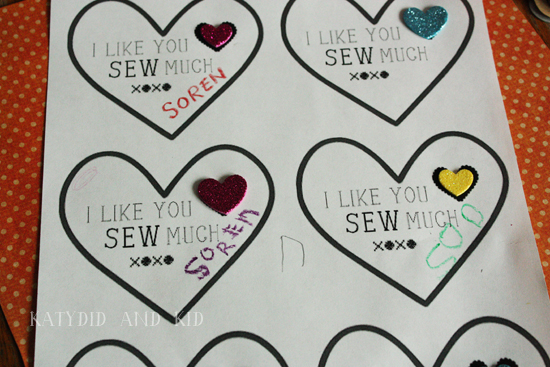
Arrange your heart, as well as the printable tag on top.  You can make your own tag too, using paper.  You might even change the wording to something like "Valentine, you leave me in stitches" or "You're SEW cool, Valentine!"  Totally up to you and your kids.

STEP THREE

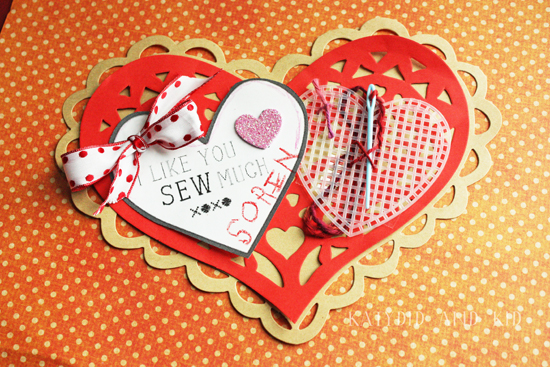
Assemble your Valentines.  Print and cut out the tags and have your child sign them and embellish them if they want.
Thread a piece of yarn (in retrospect, I would have used thin ribbon here, since it's prettier) to attach your hearts to the background.
Poke the thread through the papers (I used a metal yarn needle here, but you could use a skewer or other sharp object to poke a hole),
then tie in a bow or knot on top.
Do the same for the plastic heart.  I ended up replacing the yarn on the heart tag with a ribbon, just because I thought it looked prettier.
Now we just need to finish making another 15 for the class.  Hopefully they'll have as much fun practicing their sewing skills as we did making this.
Again, if you'd like to use my printable tags, you can download them HERE. If you want to make your own tags, I found free stitching fonts called Kingthings Stitch and Stitches that I liked.  Have fun creating!

November 28, 2023

Holiday Feathering

In case you didn't know anything about me, I'll inform you by saying that I like to decorate and feather my nest, particularly for holidays.  Handmade, natural items usually play a key role, like pumpkins for fall and pine cones for winter. 
I don't go overboard, much to the relief of my husband, but I do enjoy celebrating the seasons with decorations.  I think my kids like it; I definitely have fond memories of helping my mom make the house special for Christmas.  I also love to peek at other people's decor, like at night when we're out for a walk or just by reading blog posts that share photos of holiday decorating.  Hence, I'm sharing a bit here for those oddballs like me.
Like many of you, I pulled out the Christmas decorations this weekend (I'd prefer to wait until December, but it's just so much easier when your husband has a long weekend and there's more free time to do it).

I wanted to do something with this old sled that my brothers and I used as children (and I think my uncles and aunts too). 
It's been sitting in our basement for a few years, waiting to be painted.  My mom kindly let me "decorate" it as a pre-teen, when I painted "Merry Christmas" in bubble letters.  Ugh.  I really wish I had taken a "before" shot.  But what a great mother, allowing me to exercise my creativity by defacing a perfectly nice antique sled like that.  I wish for that sort of tolerance with my own kids.

After a few coats of red paint leftover from our front door, I tied on some scavenged fir branches, a bow made by my mom (she makes the best bows for all the cousins' weddings), some pine cones, fake berries and a laser cut wooden snowflake on clearance at Michaels.  I still left a lot of the rustic charm visible, like the runners and some of the weathered wood.
I think it's my favorite decoration this year.  My mom also made a matching bow for the front door wreath too.
Inside, we decided on just setting up a small tree.  Jude is at that age where he's into things that I hadn't even considered babyproofing, so I didn't want to add more stress to this time of year.
So out came our Charlie Brown tree, which actually doesn't look quite bad perched up on my grandma's old sewing machine table, in front of our photo wall.
It was nice paring things down to my favorite ornaments, rather than feeling the need to fill an entire tree.
Ornaments have the power to bring back memories, and the salt dough and clay ones made over the past few years bring back some good ones of the boys.
These wooden ornaments from Poland remind me of my late grandparents, who were both from there.
The straw snowflakes evoke those from Scandinavia, which is some place I've always wanted to visit at Christmastime. I swear, in a past life I was from that area; it just seems so much like "home" to me.

Here are some other corners of home.
So there you have it, colorful and eager to be enjoyed over the next few weeks.  Have you put up your decorations yet?  If you blogged about it, leave me the link in the comments and I'll come peek through your virtual windows.
Related Posts with Thumbnails